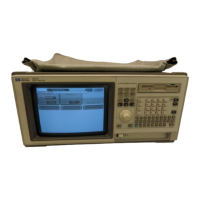
To remove and replace the front panel and keyboard
11 Using previous procedures, remove the following assemblies:
•
Handle
•
Rear Feet
•
Cover
•
Disk Drive
•
Power Supply
•
CPU Board
22 Remove the four screws connecting the front panel.
33 Slide the front panel assembly out the front of the instrument.
44 Slide the spacers out the front of the instrument to remove them.
Be careful not to lose the copper ground strips on the spacer.
When installing the spacer, insert the pins of the spacer in the appropriate holes in the
chassis. You can hold t he spacer in place while inst alling the front panel by holding it with
your finger t hrough t he disk drive mount ing slot in the chassis.
55
Remove the RPG knob by pulling the knob off the RPG shaft.
66 Disassemble the front panel assembly by lifting the keyboard circuit board away
from the front panel.
77 Lift the elastomeric keypad out of the front panel.
88 Reverse this procedure to assemble and install the front panel assembly.
When assembling the front panel, check that t he holes in the elastomeric keypad and the
keyboard circuit board align with the pins on the front panel.
To remove and replace the intensity adjustment
11 Using previous procedures, remove the following assemblies:
•
Handle
•
Rear Feet
•
Cover
•
Disk Drive
•
Power Supply
•
Rear Panel
22
Disconnect the intensity adjustment cable from the CRT driver board.
33 Using a nut driver, remove the hex nut attaching the intensity adjustment to the
chassi s.
44 Slide the intensity adjustment assembly toward the front and up out of the
instrument.
55 Reverse this procedure to install the intensity adjustment.
When installing the intensity adjustment, check that the keying tab on the adjustment aligns
wit h the keying hole in the chassis.
Replacing Assemblies
To remove and replace the front panel and keyboard
6–11

 Loading...