Test the glitch capture on the connected channels
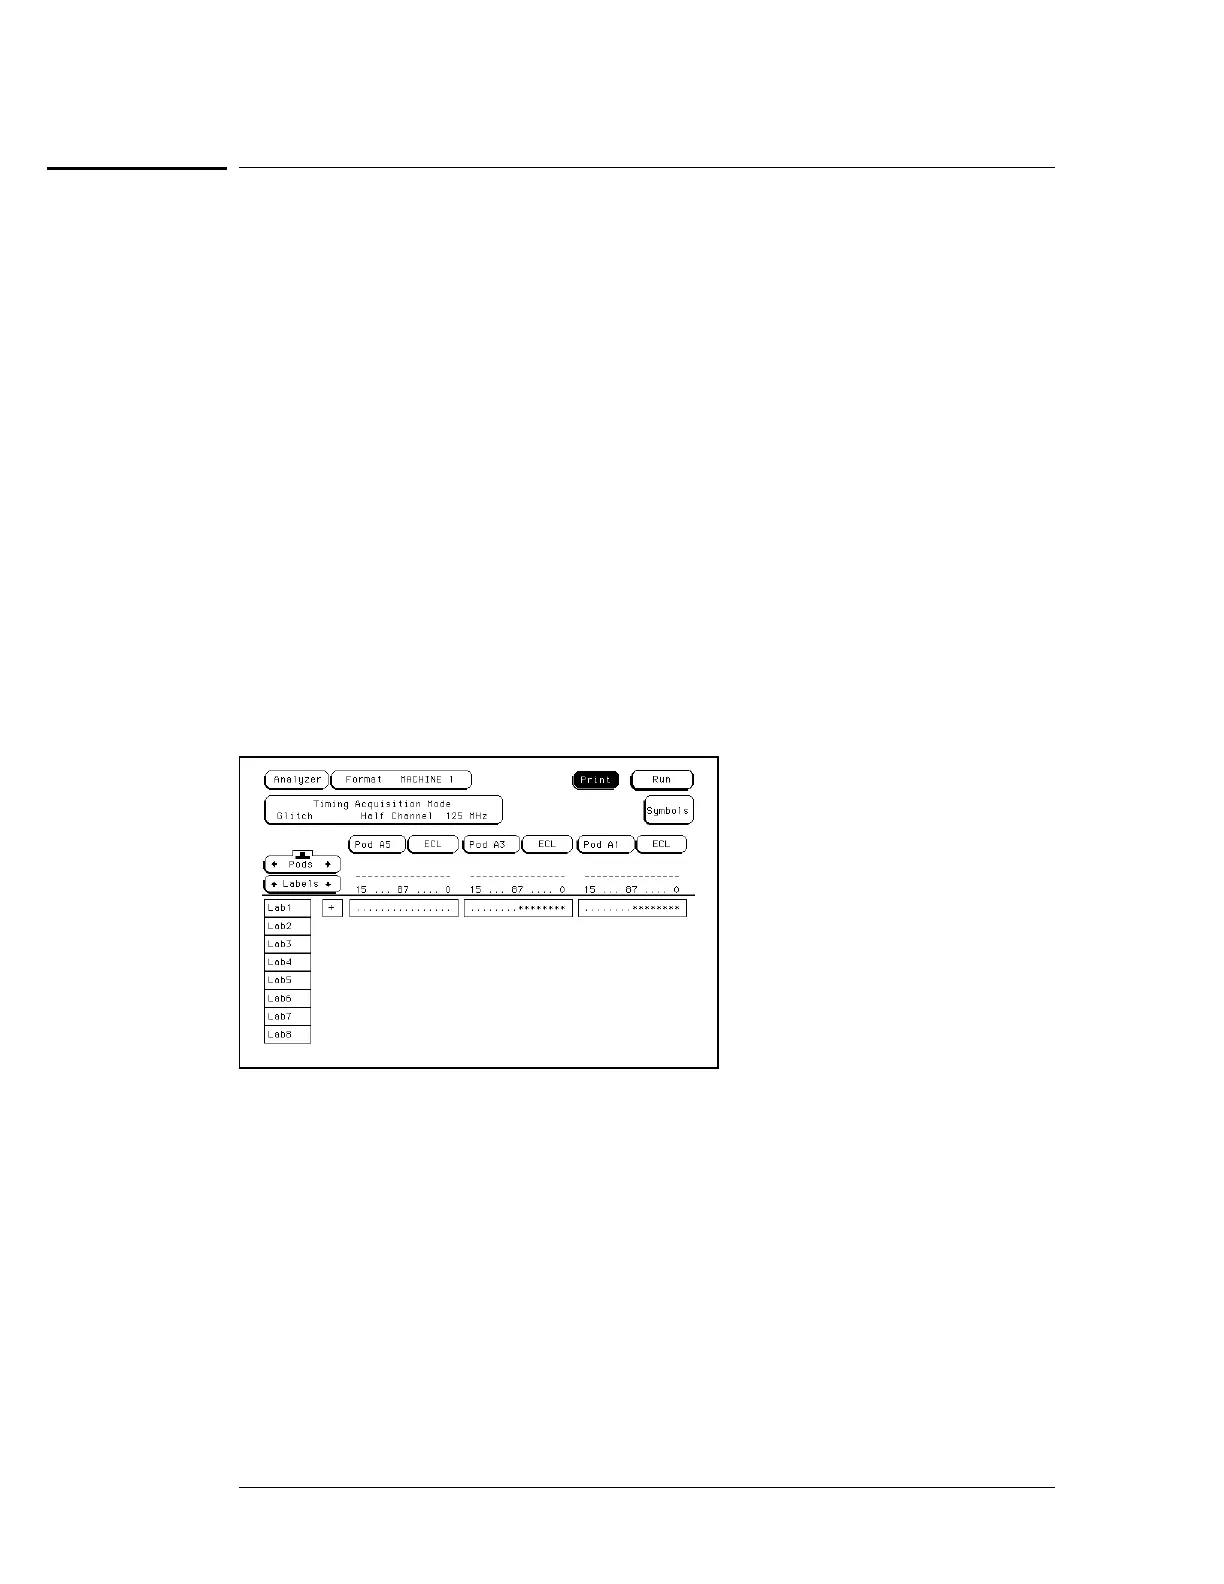
11 Set up the Format menu.
aa Press the Format key.
bb Select the field to the right of each pod, then select ECL in the pop-up menu. Use the
knob to access pods not shown on the screen (to activate the knob for pods, use the
cursor to select the Pods field and push Select).
cc Select Timing Acquisition Mode, then select Glitch Half Channel 125 MHz.
22
Turn on the channels that correspond to the channels being tested.
The channels being tested are the channels connected to the pulse generator in "Connect the
logic analyzer."
aa Select the pod field, then select one of the two pods in the pop-up. Move the cursor to
the channel assignment field of the pod and press the Clear entry key until all
channels of the pod are de-assigned (all periods). Press the Done key.
bb Select the bit assignment field for the pod. Using the arrow keys, move the selector
to a channel, then press the Select key. An asterisk means that the channel is turned
on. Press the Done key when the channels being tested are turned on.
cc Access the next pod, then turn on the channels being tested until all pod channels
being tested are turned on.
dd Turn on the clock/data channels that correspond to the clocks being tested. Turn off
the data channels and clock/data channels that are not being tested.
Testing Performance
To test the glitch capture (logic analyzer)
3–20

 Loading...