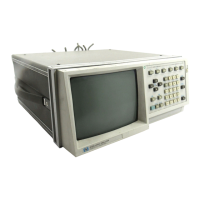
To remove and replace the monitor
11 Using previous procedures, remove the following assemblies:
•
Handle
•
Rear Feet
•
Cover
•
Disk Drive
•
Power Supply
•
CPU Board
•
Rear Panel
•
Acquisition Board
•
Oscilloscope Board (HP 1660AS-series only)
•
Intensity Adjustment
WARNING
Hazardous voltages exist on the CRT and the CRT driver board. To avoid electrical shock,
disconnect the power from the instrument before performing the following procedures.
After disconnecting the power, wait at least three minutes for the capacitors to discharge
before servicing the instrument.
22
Disconnect the cable from the rear of the CRT.
33 Disconnect the yoke cable from the CRT driver board.
44 Disconnect the high voltage lead from the bell of the CRT.
55 Slide the CRT driver board up out of the chassis.
66 Using a nut driver, remove the three hex nuts attaching the monitor and ground
bracket to the chassis, then remove the screw.
77 Slide the monitor assembly and ground bracket to the rear and up out of the chassis.
88 Reverse this procedure to install the monitor.
When installing the CRT driver board, check that the board is properly inserted in the circuit
board tracks.
To remove and replace the handle plate
11 Using previous procedures, remove the following assemblies:
•
Handle
•
Rear Feet
•
Cover
22
Remove the four screens that attach the handle plate to the chassis.
33 Remove the handle plate.
To remove the handle plate, align the plate toward the front of the instrument, then move it
up and out of the instrument.
44
Reverse this procedure to install the handle plate.
Replacing Assemblies
To remove and replace the monitor
6–12

 Loading...