Intel
®
Server Chassis P4304XXMFEN2/P4304XXMUXX Product Family System Integration and Service Guide
86
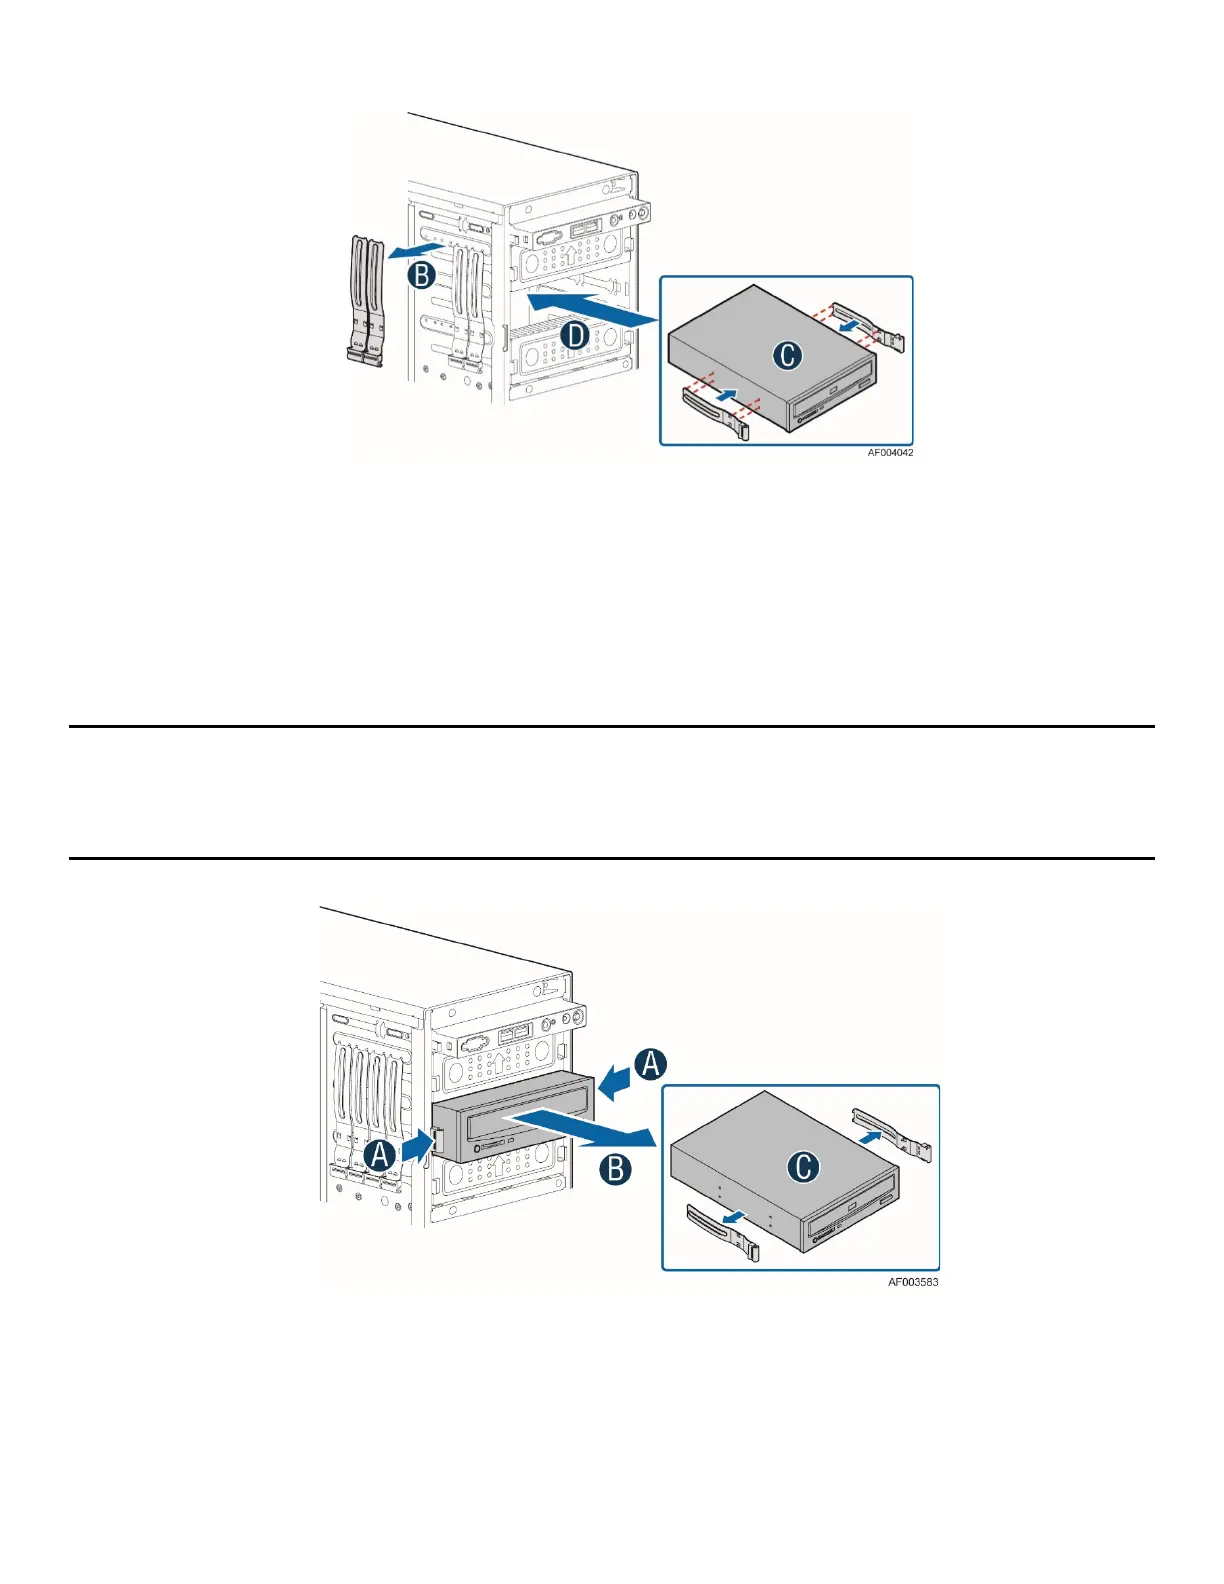
Figure 110. Installing the Optical Drive
3. Locate the slides from the chassis side (see letter B). Attach the slides to the optical drive by
pressing the slides firmly into the side dimples on the optical drive (see letter C). slide the drive
into the device bay until it snaps into place (see letter D).
4. Locate the power and data cables and connect them to the optical drive.
3.1.2 Optical Drive Removal
Note: The optical drive is NOT Hot-Swappable. Before removing or replacing the drive, first take the server
out of service; turn off all peripheral devices connected to the system, turn off the system by pressing the
power button, and unplug the power cord from the system or wall outlet. If you are not installing a device at
this location, install a filler panel to maintain proper system cooling.
Figure 111. Removing the Optical Drive
1. Disconnect the power and data cables from the optical drive.
2. Press on the slide release latches (see letter A) and pull the optical drive or slide assembly from
the chassis (see letter B). Remove the slides from the optical drive (see letter C).