Intel
®
Server Chassis P4304XXMFEN2/P4304XXMUXX Product Family System Integration and Service Guide
72
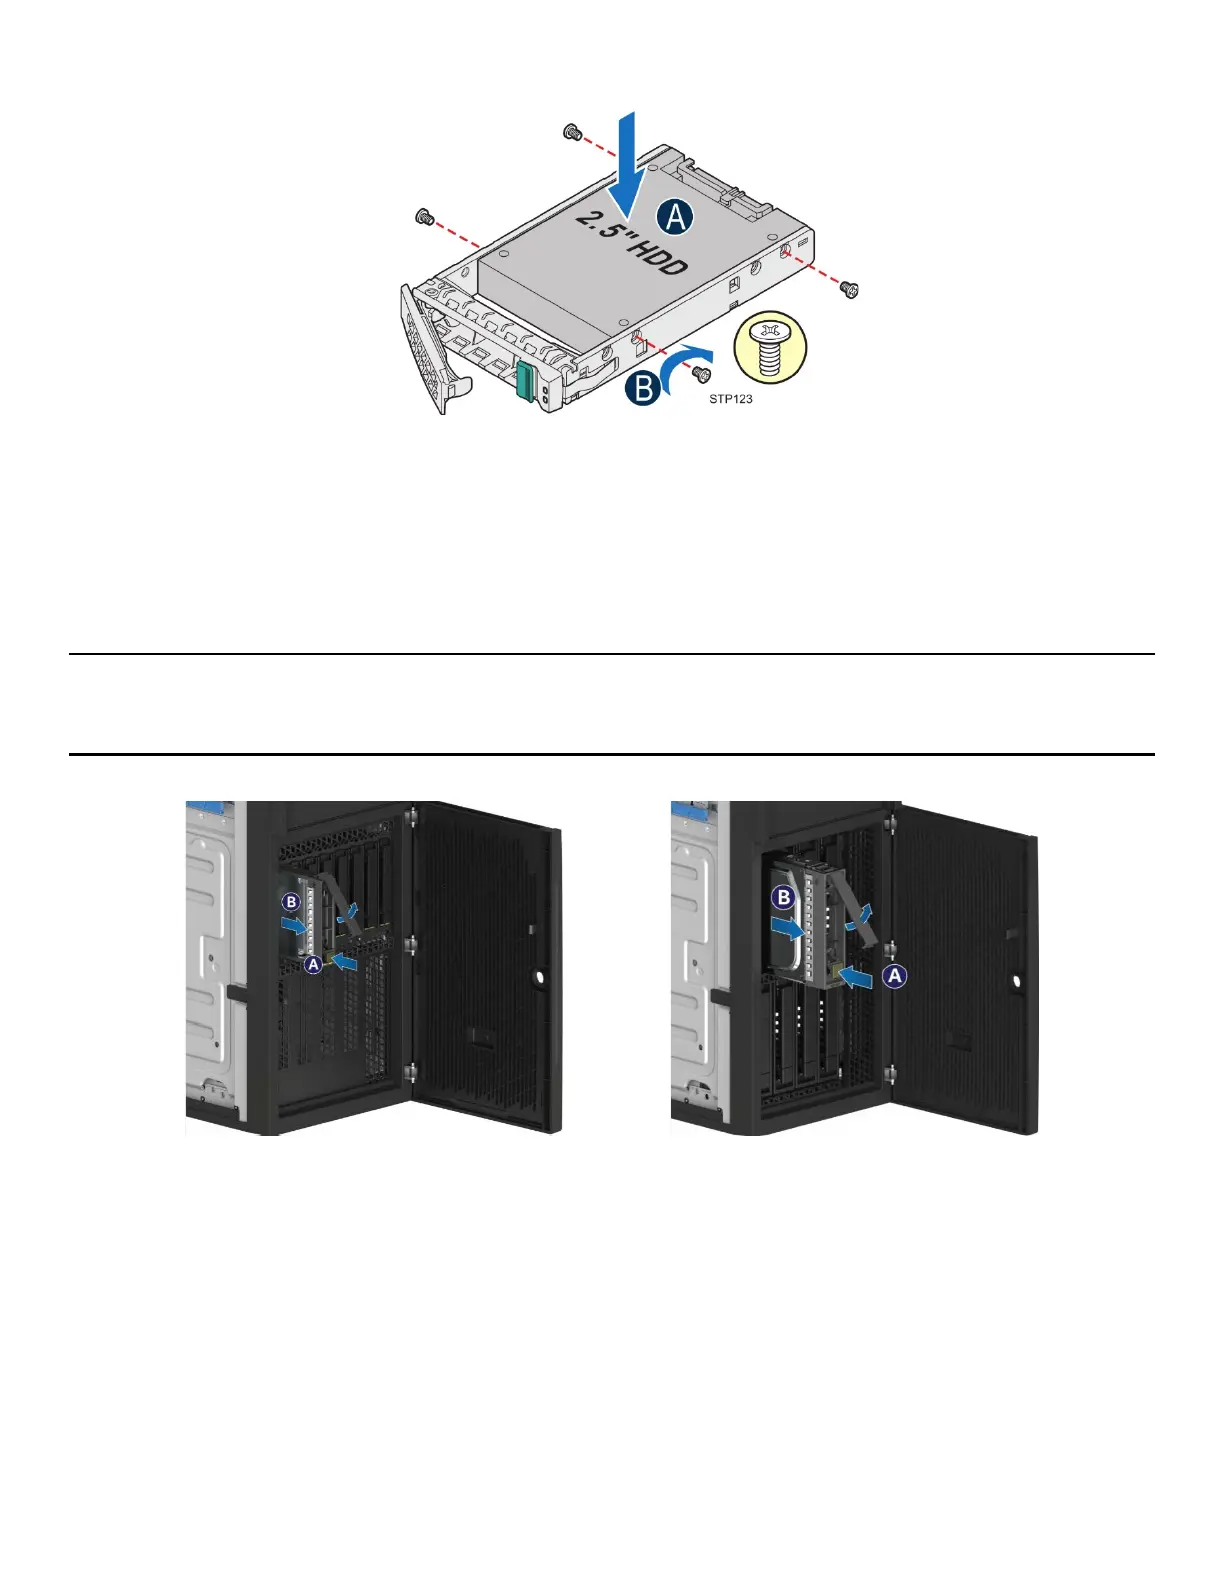
Figure 87. 2.5” Storage Device Installation – Mounting the Drive to the Carrier
3. Install the storage device into the carrier. Verify the connector end of the drive is located towards
the back of the carrier (see letter A).
4. Secure the drive to the carrier using four screws (see letter B).
2.3.9 Drive Carrier Extraction, Installation, and Assembly for Tool-less Drive Carriers
Note: To maintain proper system cooling, all externally accessible drive bays must be populated with a drive
carrier. Each drive carrier must have a hard disk drive (HDD), Solid State Device (SSD), or a supplied drive
blank installed.
2.3.9.1 Drive Carrier Extraction
Figure 88. Drive Carrier Extraction from Chassis
1. Remove the drive carrier from the chassis by first pressing the button on the carrier face plate to
release the lever (see Letter “A”).
2. Using the lever, pull the carrier from the drive bay (see Letter “B”).