number from which they originate so as not
to confuse them during re-assembly.
Seal all injection component unions as
illustrated in Par. 2.9.8 .
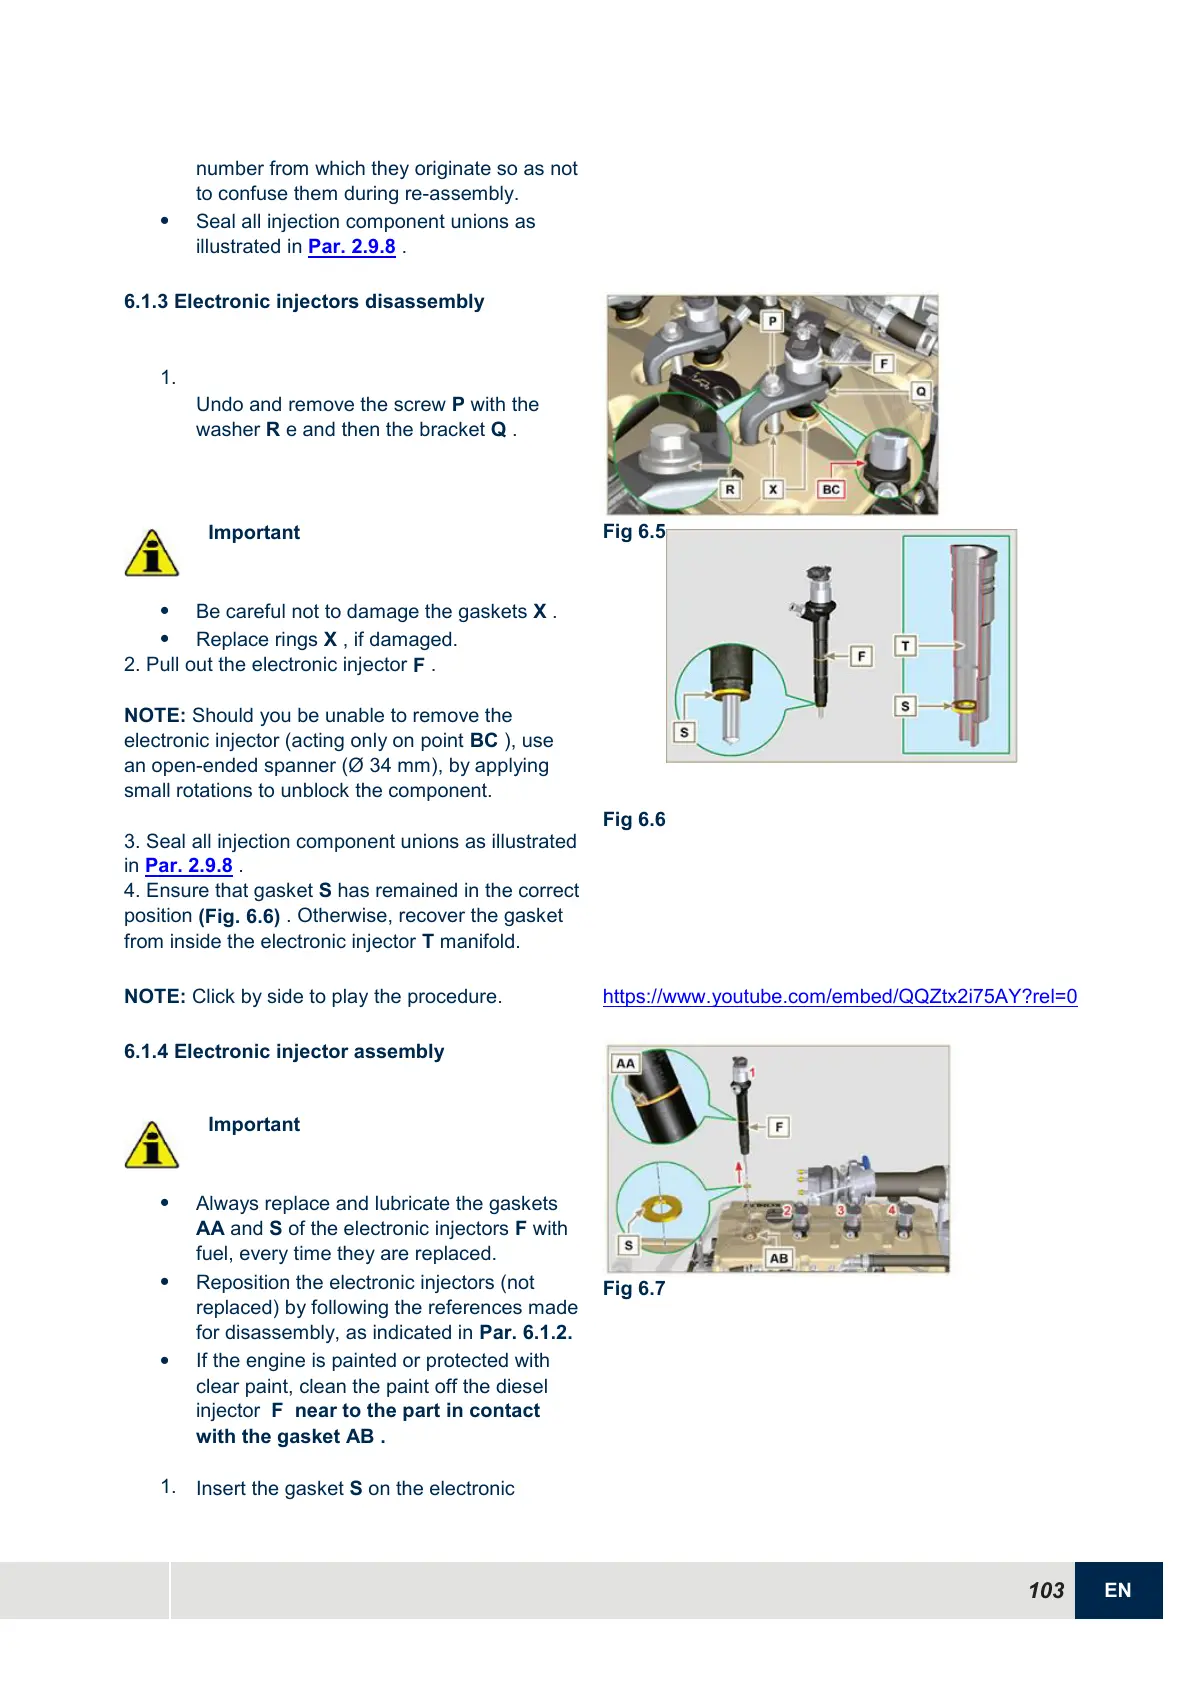
6.1.3 Electronic injectors disassembly
1.
Undo and remove the screw P with the
washer R e and then the bracket Q .
Important
Be careful not to damage the gaskets X .
Replace rings X , if damaged.
2. Pull out the electronic injector
F
.
NOTE:
Should you be unable to remove the
electronic injector (acting only on point
BC
), use
an open-ended spanner (Ø 34 mm), by applying
small rotations to unblock the component.
3. Seal all injection component unions as illustrated
in
Par. 2.9.8
.
4. Ensure that gasket
S
has remained in the correct
position
(Fig. 6.6)
. Otherwise, recover the gasket
from inside the electronic injector
T
manifold.
NOTE:
Click by side to play the procedure.
https://www.youtube.com/embed/QQZtx2i75AY?rel=0
6.1.4 Electronic injector assembly
Important
Always replace and lubricate the gaskets
AA and S of the electronic injectors F with
fuel, every time they are replaced.
Reposition the electronic injectors (not
replaced) by following the references made
for disassembly, as indicated in Par. 6.1.2.
If the engine is painted or protected with
clear paint, clean the paint off the diesel
injector F near to the part in contact
with the gasket AB .
1.
Insert the gasket S on the electronic

 Loading...