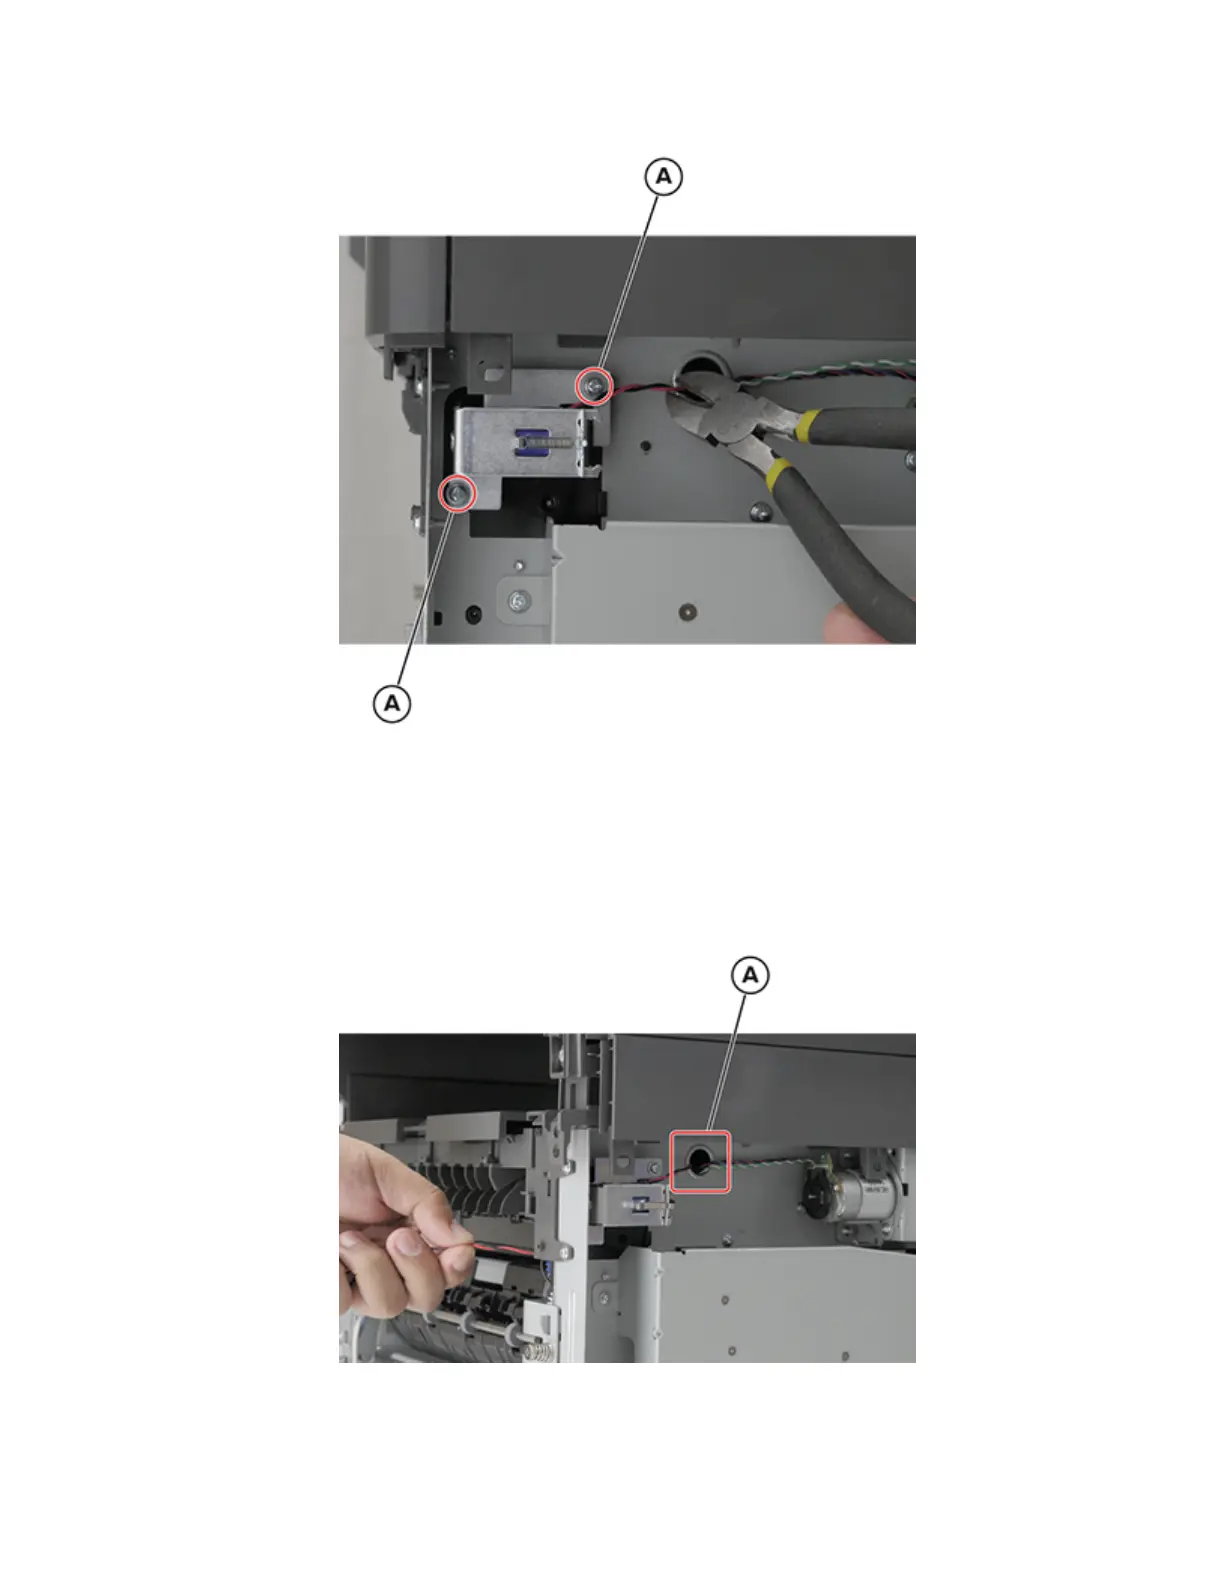
6 Remove the two screws (A), and then cut the cable.
7 Disconnect connector JDUPSOL1 from the controller board, and then pull the cable out of the printer.
Installation notes:
a Screw in place the replacement solenoid.
b Route the solenoid cable to the hole (A) exiting the rear side of the printer.
Note: Fully stretch the cable, but do it carefully to avoid cuts as it rubs into the edges of the hole.
c Install the redrive assembly.
7018
Parts removal
234

 Loading...


