6 Position the printer on its left side.
Warning—Potential Damage: The ADF might swing open while you position the printer on its side.
7 Remove the power supply. See “Power supply removal” on page 273.
8 Remove the duplex assembly. See “Duplex removal” on page 275.
9 Remove the pick roller assembly. See “Pick roller assembly removal” on page 280.
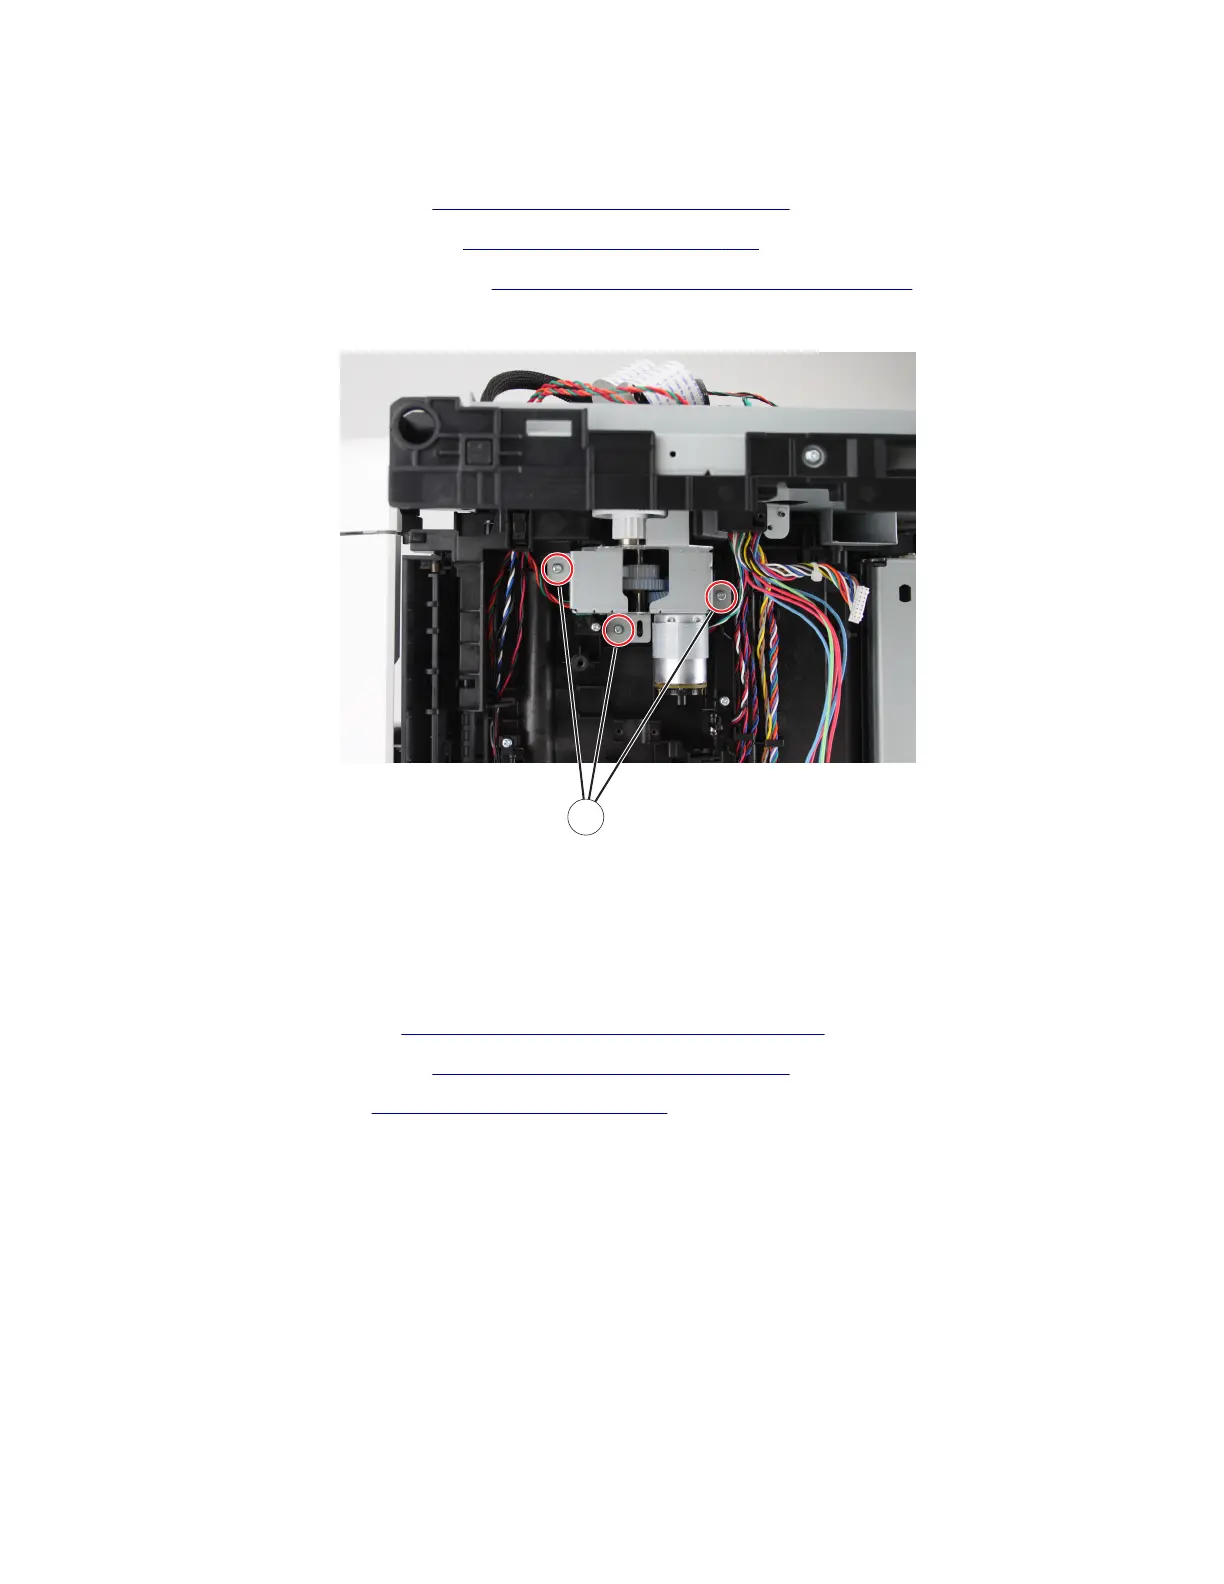
10 Remove the three screws (A).
A
11 Disconnect the cable (pick motor) from the assembly.
12 Remove the assembly.
Sensor (toner density) removal
1 Remove the rear cover. See “Rear door and cover removal” on page 295.
2 Remove the power supply. See “Power supply removal” on page 273.
3 Remove the duplex. See “Duplex removal” on page 275.
4 Position the printer on its left side.
7018
Parts removal
283
 Loading...


