359
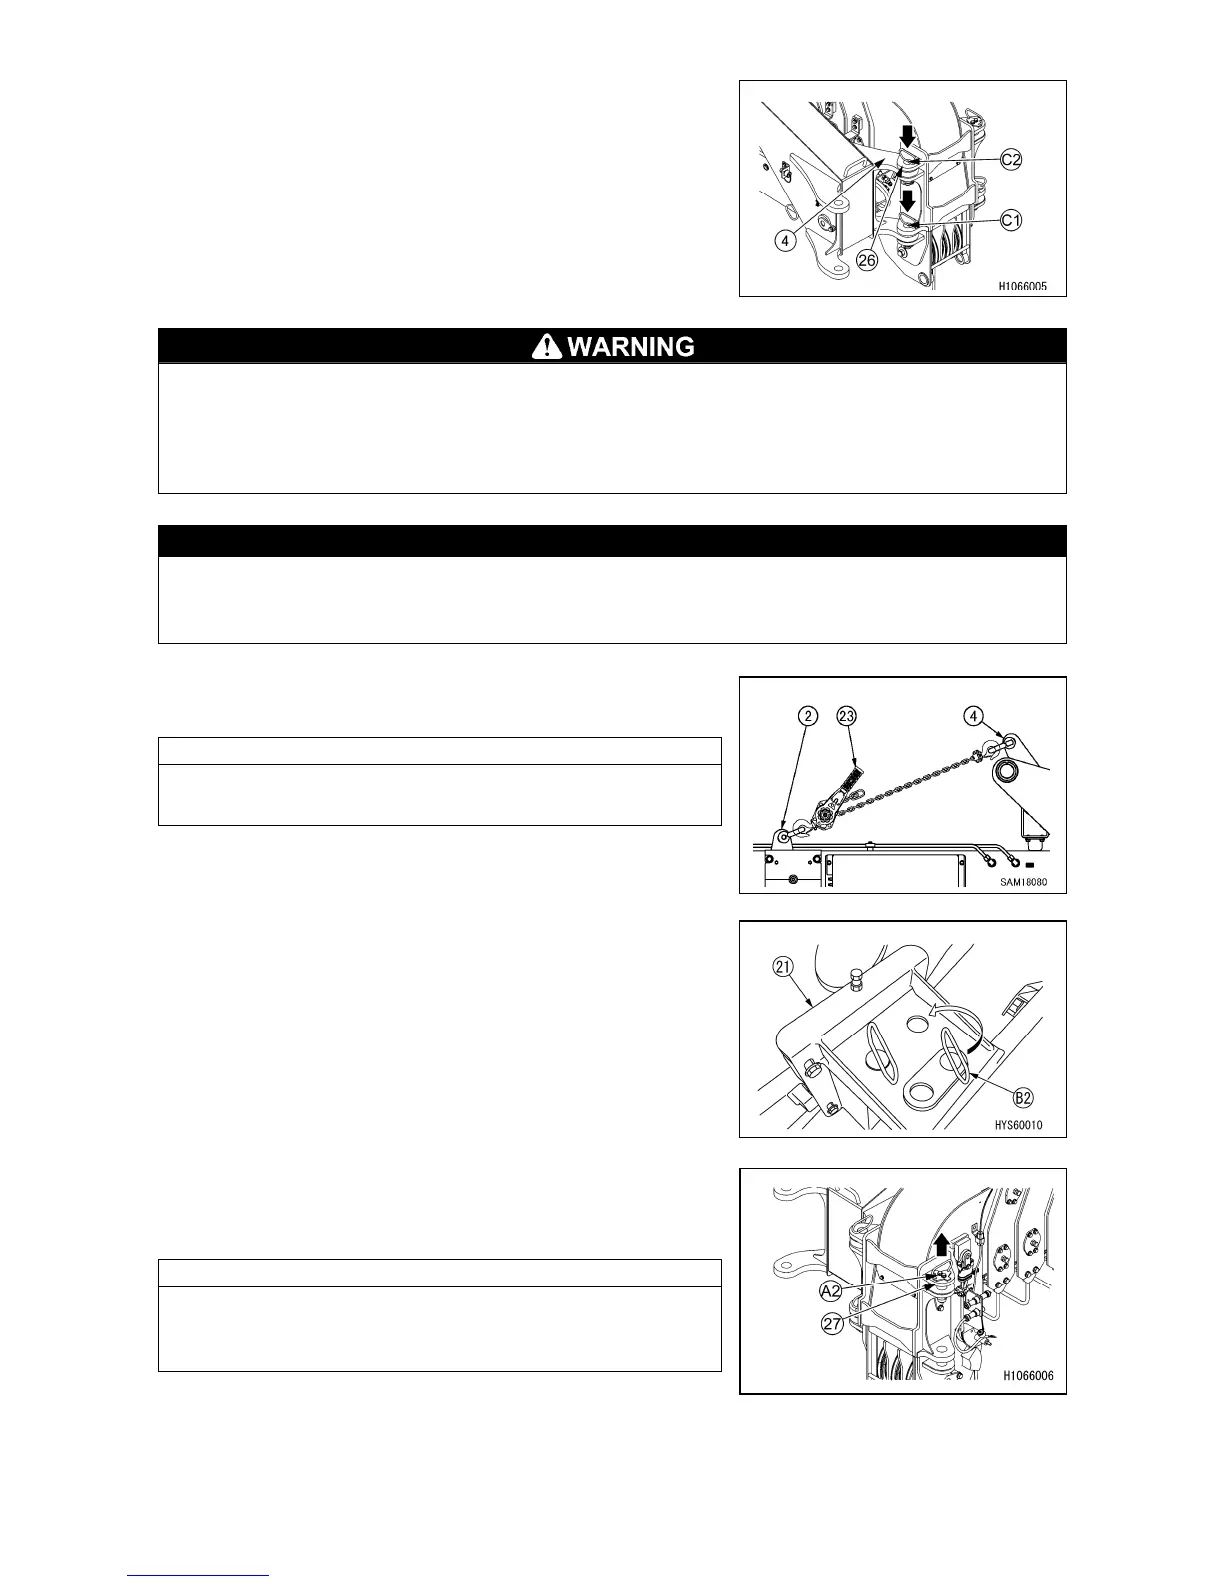
9. After aligning the holes (A, B) on the right section of the fly
jib mounting bracket (26) with the hole on the fly jib base (4),
insert the position pins (C1, C2) to the hole and insert a
linchpin. Remember to turn the ring back to lock it securely.
• Do not remove the position pin (B2) from the mounting bracket A (21), until the position pins
(C1, C2) are securely inserted into the hole on the right section of the fly jib mounting bracket
(26). If you remove, it may cause a serious accident.
• The position pin (C1, C2) must be inserted from above facing downwards. Otherwise, the
position pin might come off, and the fly jib may fall causing a serious accident.
CAUTION
Do not perform extend/retract operation with the position pins (B2, C1, C2) inserted into both
the holes on the right section of the fly jib mounting bracket (26) and the stowage bracket A (21).
If you perform the above, the fly jib and the main boom might be seriously damaged.
10. Attach the lever block (23) to the No.1 fly jib (2) and the fly
jib base (4) to prevent the fly jib from falling.
NOTES
The lever block (23) should be attached with a tension so that
the No.1 fly jib (2) is slightly lifted.
11. Pull out the linchpin of the position pin (B2) of the stowage
bracket A (21) and pull out the position pin (B2).
12. Pull out the shaft lock pin of the position pin (A2) on the left
section of the fly jib mounting bracket (27) and pull out the
position pin (A2).
NOTES
You need this position pin (A2) you have just pulled out to
connect the fly jib and the left section of the fly jib mounting
bracket (27).