312
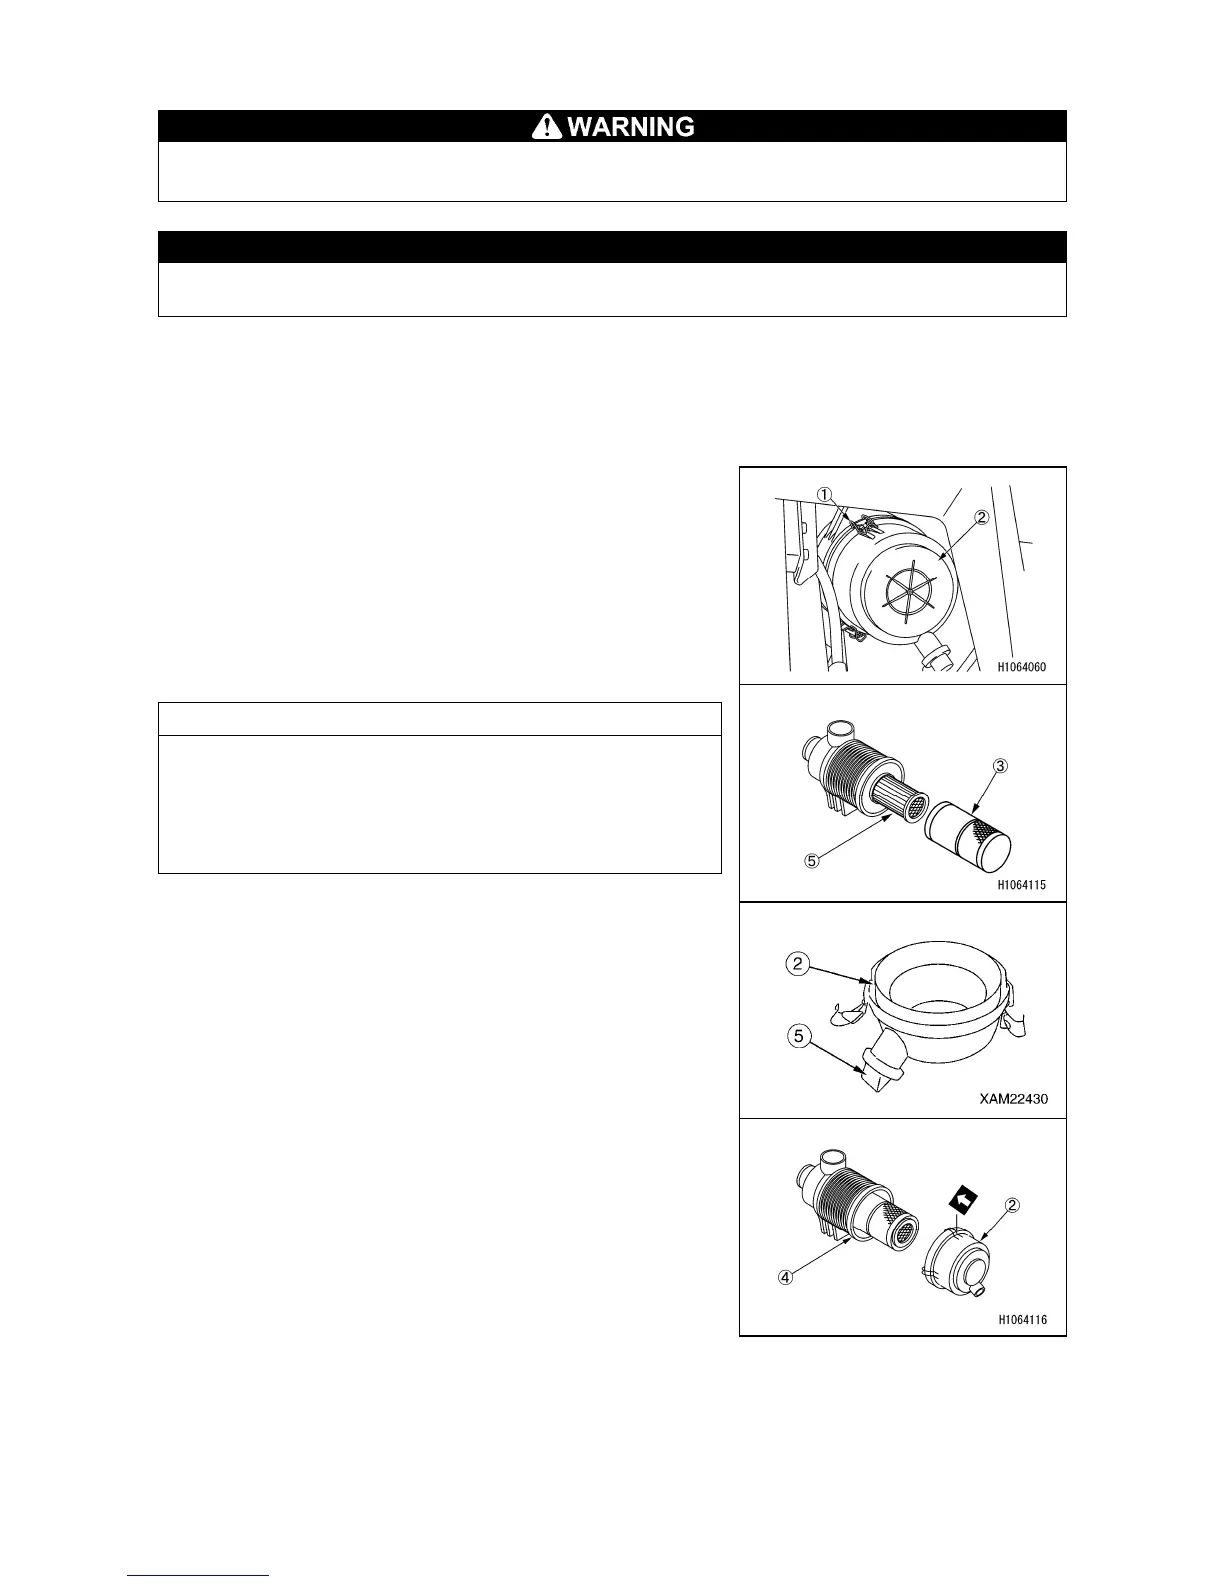
[2] REPLACEMENT OF AIR CLEANER
Do not clean and replace the air cleaner element when the engine is in rotation.
Such action may cause damage to the engine.
CAUTION
• Avoid the use of an element if the groove, gasket, or sealing is damaged.
• Always use Maeda genuine elements.
1. Place the machine on a level surface.
2. See “OPERATION 1.9 RADIATOR GRILL” and install
the radiator grill. See “OPERATION 1.12 OPERATION
SIDE COVER” and remove the operation side cover.
3. Disengage the clamps (1) (3 places) and remove the
dust pan (2).
4. Pull out the outer element (3) only.
NOTES
• The inner element (5) should be removed only when the
element clogging occurs soon after replacing the outer
element (3) with a new one.
• The inner element (5) is for backup to prevent engine
troubles caused by missing or damaged outer element
(3).
5. Cover the duct entrance located at the back of the air
cleaner body (4) with a clean cloth or tape, to keep
impurities out of the duct entrance.
6. Clean inside the air cleaner body (4).
7. Clean inside the dust pan (2) and the rubber cup (5).
8. Remove the cloth or tape from the air connector at the
back of the air cleaner body (4).
9. Insert a new element (3) into the air cleaner body (4).
10. Mount the dust pan (2) by matching the arrow to the
mating mark on the air cleaner body (4).
11. Secure the clamps (1) (3 places).
12. See “OPERATION 1.9 RADIATOR GRILL” and install
the radiator grill. See “OPERATION 1.12 OPERATION
SIDE COVER” and install the operation side cover.