Manitowoc Published 11-06-15, Control # 040-13 7-9
2250 SERVICE/MAINTENANCE MANUAL POWER TRAIN
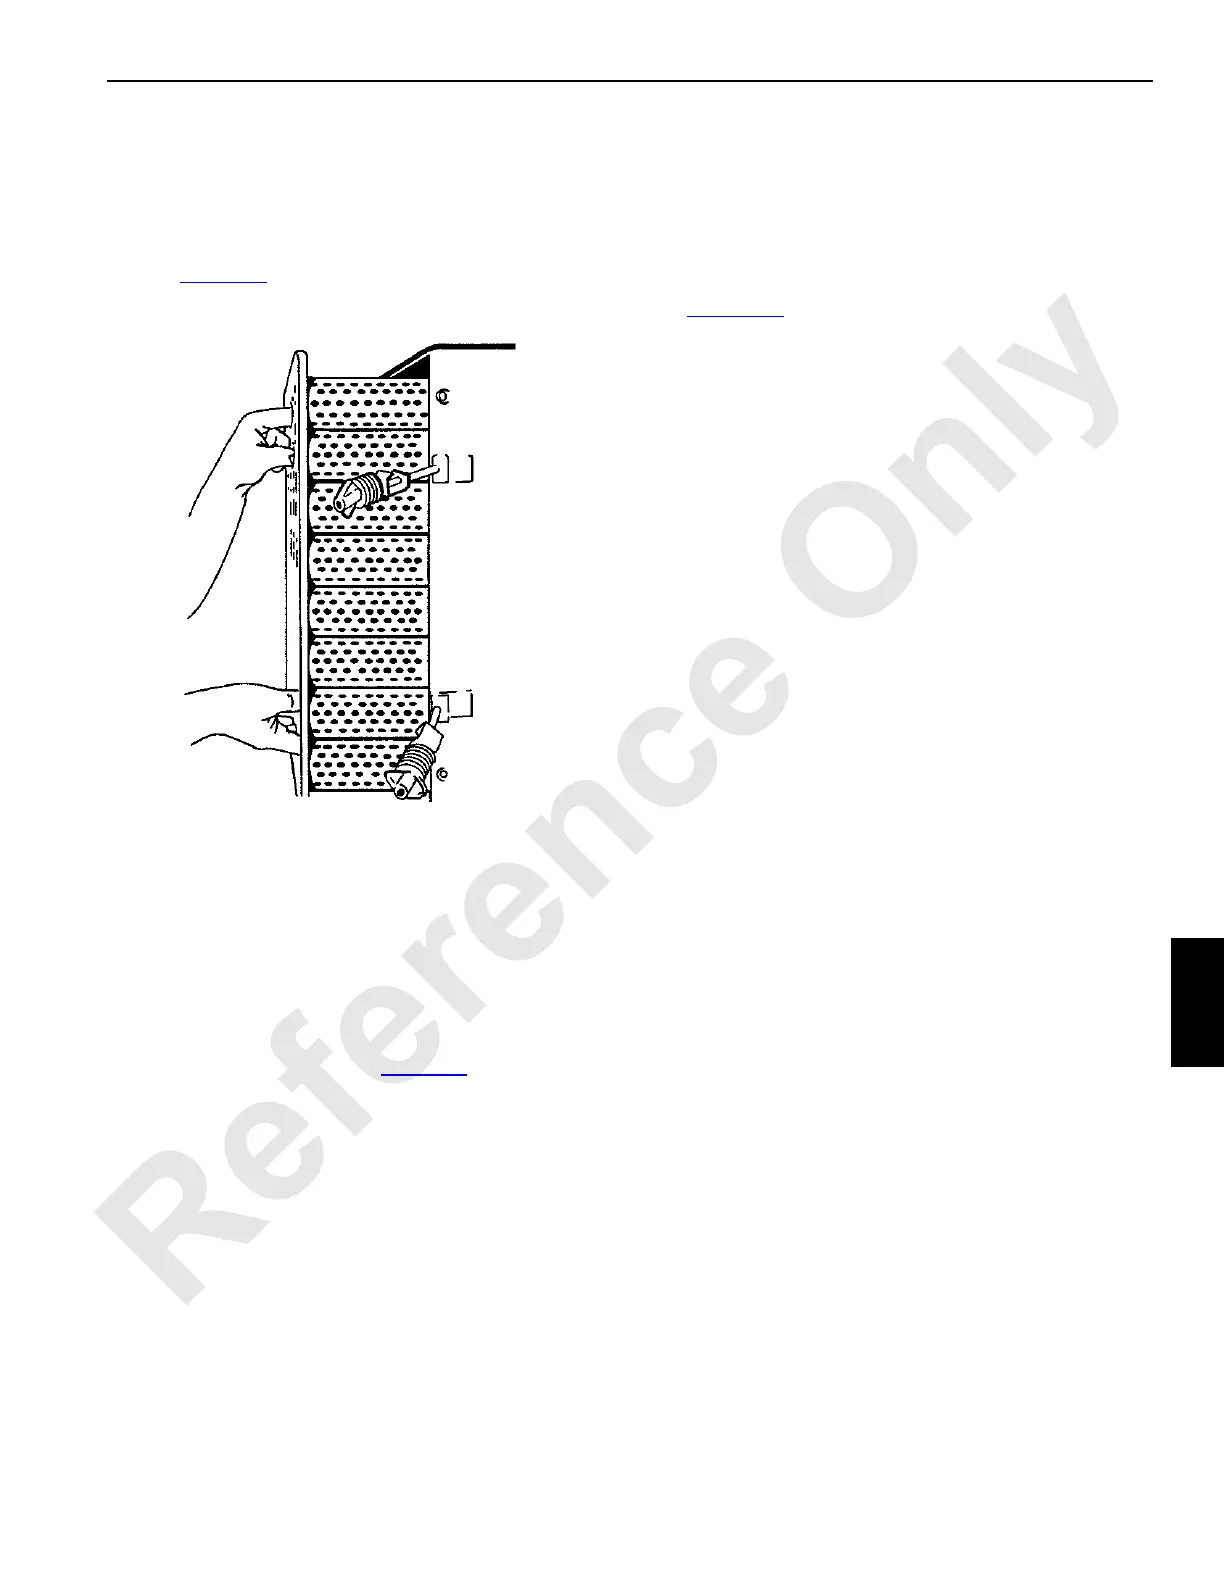
b. Loosen seal in all four corners of filter one at a time
by pulling it straight out.
c. It may be necessary to loosen seal along edges of
element in a similar manner.
d. After seal is loose, grasp filter as shown in
Figure 7-9
and pull filter straight out and slightly up
so filter clears edges of housing.
3. Clean inside of housing with a damp cloth. Make sure
housing is free of all foreign matter.
Use care not to allow foreign matter to enter tubing
in air inlet hole to engine.
4. Wipe off face of pre-cleaner. If desired, pre-cleaner can
be steam cleaned.
5. Install new filter, as follows:
a. Grasp filter as shown in Figure 7-9
.
b. Insert filter in housing. Avoid hitting element tubes
against sealing flanges on edges of housing.
c. Make sure filter is seated properly in housing. Firmly
press all edges and corners of element into place to
form a positive seal against flanges in housing.
Do not pound filter in place.
6. Assemble pre-cleaner to housing with clamps. Tighten
nuts in a crisscross manner to 70 in-lbs (8 N•m).
7. Check that ejector valve is installed in dust bin of pre-
cleaner.
8. Reset filter indicator.
ENGINE AIR CLEANER MAINTENANCE —
TIER 4 ENGINE
See Figure 7-10 for the following procedure.
The air cleaner is mounted and fastened to the engine air
intake (6) with a rubber elbow reducer (5), clamps (3), tubes
(2) and reducer (4). Servicing the air cleaner is an important
function because:
• Clogged air cleaner filters will prevent adequate air flow
to the engine, causing poor starting and increased
exhaust emissions.
• An improperly installed or damaged air cleaner can
allow dirty air to be drawn directly into the engine.
Either condition can cause engine damage.
Inspection
To maintain engine protection and filter service life, inspect
the following areas at regular intervals:
Daily
Check service indicator (8) with engine running. The
indicator gives a visual indication when it is time to replace
the filters.
• A yellow flag in the indicator window (8a) extends as the
filters become plugged. Replace filters when the
yellow indicator reaches the red zone at the end of
the indicator.
• The yellow flag remains locked in place after the engine
is stopped. When the filters are replaced, push button
(8b) in to reset the indicator.
Weekly
1. Inspect rubber reducers (4 and 5) between air cleaner
and engine for cracks or other damage which might
allow unfiltered air to enter the engine. Replace worn or
damaged parts.
2. Check housing (1e) for dents or other damage that may
allow unfiltered air to enter engine. Replace housing if
damaged.
3. Check for loose clamps (3). Tighten if necessary.
4. Inspect engine intake (6) for obstructions. Clean as
required.

 Loading...


