Special Imaging Modes
11-15
Type Parameter Description
Exit Exit Exit 3D/4D mode.
11.1.5.3 Smart3D Image Acquisition
The following takes the fetal face 3D imaging as an example.
1. Optimize the 2D image of the desired region.
Make sure:
z High contrast between the desired region and the AF (amniotic fluid) surrounded.
z Clear boundary of the desired region.
z Low noise of the AF area.
2. Set ROI (Region of Interest) on the 2D image.
Roll the trackball to change the ROI size, ROI position and curved VOI, press the
<Set> key to toggle among setting the ROI size, ROI position or curved VOI
To set the ROI, make sure:
z Set ROI on the 2D image with the largest section area of the fetal face.
z Set ROI a little larger than the fetal head.
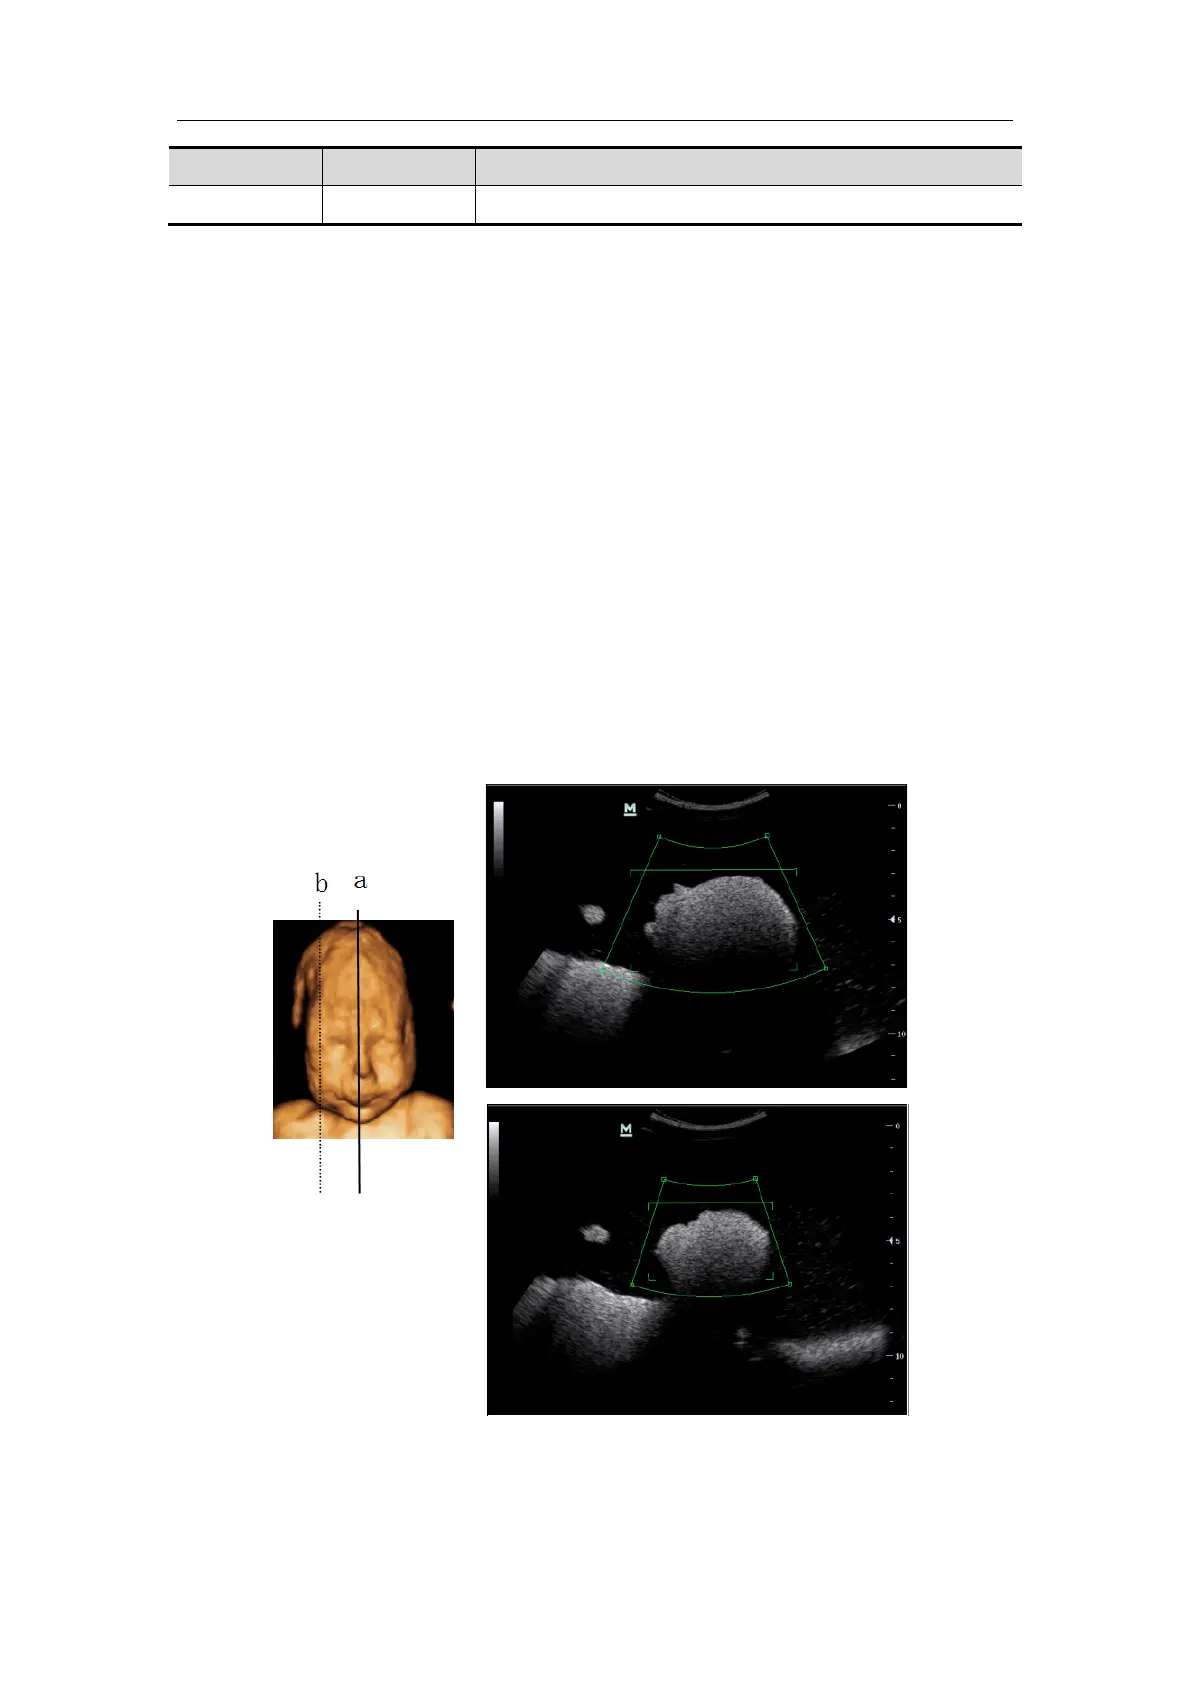
Take scanning the fetal face sagittally as an example, the largest ROI is set on the 2D
image acquired from the sagittally section across the center of the face (with the largest
face section area), as shown in Figure a below. If not, a smaller face section appears and
results in a smaller ROI, as shown in Figure b below.(The left figure below takes a 3D
restructured fetal face to indicate the fetal under exam.))
A small ROI results in an incomplete 3D image, which can be corrected by resetting
ROI after acquisition. For details, please refer to “Reset ROI”.
3. Press [Update] key or click [Start] to begin the acquisition.