User’s Guide Kona cutting plotter
Basics
AP-75380 - Revision 1.2 31
3
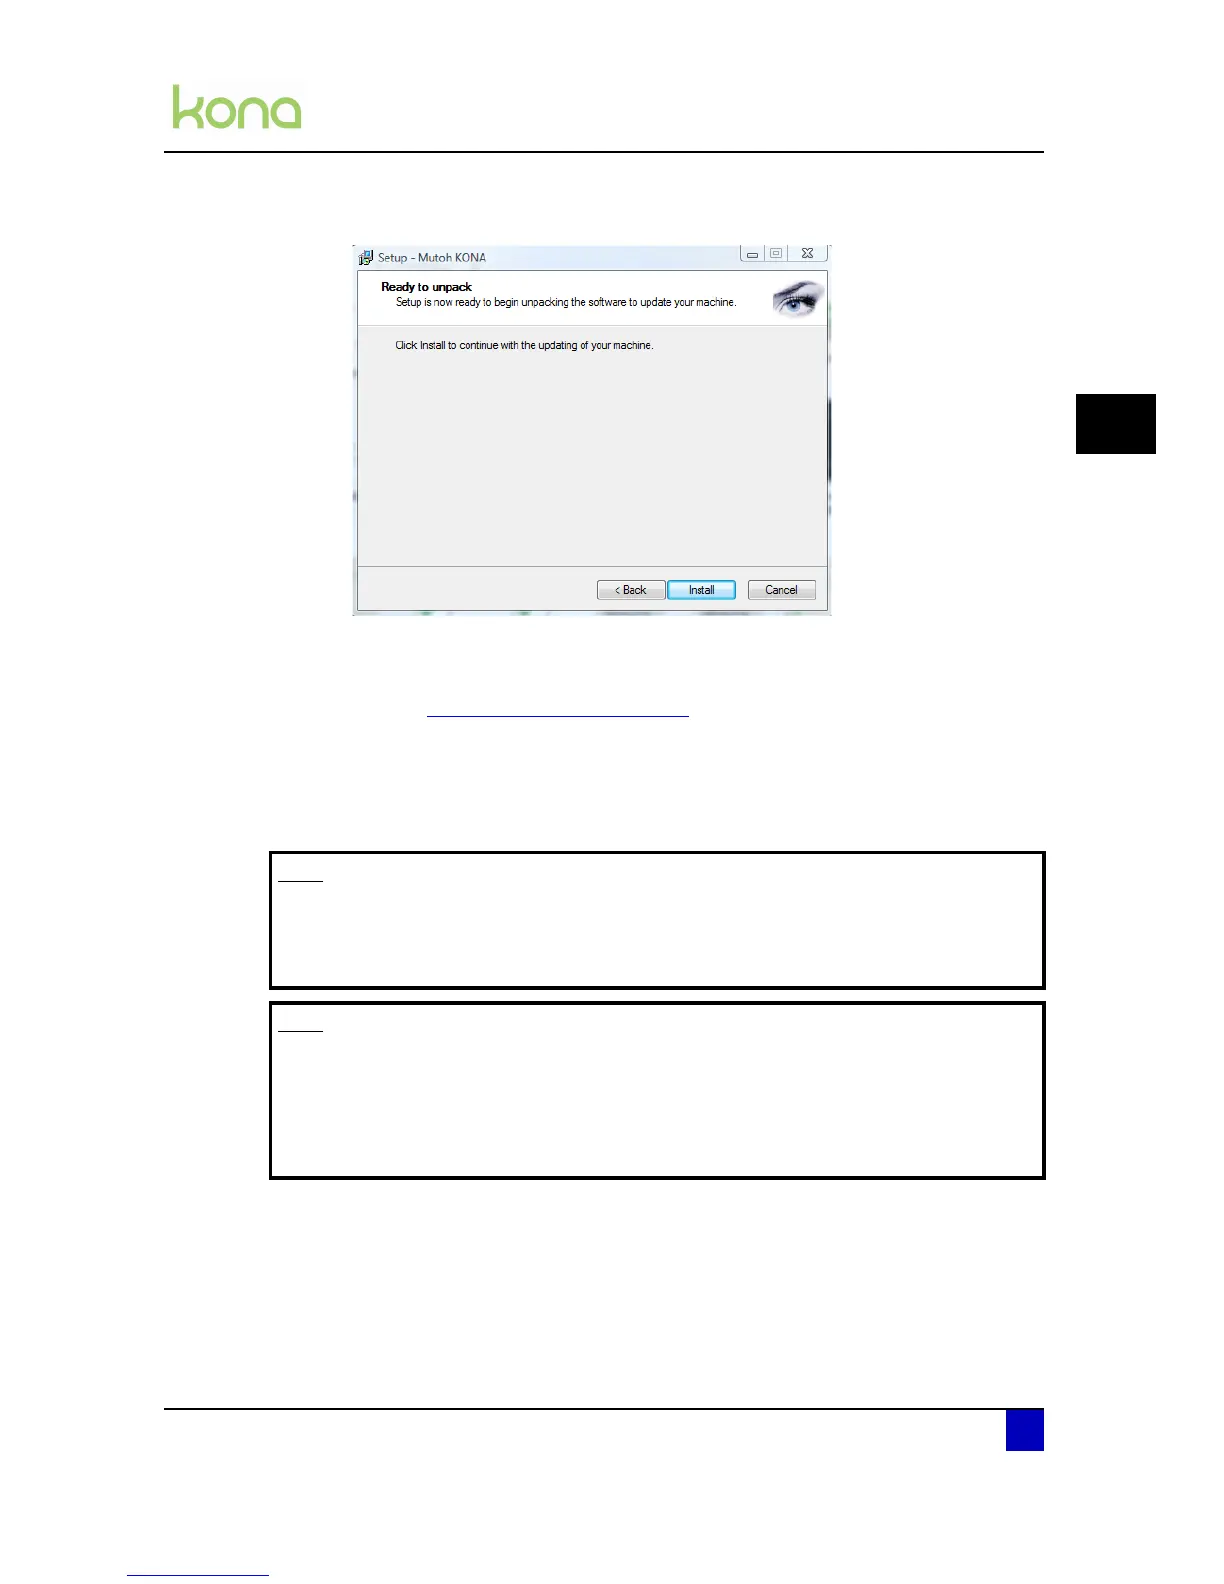
Step 9: Click Install to continue.
Step 10: The program will extract the files.
Step 11: Select the ComPort on which the cutter is connected and press Apply.
Refer to Check COM port used on page27
Step 12: The PC will send and program the new firmware to the cutter.
Step 13: The Kona cutting plotter will restart automatically as soon as the firmware has been
installed.
Step 14: The new firmware has been installed properly when you hear a beep.
Note
After updating the new firmware, take a parameter backup. A new firmware
automatically leads to new internal parameters.
Refer to the application guide for more information.
Note
It is not advised to downgrade to lower firmware versions. If downgrading the
firmware, a correct functioning cutter is no longer guaranteed with the current
settings.
Reset the user machine defaults and restore the backup from the previous
version. e.g. restore parameter backup taken on FW 1.0.0.