User’s Guide Kona cutting plotter
Basics
AP-75380 - Revision 1.2 37
3
3.3 Installing and replacing tools
3.3.1 Installing tools
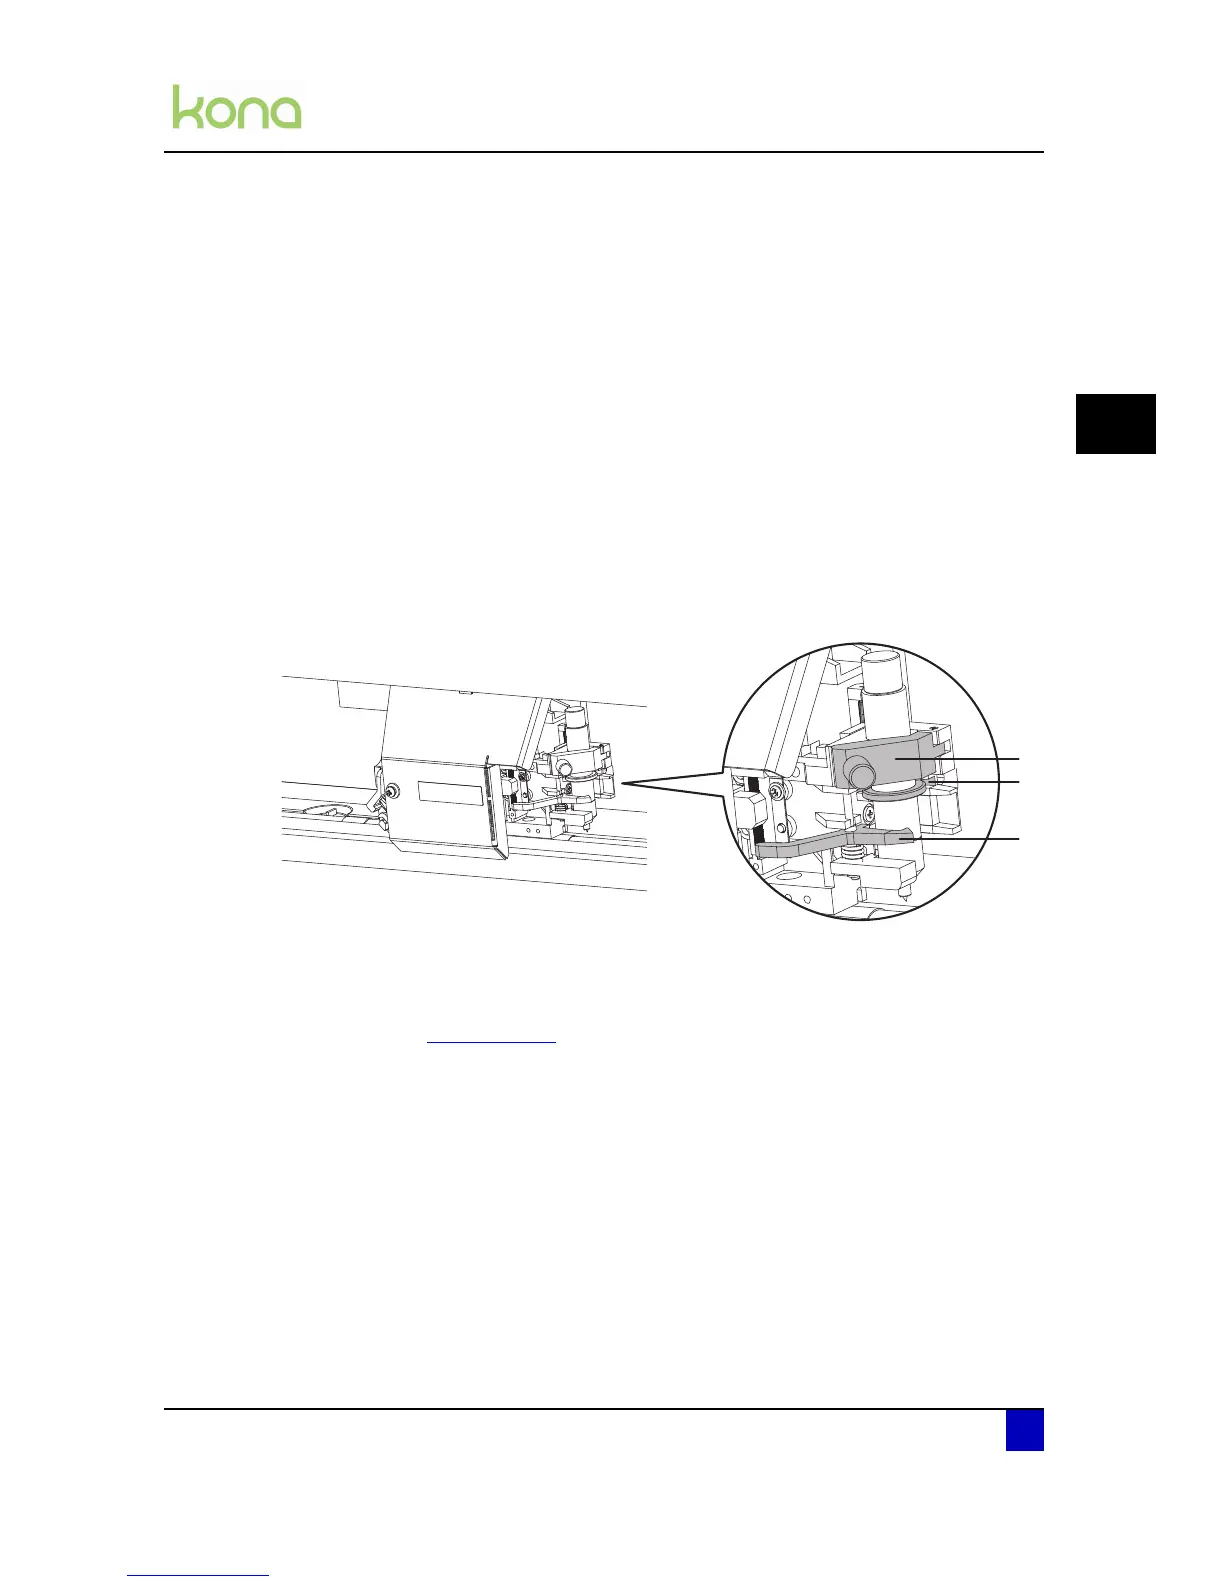
At the right-hand side of the cutter head, you will find a pivoting mounting bracket. Opening
this bracket will enable you to install a full range of cutting and drawing tools.
To do so, please follow the instructions mentioned below.
Step 1: Power off the Kona.
Step 2: Make sure the pressure rollers are up.
Step 3: Manually move the cutter head to the left.
Step 4: Open the screw (1) to unlock the tool head-mounting bracket.
Step 5: Hold back the clip (3) of the tool head and slide the tool into position, making sure
the tool collar fits into the groove just beneath the locking screw (2).
Step 6: Fasten the screw (1) to secure the tool into position.
Step 7: Power on the cutter and perform the EPOS alignment check to be sure the distance
between EPOS sensor and knife/pen point is set correctly. Otherwise, it might occur
that the data is cut with an offset.
Refer to Epos on page93