User’s Guide Kona cutting plotter
Basics
44 AP-75380 - Revision 1.2
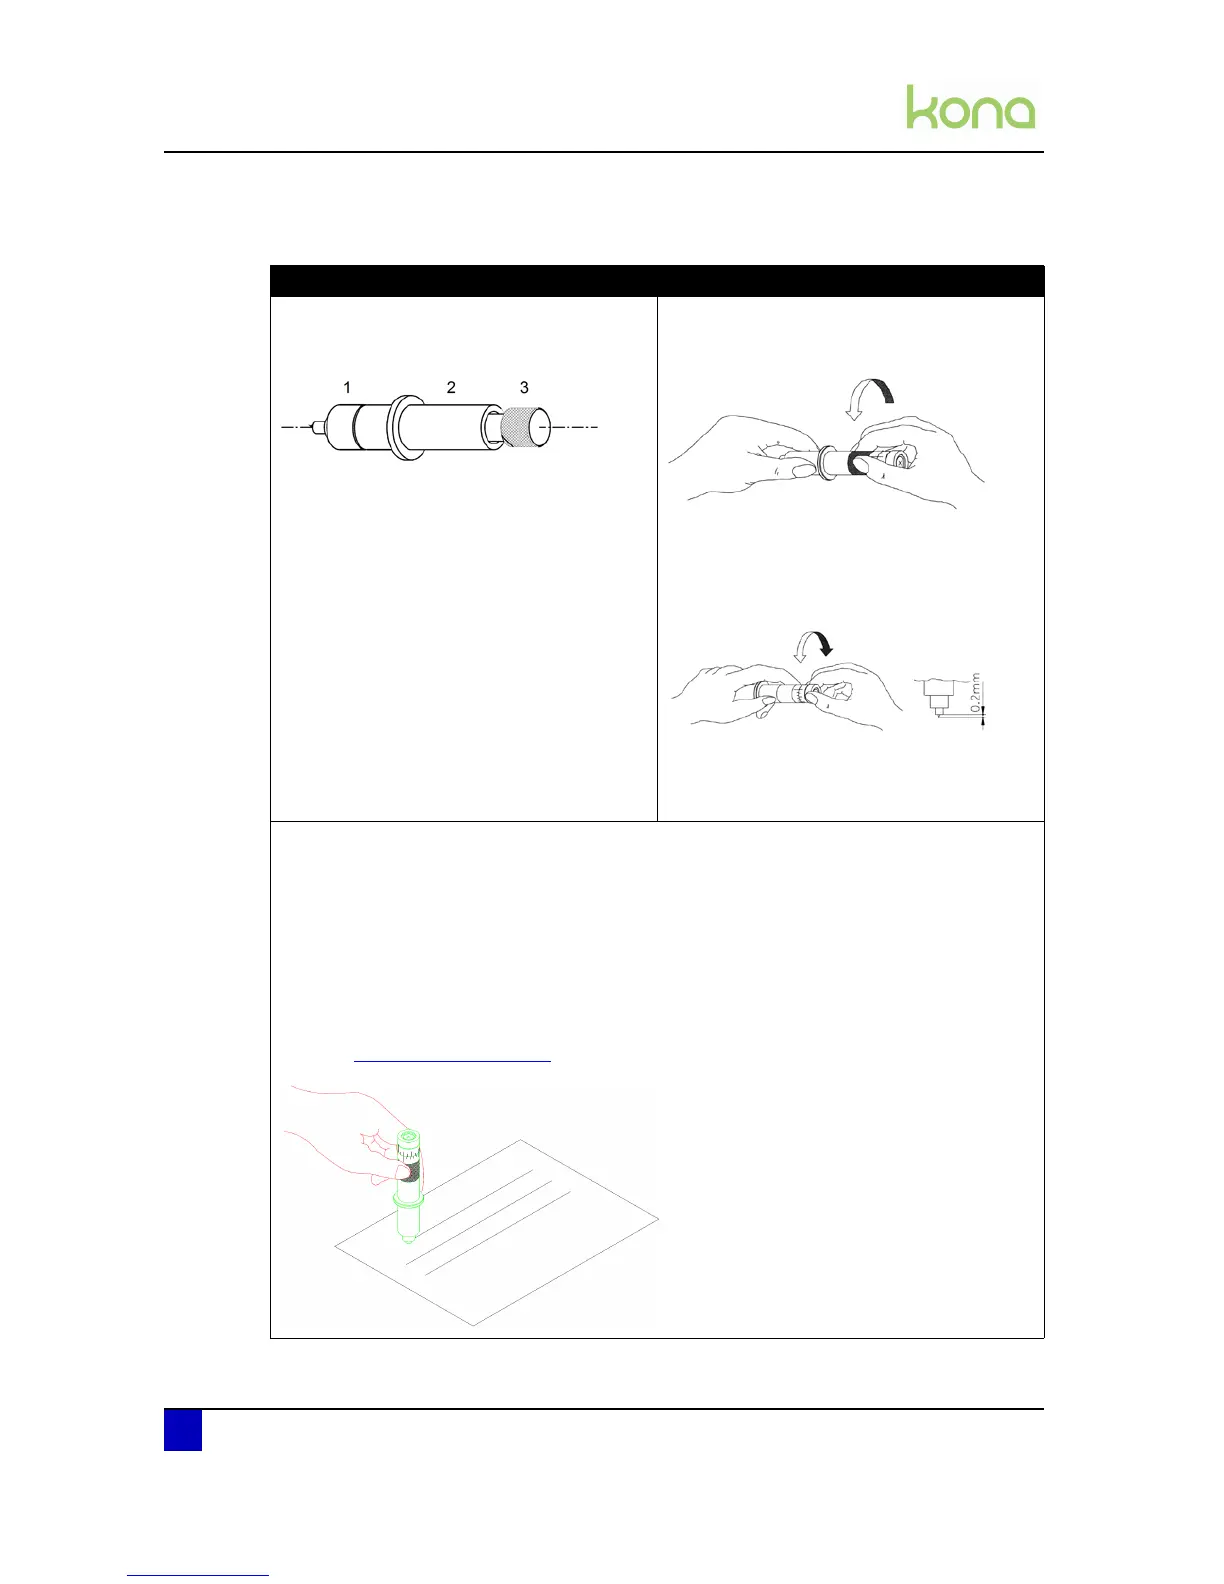
3.4.3 Adjusting the knife depth
Standard knife holder Knife holder with nonius
Hold the body (2) as shown below in one
hand and adjust the depth by using the set
screw (3).
Turning the set screw (3) clockwise will
make the blade protrude out of the edge of
the base part (1). Turning the set screw (3)
counter clockwise, will retract the blade. For
a first test, turn out the blade until it
protrudes about 0.2mm (0.008”) out of the
base part.
Loosen the base part of the cutting knife. To
do this, take the base part in your left hand
and twist the ring slightly.
Take the base part and the ring in your left
hand and twist the shaft until the knife point
protrudes about 0.2 mm (0.008”) out of the
base part.
Tighten the ring firmly against the base part.
This will prevent the cutting blade from
coming loose during cutting.
Make a manual test-cut on a small piece of media, of the same type that you will be using.
For contour cutting
Adjust the depth until the top layer is cut completely and that you can see a slight scratch on
the backing when peeling off. At no times you should be able to see a scratch at the back
side of the media.
For cutting through
Adjust the depth until the knife just cuts through the back side of the media.
Refer to Cut through on page102