4: Repair Internal Assemblies — Front Case
98
Replace LCD Display R1.0
1 Install the LCD Display Cable, see Figure 64B.
2 Use hot melt glue and hot melt glue gun to seal the LCD Display Cable, see Figure 64 A. Wait until
it cools
3 Install the LCD protective cover and metal shield, see Figure 63B.
4 After installing the LCD protective cover, place the LCD Display cable into the cable slot. See
Figure 63 C.
5 Remove the protective thin film on the LCD screen.
6 Install and tighten the five M 3x10 screws with washers, see Figure 62.
7 Put the LCD Display Cable into the two plastic cable fasteners on UI PCA, see Figure 61.
8 Close the Case. See “Closing the Case” on page 149.
NOTE: Do not touch the LCD screen.
Remove LCD Display R1.1
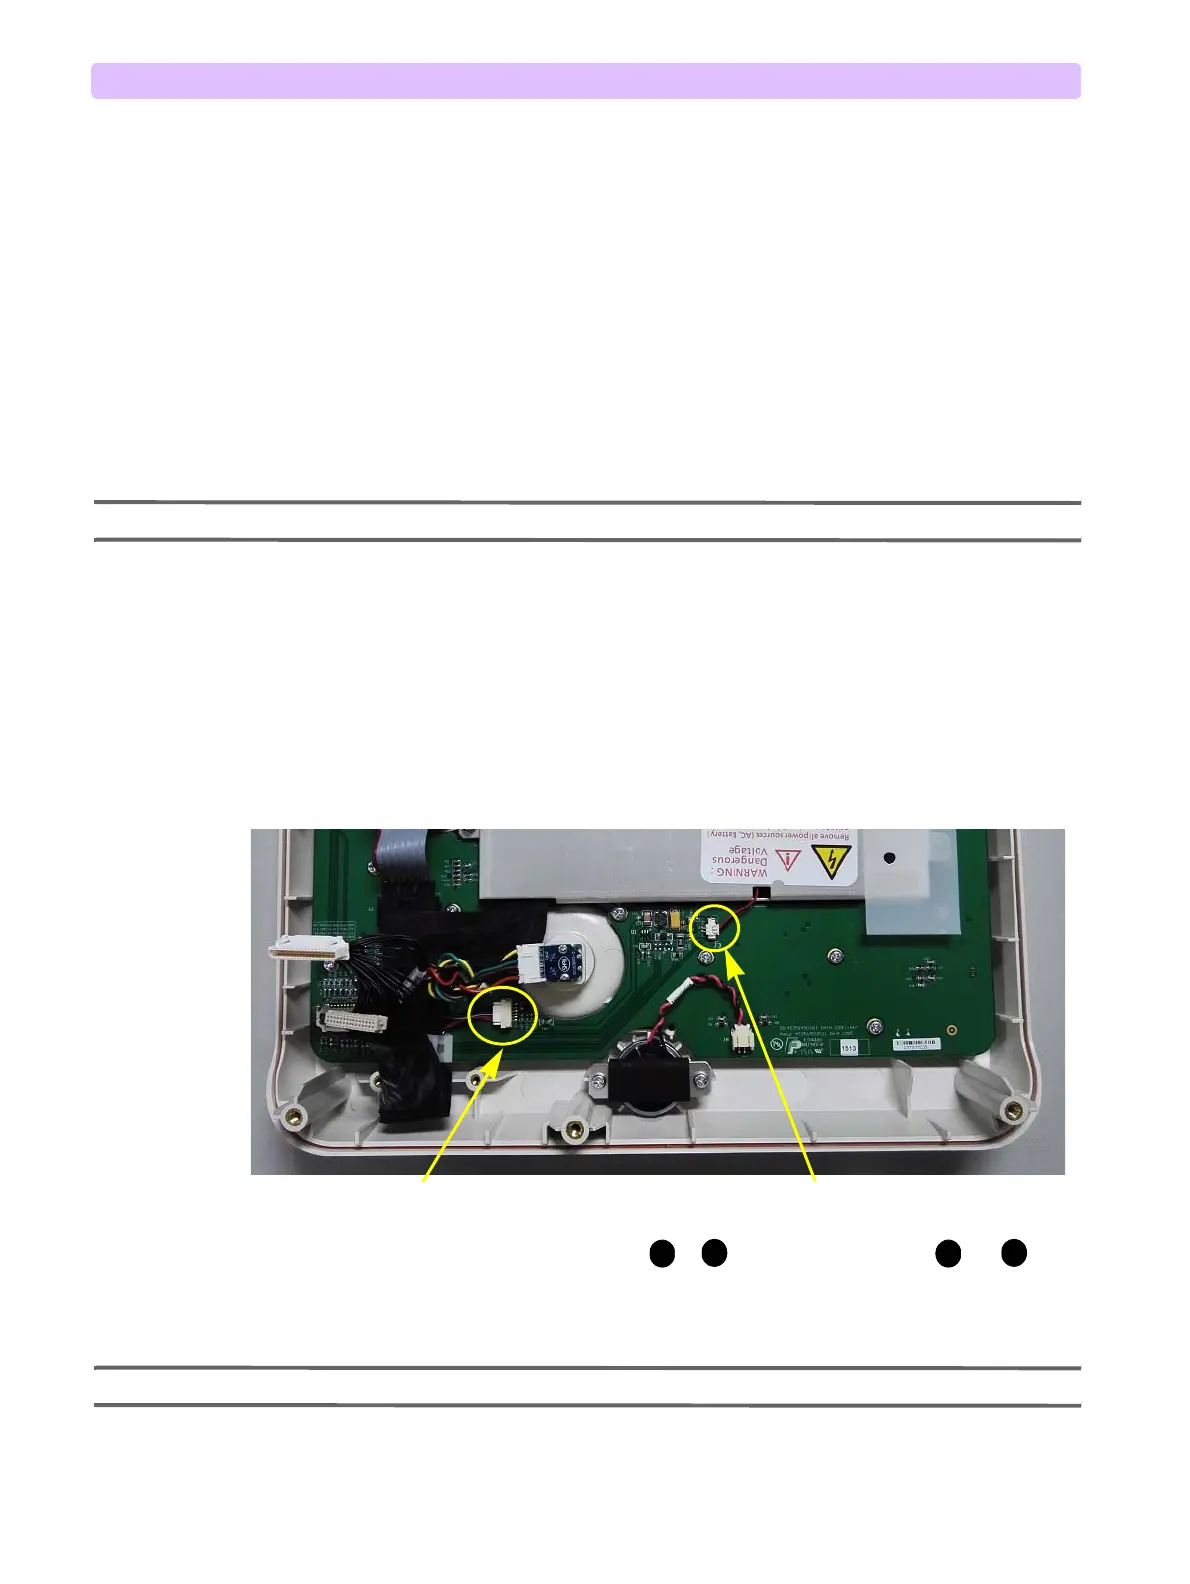
1 Press middle area and lift right side of the plastic cable fastener to loosen the fastener, see yellow
circle in Figure 65.
2 Unplug the 6-pin connector on LCD Display cable and the 2-pin LCD Display Wire from the UI
PCA, see Figure 65.
3 Remove the five M 3x10 screws with washers ( to ), see Figure 62 A. Screw and are
underneath the cover.
4 Remove the LCD Display R1.1 Assembly, see Figure 62 B.
5 Remove the metal housing.
NOTE: No individual LCD Display cable is available as service part for LCD Display R1.1.
Figure 65 LCD Display Assembly-5
6-pin connector on LCD Display Cable
2-pin LCD Display Cable Wire



 To Next Page