Section 18: BODY
PA1562
42
4. Tighten the bolts.
5. Check that the door swings freely and
closes properly. It may be necessary to
adjust the door latch to get proper fit and
operation.
To adjust the latch mechanism (3, Fig. 34) and
the striker pin:
1. Open the door to access the striker pin.
2. Slightly loosen the striker pin.
3. Using a hammer, adjust the striker pin to
center it in the door latch mechanism.
4. Tighten the striker pin.
5. Check door fit and operation.
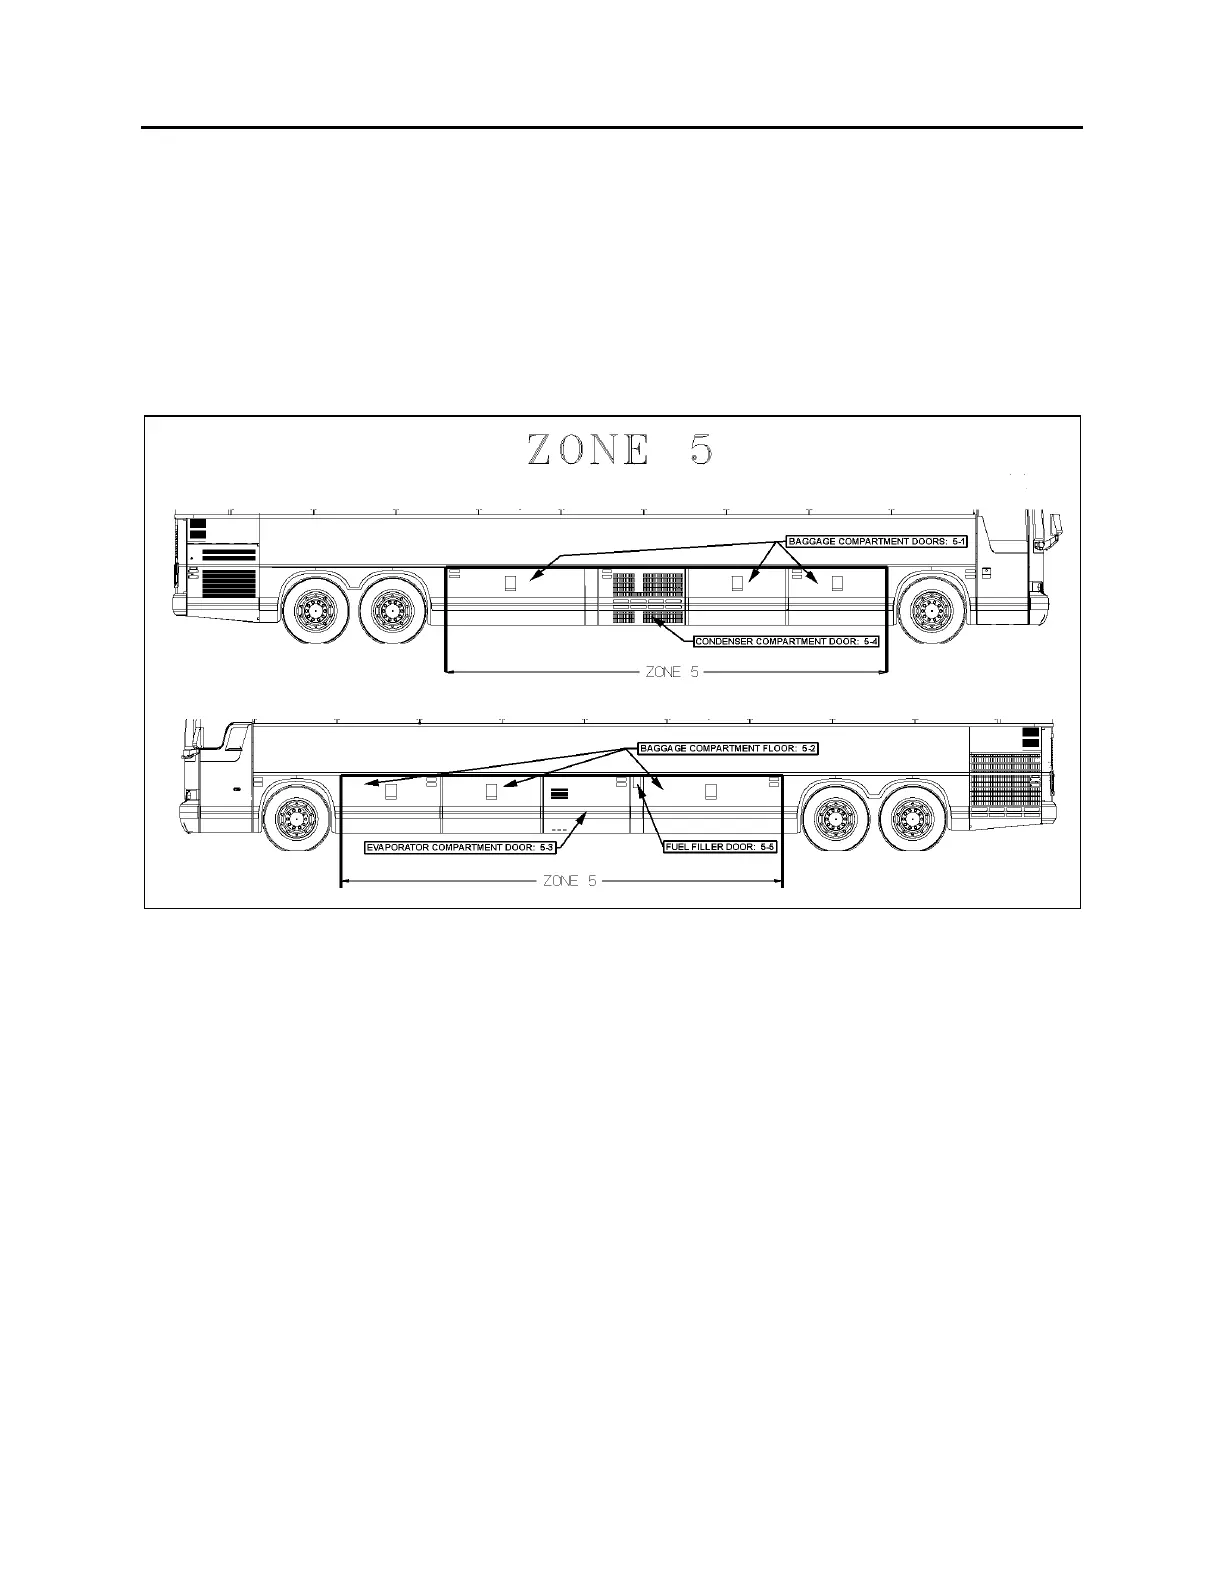
11 ZONE 5
FIGURE 35: ZONE 5 18628
11.1 BAGGAGE COMPARTMENT DOORS
For the removal and installation of baggage
compartment door stainless steel body panel,
you will need:
A drill with drill bits;
Pneumatic “Zip gun” type tool;
Razor sharp window scraper or putty knife;
• Open damaged compartment door and
unfasten rub rail fixing bolts. Remove rub
rail.
• Unfasten bolts and disconnect cable if
necessary in order to remove door from
vehicle.
• Preferably install the door onto a work
surface where it can be solidly fixed.
11.1.1 Door Lower Panel
Panel Removal
• Using the “Zip Gun”, cut Sika bead located
½ inch from the door panel perimeter edge.
• Wearing gloves, goggles and ear plugs, pry
loose body panel using a “Zip gun” or lever
starting from the door lower part.
• Using the window scraper, remove any Sika
bead or self adhesive tape residue left on
the door frame.
Lower Panel Preparation and Installation
• Use a Chix cloth and anti-silicone to remove
any dust or residue from door frame.
• Prepare door frame using a scratch pad
“Scotch Brite”.
• Clean door frame again using anti-silicone.