Roche Diagnostics
238 Instructions for Use · Version 13.0
9 Calibration verification control cobas b 123 POC system
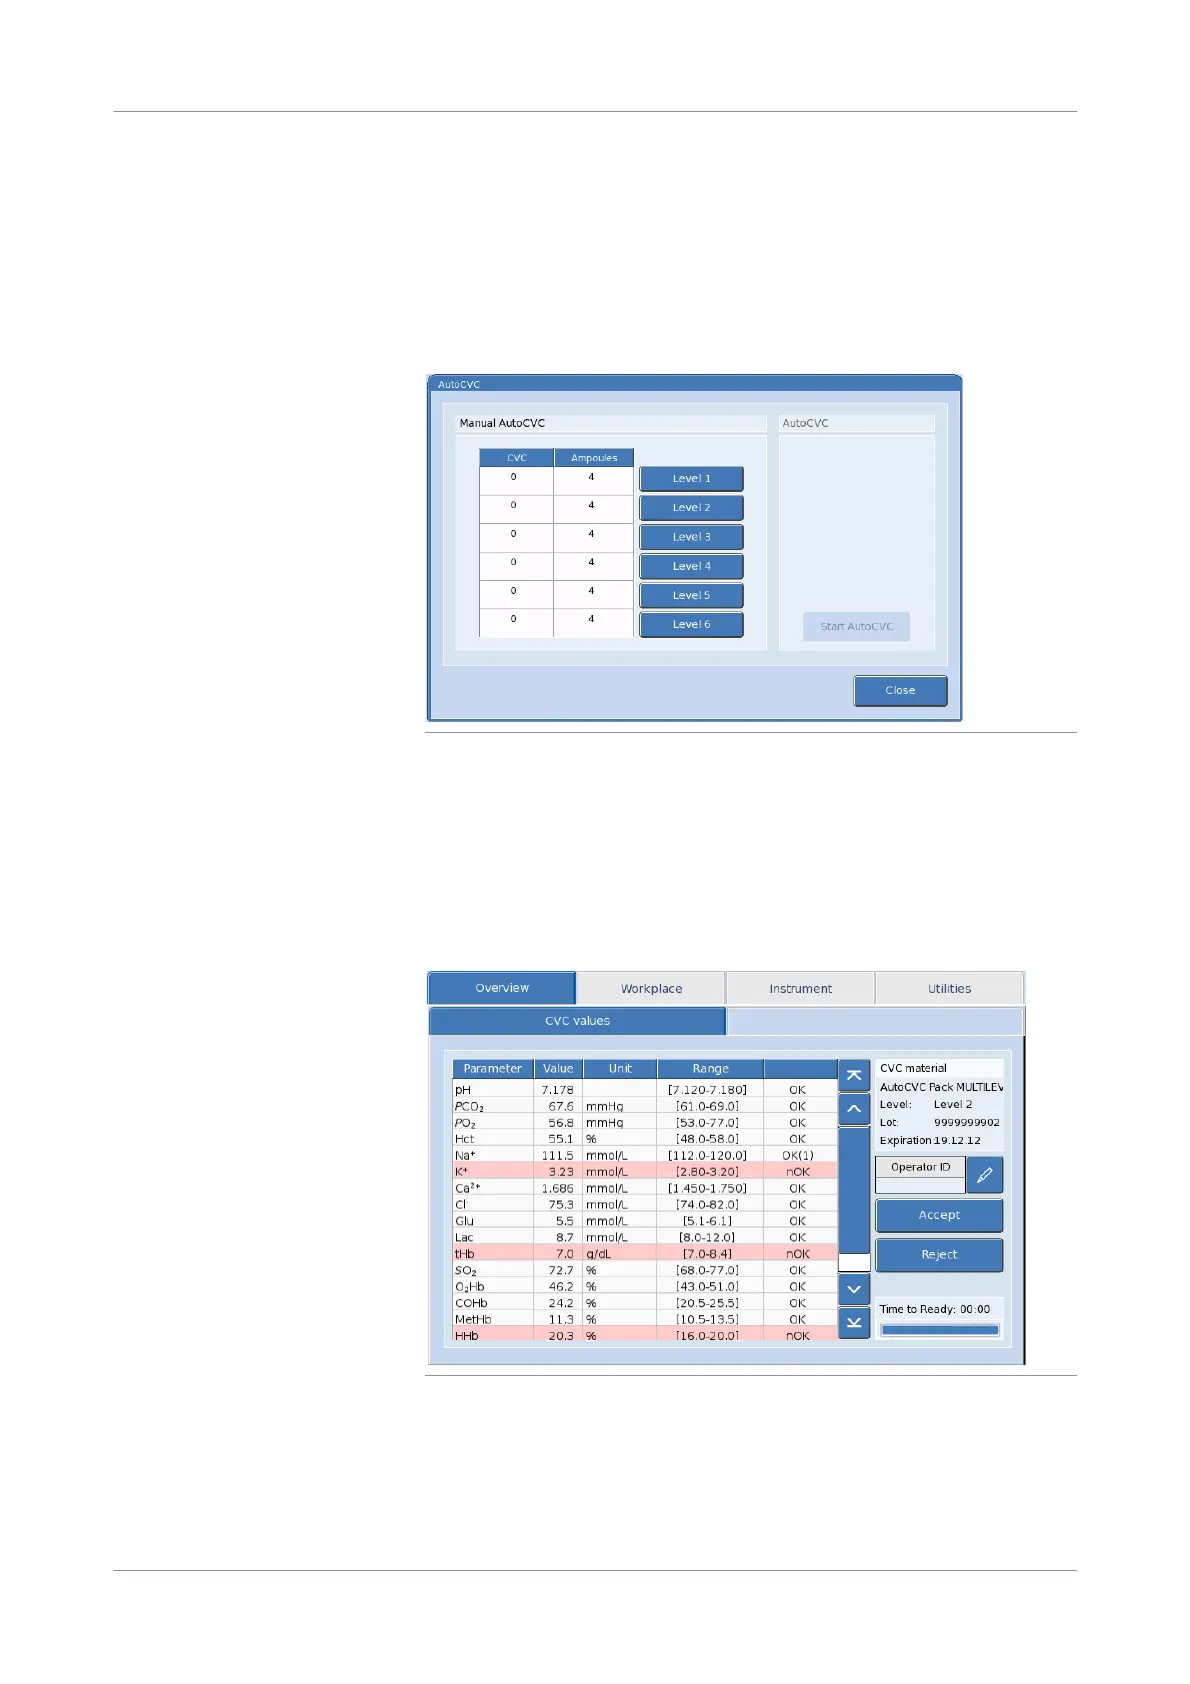
Performing an AutoCVC measurement
Performing an AutoCVC measurement
p To perform an AutoCVC measurement
1
Workplace > Calibration verification
The following dialog box appears on the screen:
Figure 9-2 Configuring AutoCVC measurement screen
2
To start the measurement, press one of the level buttons (Level 1–Level 6).
The CVC column on the dialog box represents the number of performed CVC
measurements at this level with the installed AutoCVC module.
The Ampoules column on the dialog box represents the number of remaining
ampoules at this level in the installed AutoCVC module.
3
To view your results, enter the CVC values tab.
Figure 9-3 CVC values tab after an AutoCVC measurement
If a parameter’s CVC result is within the target range, OK text is displayed next to
the parameter’s CVC result in the CVC values tab.
If a parameter’s CVC result is not within the target range, the parameter’s CVC
results in the CVC values tab is shaded in red and nOK text is displayed next to it.

 Loading...