A2537-002/01 February 2020 2-10 SEMCO Proprietary Information
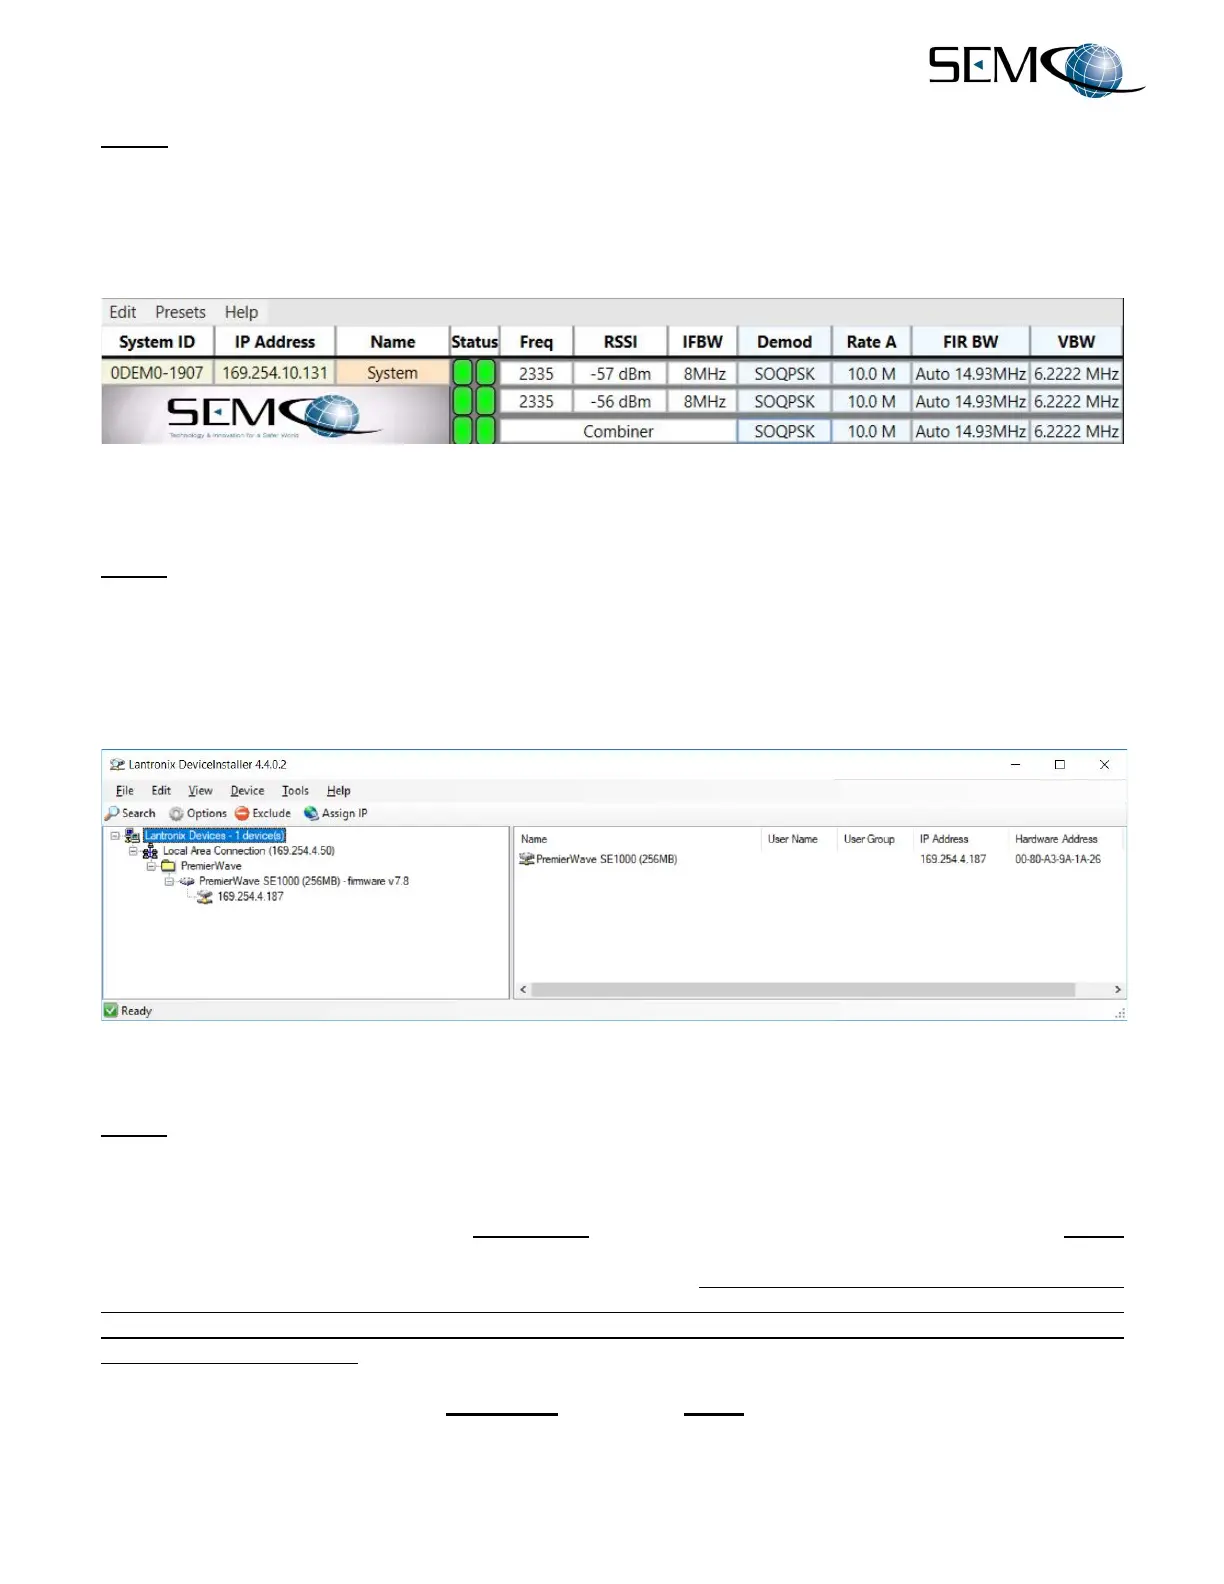
Step 2 - Open the SLTS software. If the IP addresses of the connected RC100C-2 receivers are already
recognized by the SLTS program, then the Receiver Status Window shown in Figure 2-15 will appear for
each connected RC100C-2, and the connected RC100C-2 IP addresses will be listed under IP address.
As an example, Figure 2-15 shows one RC100C-2 connected with an IP address of 169.254.10.131.
Figure 2-15
SLTS Receiver Status Window
Step 3 – If the Receiver Status Screen does not display each receiver’s IP address and status, then open
the Lantronix DeviceInstaller and it will search for the IP address of all attached receivers. This is
accomplished by double-clicking on Lantronix Devices, PremierWave and then PremierWave SE1000
(256MB)-firmware as shown in Figure 2-16.
The IP addresses of each connected RC100C-2 will be listed.
Figure 2-16
Receiver IP Address Search
Step 4 – Copy down all listed receiver IP addresses. Open the SLTS Program and click on Edit, System
Address List and Add as shown in Figure 2-17.
In the Create System Connection Setup window, enter each connected receiver IP address by typing in
each IP address in the window below IP Address as shown. It is also a good time to edit system Name
by typing in information that will tie a particular receiver S/N or location to its IP address. In the Figure 2-
17 example the receiver S/N DEMO-1907 has been used. Note that there is a “0” entered preceding
DEMO-1907 (0DEMO-1907). Typing in a numerical sequence (i.e., 0, 1, 2, 3 etc.) in this manner ensures
that all networked receivers will be listed in that order. Otherwise, they will be listed in the order that they
come on-line in a network.
Click on Create after the receiver’s IP address and desired Name has been entered. Repeat this step for
each receiver IP address.