A2537-002/01 February 2020 2-11 SEMCO Proprietary Information
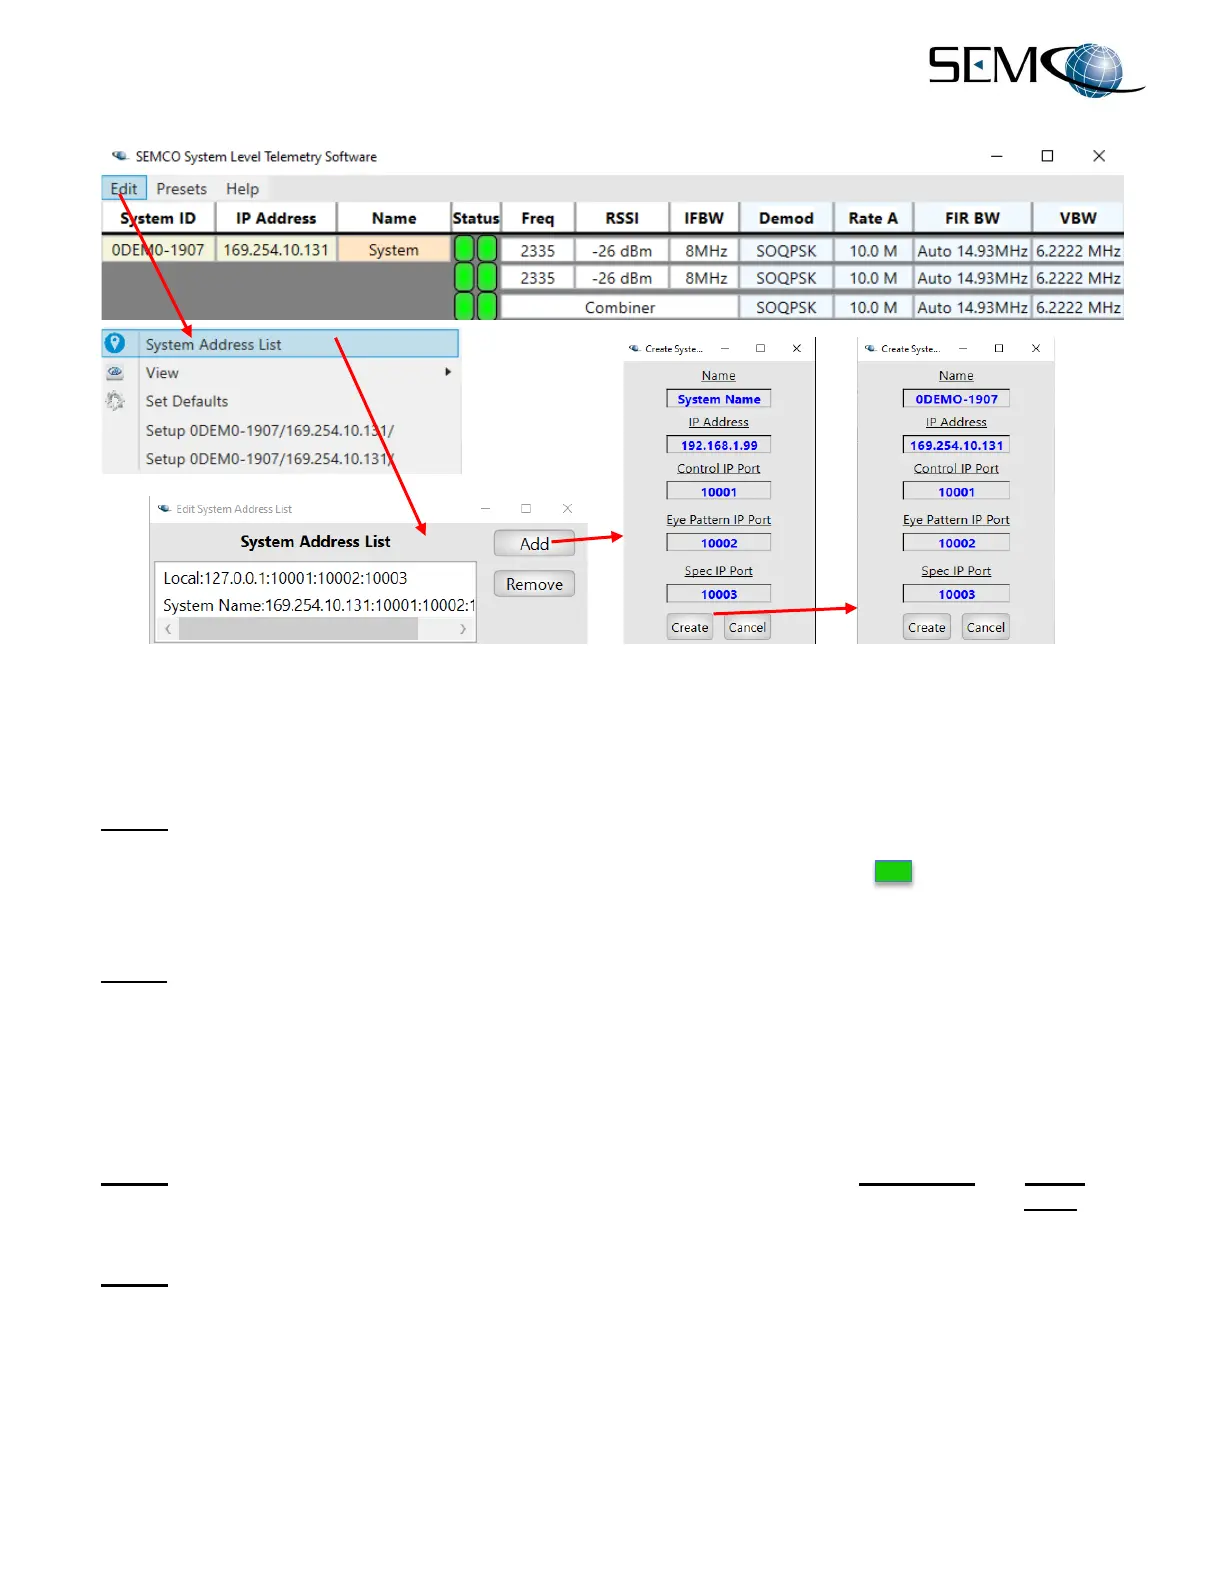
Figure 2-17
Entering Receiver IP Address and Name
2.5.1 Changing a Receiver IP Address
Step 1 - Open the Lantronix DeviceInstaller and double-click the receiver’s IP address.
Referring to Figure 2-18, select the Web Configuration tab. Click on the green
è button, and a prompt
for a username and password will appear. The factory-default username is “admin” and “PASS” is the
default password.
Step 2 - Referring again to Figure 2-18, click on the Network side-tab and then the Configuration button.
The IP address, Gateway, and other parameters can be set here. Make the desired changes, and then
reboot the Lantronix program by clicking on SYSTEM and Reboot. Wait until the system completely
reboots.
After reboot, check the Lantronix program DeviceInstaller per paragraph 2.5, Step 3 above to verify
settings.
Step 3 - Open the SEMCO SLTS remote software and add the new receiver IP Address and Name per
Step 4 and Figure 2-17 above. The Control IP Port, Eye Pattern IP Port, and Spec IP Port must also
be as shown in Figure 2-17 above.
Step 4 - Click on Create. The Edit System Address List window will show the added receiver. Click Add
to add additional receivers in the same manner, or click the “x” to exit. The main status screen should
update within a few seconds to show each added receiver.