A2537-002/01 February 2020 6-9 SEMCO Proprietary Information
As previously mentioned, tall 3 channels are turned ON if Diversity Slaving is enabled.
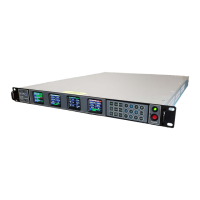
Figure 6-14
Enabling the Bit Sync De-randomizer Using the Front Panel
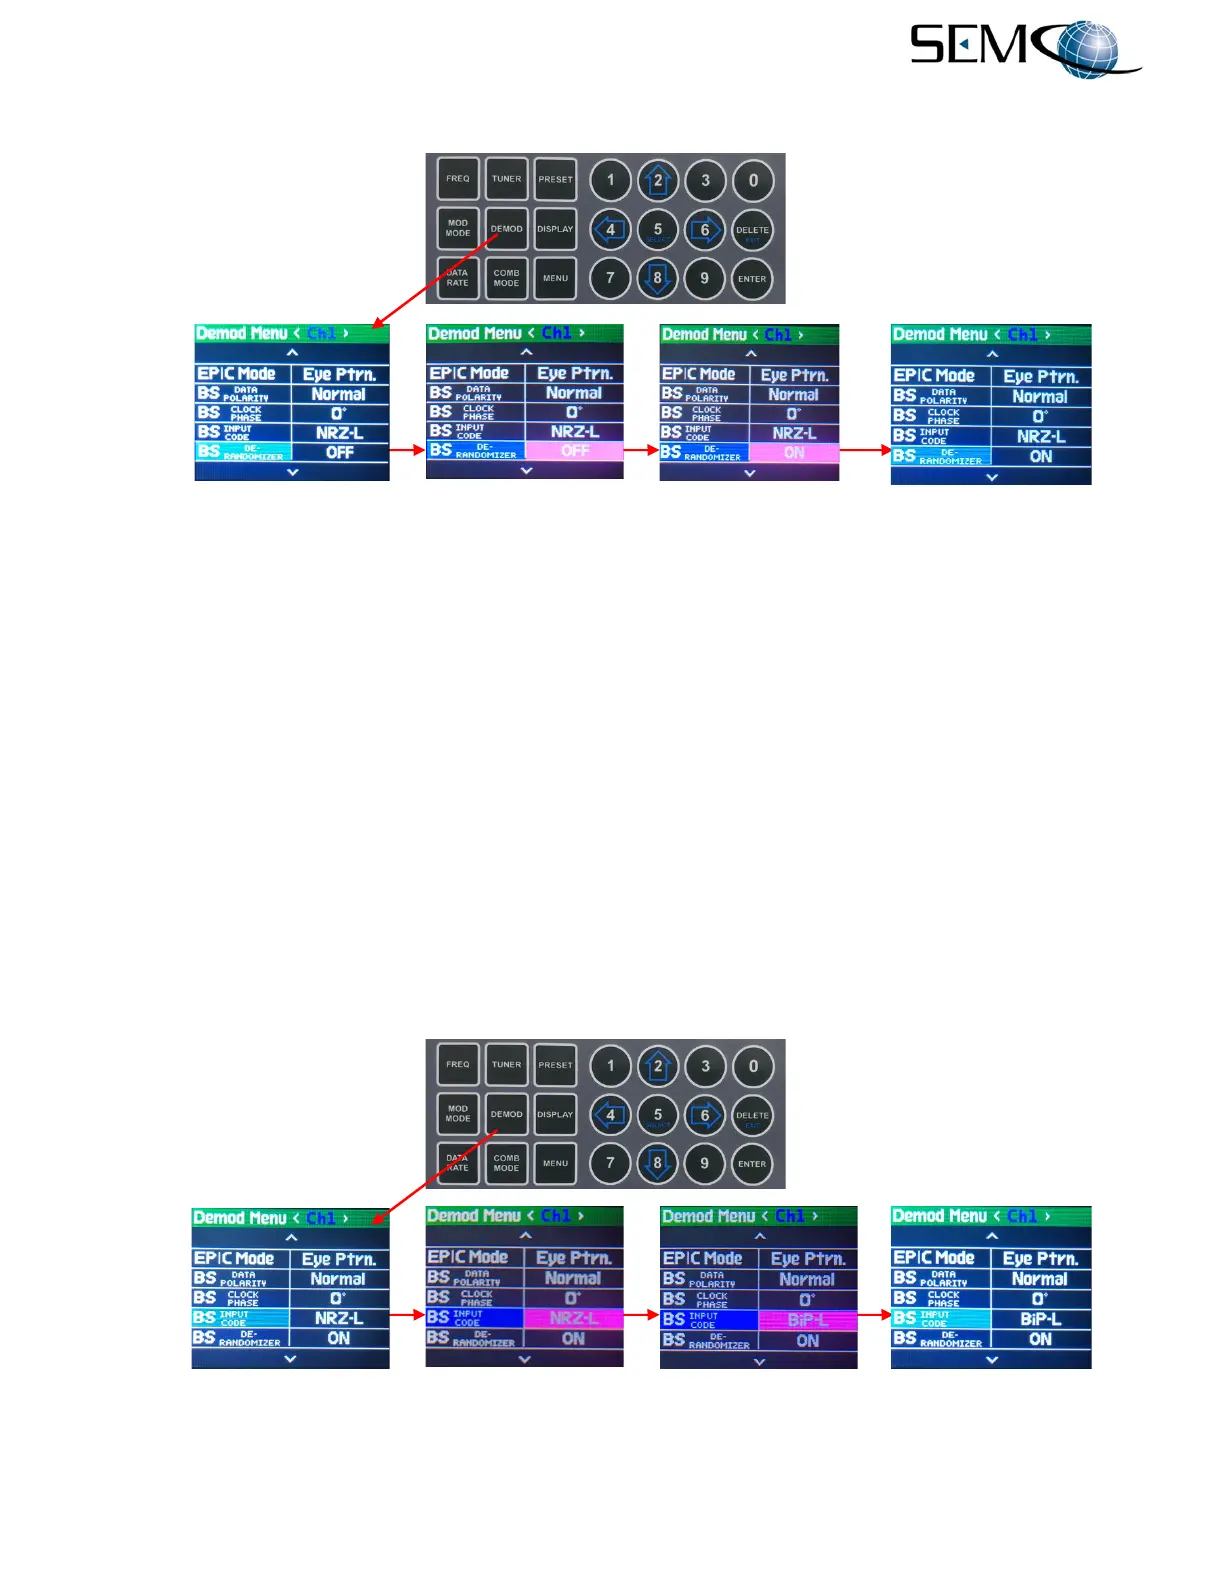
Figure 6-15 illustrates the steps for selecting the de-randomizer input codes.
The operator pushes the DEMOD MODE button to access the <Ch1> Demod Menu display, uses the UP
(2) and DOWN (8) arrows to scroll to BS INPUT CODE in blue, and then pushes ENTER or SELECT (5)
to highlight the selection window in bright magenta. Using the UP (2) and DOWN (8) arrows, the operator
selects the desired INPUT CODE and pushes ENTER or SELECT (5).
Using the horizontal LEFT (4) and RIGHT (6) arrows, the operator selects <Ch2> in the Demod Menu
header display bar, pushes ENTER or SELECT (5) to highlight the selection window in bright magenta,
uses the UP (2) and DOWN (8) arrows to select INPUT CODE and then pushes ENTER or SELECT (5).
Using the horizontal LEFT (4) and RIGHT (6) arrows again, the operator selects <Comb> in the Demod
Menu header display bar, pushes ENTER or SELECT (5) to highlight the selection window in bright
magenta, uses the UP (2) and DOWN (8) arrows to select INPUT CODE and then pushes ENTER or
SELECT (5).
As previously mentioned, all 3 channel settings are set-up simultaneously if Diversity Slaving is enabled.
Figure 6-15
Selecting Bit Sync De-Randomizer Input Codes Using the Front Panel