A2537-002/01 February 2020 2-6 SEMCO Proprietary Information
When entering numerical values, the menu will react differently when entering illegal values. For FREQ,
an invalid value will do nothing when pressing ENTER. For DATA RATE, an invalid value will do nothing
and exits the menu.
For parameters within a function menu, attempting to submit an invalid value will do nothing while keeping
the parameter highlighted in bright magenta. In all cases, use the EXIT (DELETE) button and attempt to
re-enter a valid value.
2.4.2 Front Panel Display Screen Settings
The user has the choice of configuring the 4 displays with the information of their choice. Pressing the
DISPLAY function/button provides a scrolling list in the far-right display (closest to the keypad) that lists all
options for any of the 4 display screens. When the DISPLAY button is pressed, the top title bar will be
highlighted in a bright magenta color.
To choose a display other than the far-right display for desired settings, use the LEFT (4) and RIGHT (6)
arrow to move the bright magenta top title bar to the display of choice. Then, using the far-right display,
scroll UP (2) and DOWN (8) arrows until the setting desired is highlighted. Press ENTER or SELECT (5)
and the selected setting will appear in the display of choice. Repeat the steps above for the other front
panel displays as desired.
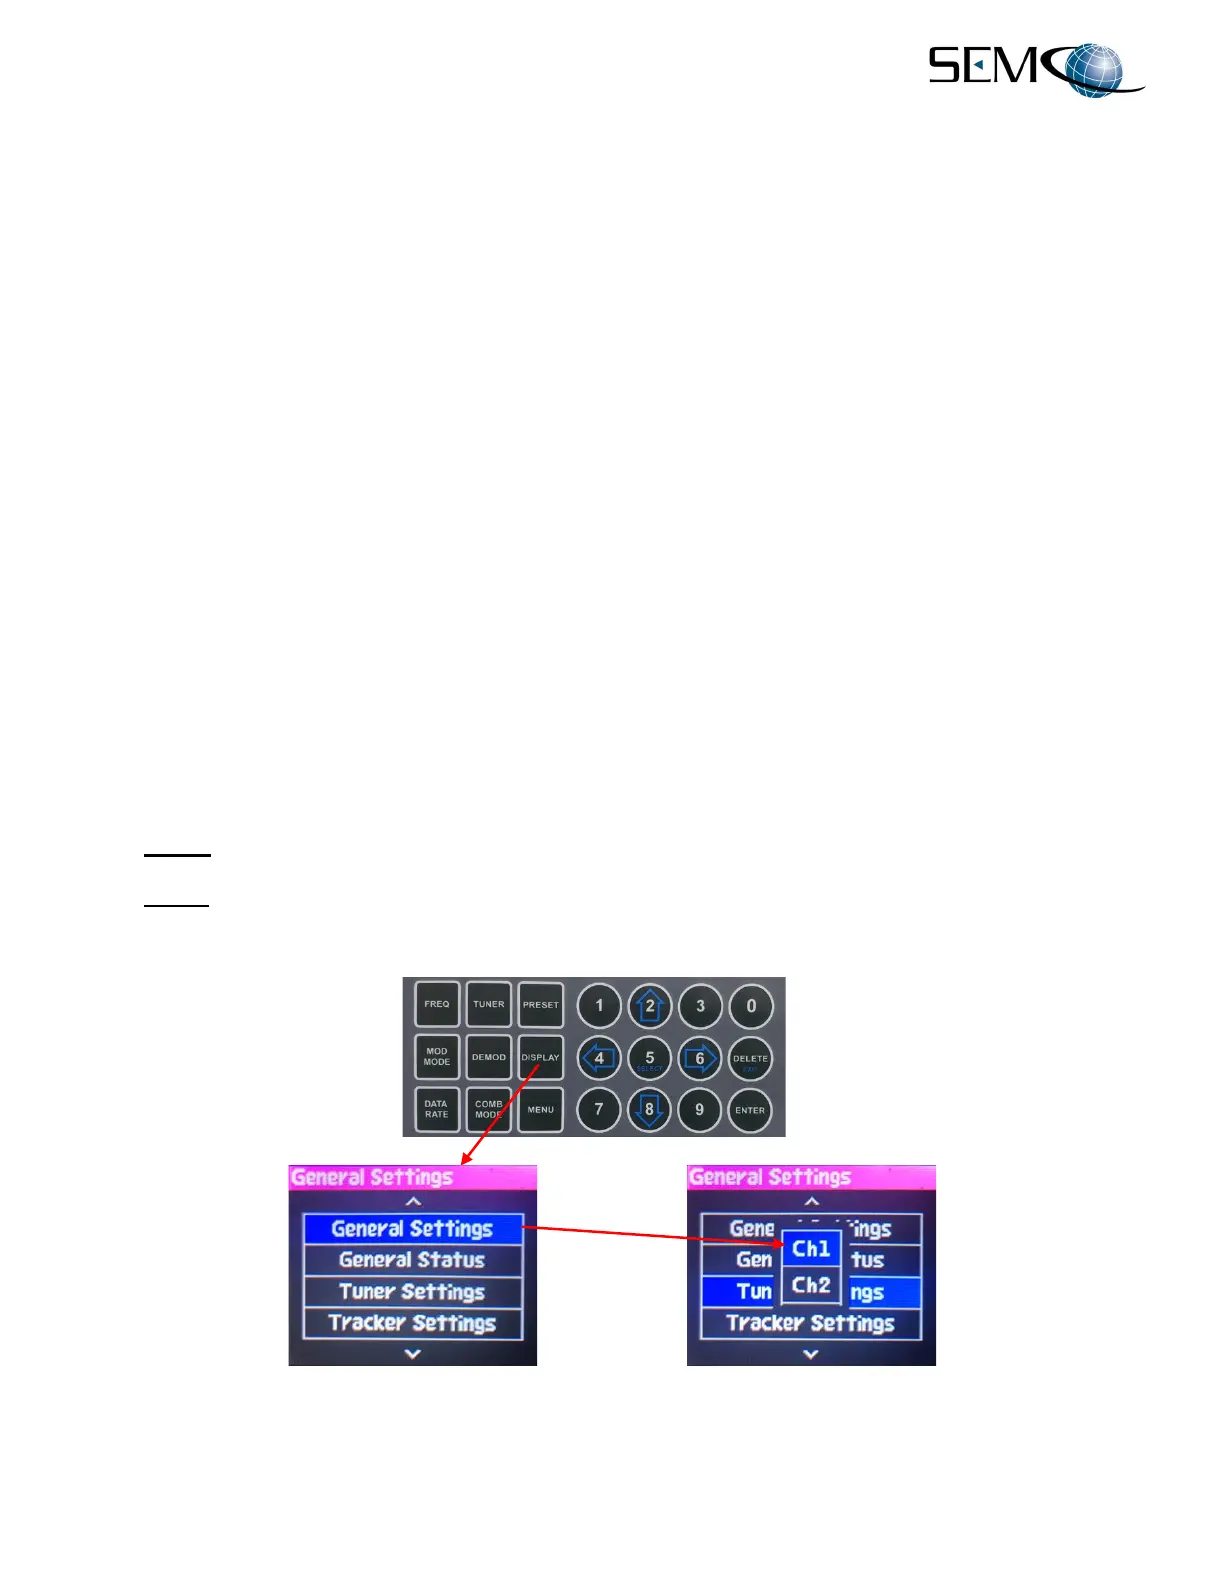
2.4.2.1 Front Panel Display Screen Settings Example
The following example illustrates setting up the 4 front panel displays. In this example, CH1 RF Tuner
Settings are going to be set-up on the far-left display. Going left-to right, CH 2 RF Tuner Settings are
going to be set-up on the next display, General Settings for CH1, CH2 and the Combiner are going to
be set-up on the next display and General Status is going to be set-up on the last (far right) display.
A. Step 1 - Select DISPLAY on the keypad and verify the far-right display is as shown in Figure 2-6.
B. Step 2 - Using the DOWN (8) arrow, scroll to Tuner Settings and press ENTER. Then use the DOWN
(8) arrow to select Ch1 (highlighted in blue) as shown in Figure 2-6.
Figure 2-6
Front Panel Display Screen Settings