1. Make sure that the holding plate is oriented correctly. See the symbol on the hold‐
in
g plate.
2. Mount the holding plate on the mounting surface. Either use the two outer drill
holes (à) or the two drill holes with countersink (ß). Also use the drill hole in the
holding tab.
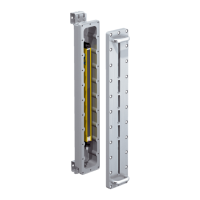
Procedure when using the drill holes with countersink (ß):
w
Loosen the screws (7) and remove the alignment bracket from the holding
plate.
w
Mount the holding plate on the mounting surface.
w
Make sure that the alignment bracket is oriented correctly. See the symbol on
the alignment bracket.
w
Push the alignment bracket back onto the centering pin (8) and fix it on the
holding plate using the M4 screws, washers and spring rings (7).
3. Make sure that the mounting bracket 1a or 1b is oriented correctly. See the sym‐
bol on the mounting bracket.
4. Use the supplied M4 screws, washers and spring rings to fix mounting bracket 1a
or 1b on the alignment bracket.
5. Only with mounting kit 2b: an additional stabilization screw is needed if there are
stricter requirements on vibration/shock resistance. Turn the stabilization screw
with washer and spring ring (á) into the thread hole of the holding plate through
the slot of the alignment bracket.
6. Push the safety laser scanner onto the mounted mounting bracket.
7. Use all 4 supplied M5 screws to fix the safety laser scanner on the mounting
bracket.
8. Tighten the M5 screws. Tightening torque: 4.5 Nm to 5.0 Nm.
9. Align the safety laser scanner. You can use a slotted screwdriver (blade width
8 mm) for fine alignment, see "Alignment", page 117.
10. Tighten the M4 screws. Tightening torque: 2.2 Nm to 2.5 Nm.
5 MOUN
TING
70
O P E R A T I N G I N S T R U C T I O N S | microScan3 – EFI-pro 8021913/15ZW/2019-11-14 | SICK
Subject to change without notice