SMARTRG INC. PROPRIETARY AND CONFIDENTIAL. ALL RIGHTS RESERVED. COPYRIGHT © 2018 83
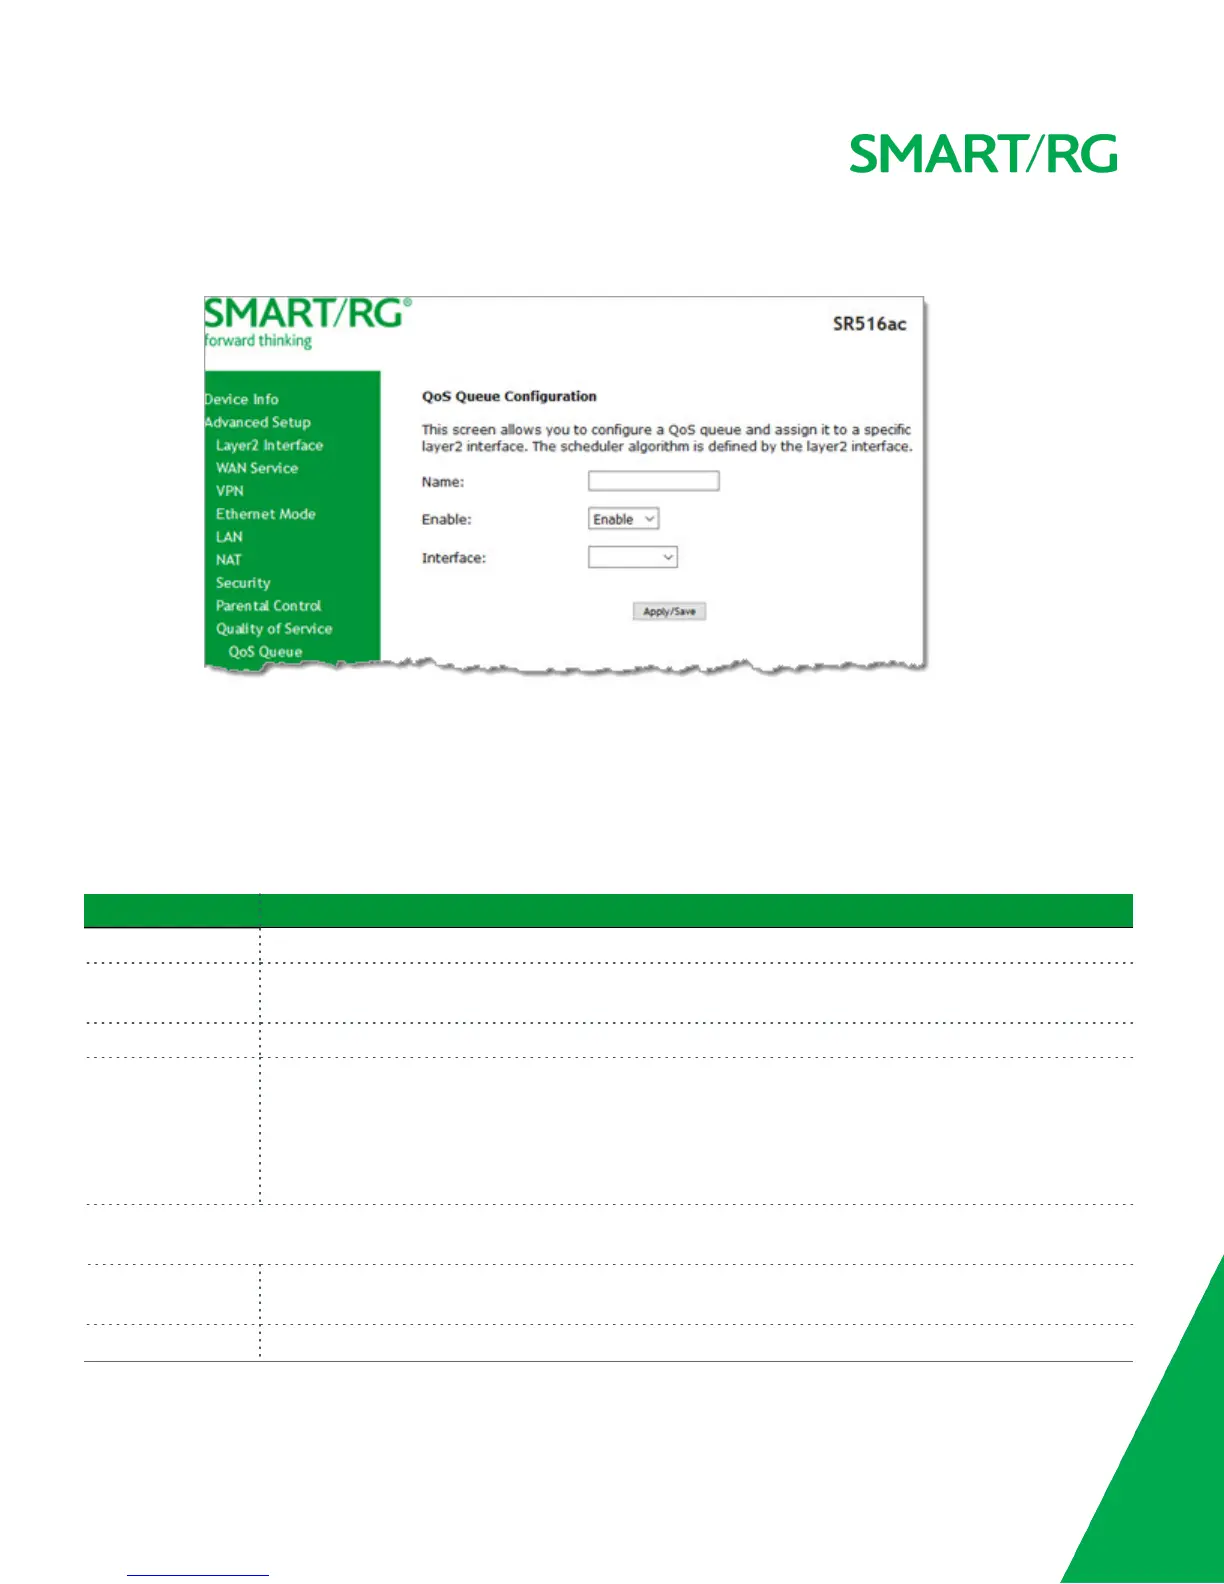
2. To add a queue:
a. Click Add at the bottom of the table. The following page appears.
b. Fill in the fields, using the information in the following table. The visible fields vary by interface and queue pre-
cedence selections. In most cases, you can use the default values.
c. Click Apply/Save. You are returned to the Qos Queue Setup page.
3. To remove a queue, click the Remove checkbox to the right of the entry and then click the Remove button at the bot-
tom of the page.
4. Click Apply/Save to save your settings.
The applicable fields are explained below.
Field Name Description
Name Enter a descriptive name for this configuration.
Enable Select to enable or disable this QoS queue for the interface that you select. Options are Enable and Dis-
able. The default is Enable.
Interface Select the Layer 2 interface to be associated with the defined QoS queue, e.g., eth0 or ptm01.
Queue Precedence (Appears when atm, eth or ptm interfaces are selected in the Interface field) Select the priority value
to be associated with the defined QoS queue. Options vary by interface and can include 1(SP), 1
(WRR|WFQ), 2(SP), 3(WRR), 4(SP|WRR|WFQ), and so on.
Note: The lower the precedence value, the higher priority the queue is given. Traffic is given priority
based on the combined values from this field and Queue Weight field.
The following fields become visible based on your selections in the Interface and Queue Precedence fields. Which fields
appear vary by your selections. The fields are listed below in alphabetical order.
DSL Latency This option is set to Path0 by default and cannot be changed. No error correction is performed. This can
reduce latency on error-free lines.
Minimum Rate Enter the minimum shaping rate defined for packets in QoS queues. Options are 1 - 100000 Kbps. The