Return To Table of Contents
www.stryker.com 1900-009-002 REV B 1-17
English
SCALE SYSTEM CALIBRATION
Note
A weight of known amount is required to calibrate the scale system. It is recommended to use a 100 lb (45 kg) or two
50 lb (22.6 kg) weights to complete this procedure. The weight(s) must be ± 0.5 lb. (0.2 kg) at 50 lb. (22 kg) or less or
± 1.0 lb. (0.4 kg) at ≥ 50 lb. (22 kg) when flat to ensure the precision of the scale system. If the weight(s) does not have
the required tolerance, a controlled weighing must be made in order to determine their weight within the ± 0.5 lb. (0.2
kg) at 50 lb. (22 kg) or less or ± 1.0 lb. (0.4 kg) at ≥ 50 lb. (22 kg) (when flat) tolerance.
Procedure
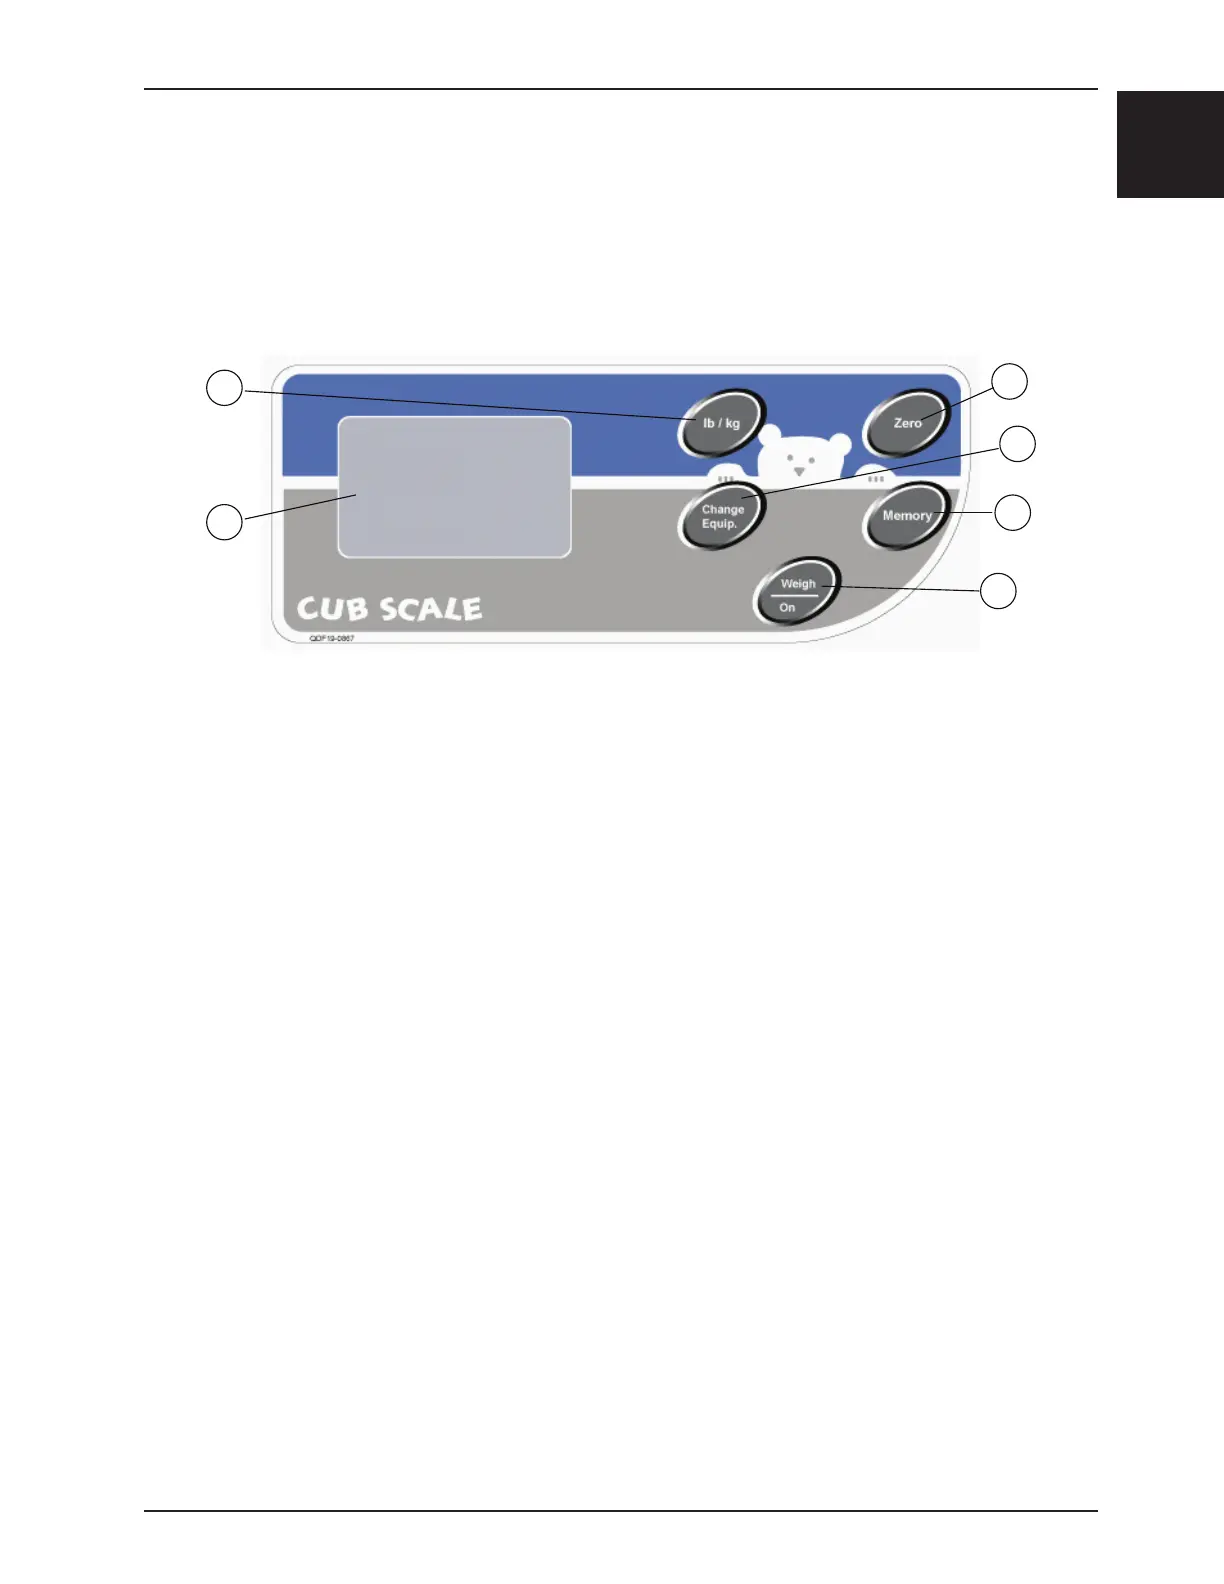
1. Press the lb / kg (D), Change Equip. (E), and Weigh / On (A) buttons simultaneously for at least two seconds and
release them.
2. Press lb / kg (D), lb / kg (D), Weigh / On (A), Change Equip. (E), and lb / kg (D) in succession. The display (F) should
now read “Cbr?“.
3. Press Weigh / On (A). “F“ or “H“ will appear on the screen.
4. Press lb / kg (D) to toggle between “F“ and “H“. Select the proper setting for the base style of the stretcher. F is
for a fixed base stretcher and H is for a hydraulic base stretcher.
5. Press Weigh / On (A) to confirm the selection.
Note
Fixed base stretchers only require the four load cells to be calibrated (steps 6 to 12). Once step 12 is completed, “Cbr?”
will appear on the display. Press the Zero (C) button for at least two seconds to return the scale to normal operation.
6. The previous calibration weight will now show in the display. Enter the new weight value to be calibrated to using the
lb / kg (D) button to increase the weight by 0.1 lb or the Change Equip. (E) button to decrease the weight by 0.1 lb.
Holding either button for at least two seconds will quickly increase or decrease the weight. Round the value to the
nearest 0.1 lb. Example: 100.58 lb rounds to 100.6 lb; 100.54 lb rounds to 100.5 lb.
7. Press Weigh / On (A) to confirm the calibration weight value.
8. Bring the litter to the flat (0° ±0.5°) position and ensure there is no weight on the stretcher. Wait five seconds and
press the Weigh / On button. The analog-to-digital converter (ADC) is now calibrated.
Note
The messages “movement” or “Error” may appear on the display during the calibration process. This indicates the
stretcher moved too much during the process or that the measurement taken is in error. If this occurs, the calibration
must be performed again.
9. “F-L” will now show in the display. Place the weight(s) on the foot left corner of the litter and wait five seconds.
Press the Weigh / On button.
10. “R-r” will now show in the display. Place the weight(s) on the foot right corner of the litter and wait five seconds.
Press the Weigh / On button.
Figure 8 - Scale Control Panel
Setup