Lab 8
Gettings Started with the MSP430 - Using Energia (Arduino) 8 - 27
4. Download and run the sketch.
With the code downloaded and (automatically) running on the Launchpad, go ahead and
push the button.
But, how do we know it is running? It doesn’t change the LED, it only sends back the current
pushbutton value over the serial port.
Hint: After running the sketch and looking at the Serial Monitor (in the next step), you might
find that nothing is showing up. Try switching “pin 5” for “PUSH2” in the code. Look at the
mapping diagrams between the ‘G2553 and ‘F5529 Launchpads to see the mismatch.
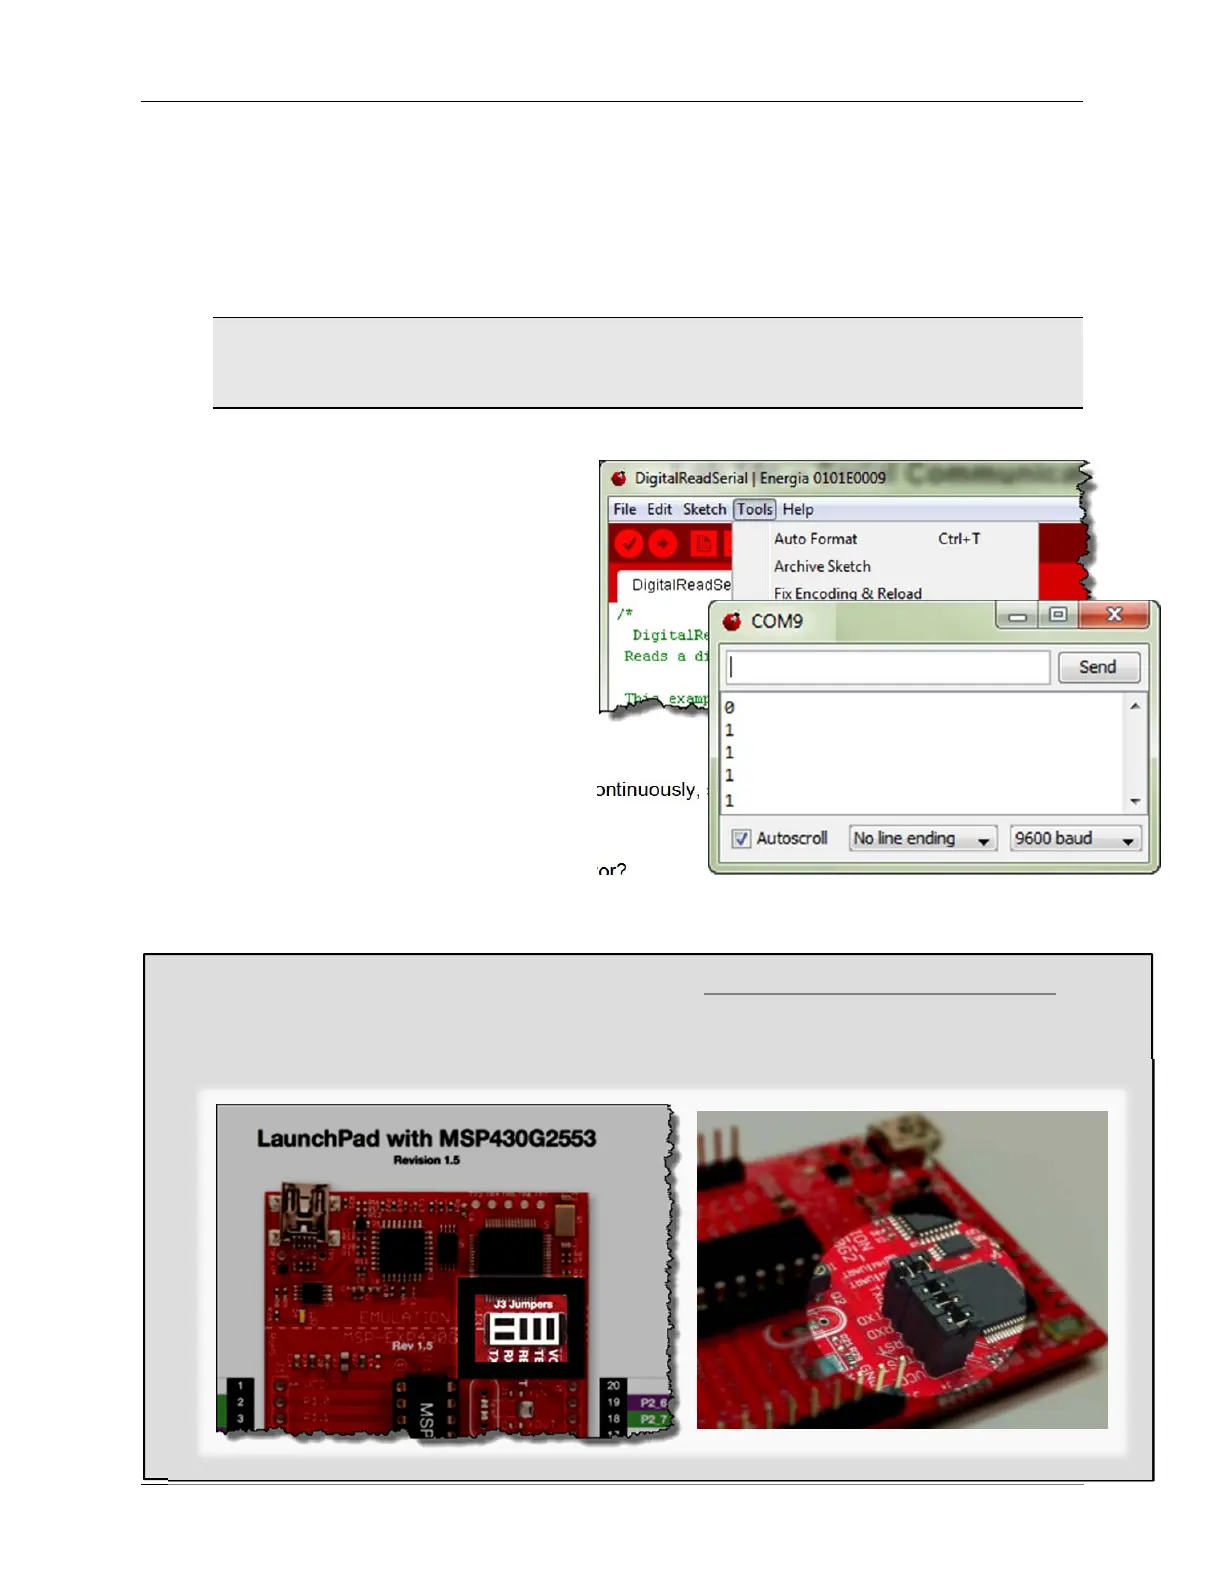
5. Open the serial monitor.
Energia includes a simple serial
terminal program. It makes it easy to
view (and send) serial streams via
your computer.
With the Serial Monitor open, and
the sketch running, you should see
something like this:
You should see either a “1” or “0”
depending upon whether the putton
is up or down.
Also, notice that the value is updated continuously, since the sketch reads the button and
writes it to port in the loop() function.
Do you see numbers in the serial monitor?
________________________________________________________________________
What if the Serial Monitor is blank?
(’G2553 Launchpad Configuration)
If this is the case, your Launchpad is most likely configured incorrectly. For serial communications to work
correctly, the J3 jumpers need to be configured differently than how the board is configured out-of-the-box.
(This fooled us, too.) Refer to these diagrams for correct operation. (This does not affect other Launchpads.)