Lab 4a – Program the MSP430 Clocks
Initialization Code - Three more simple changes
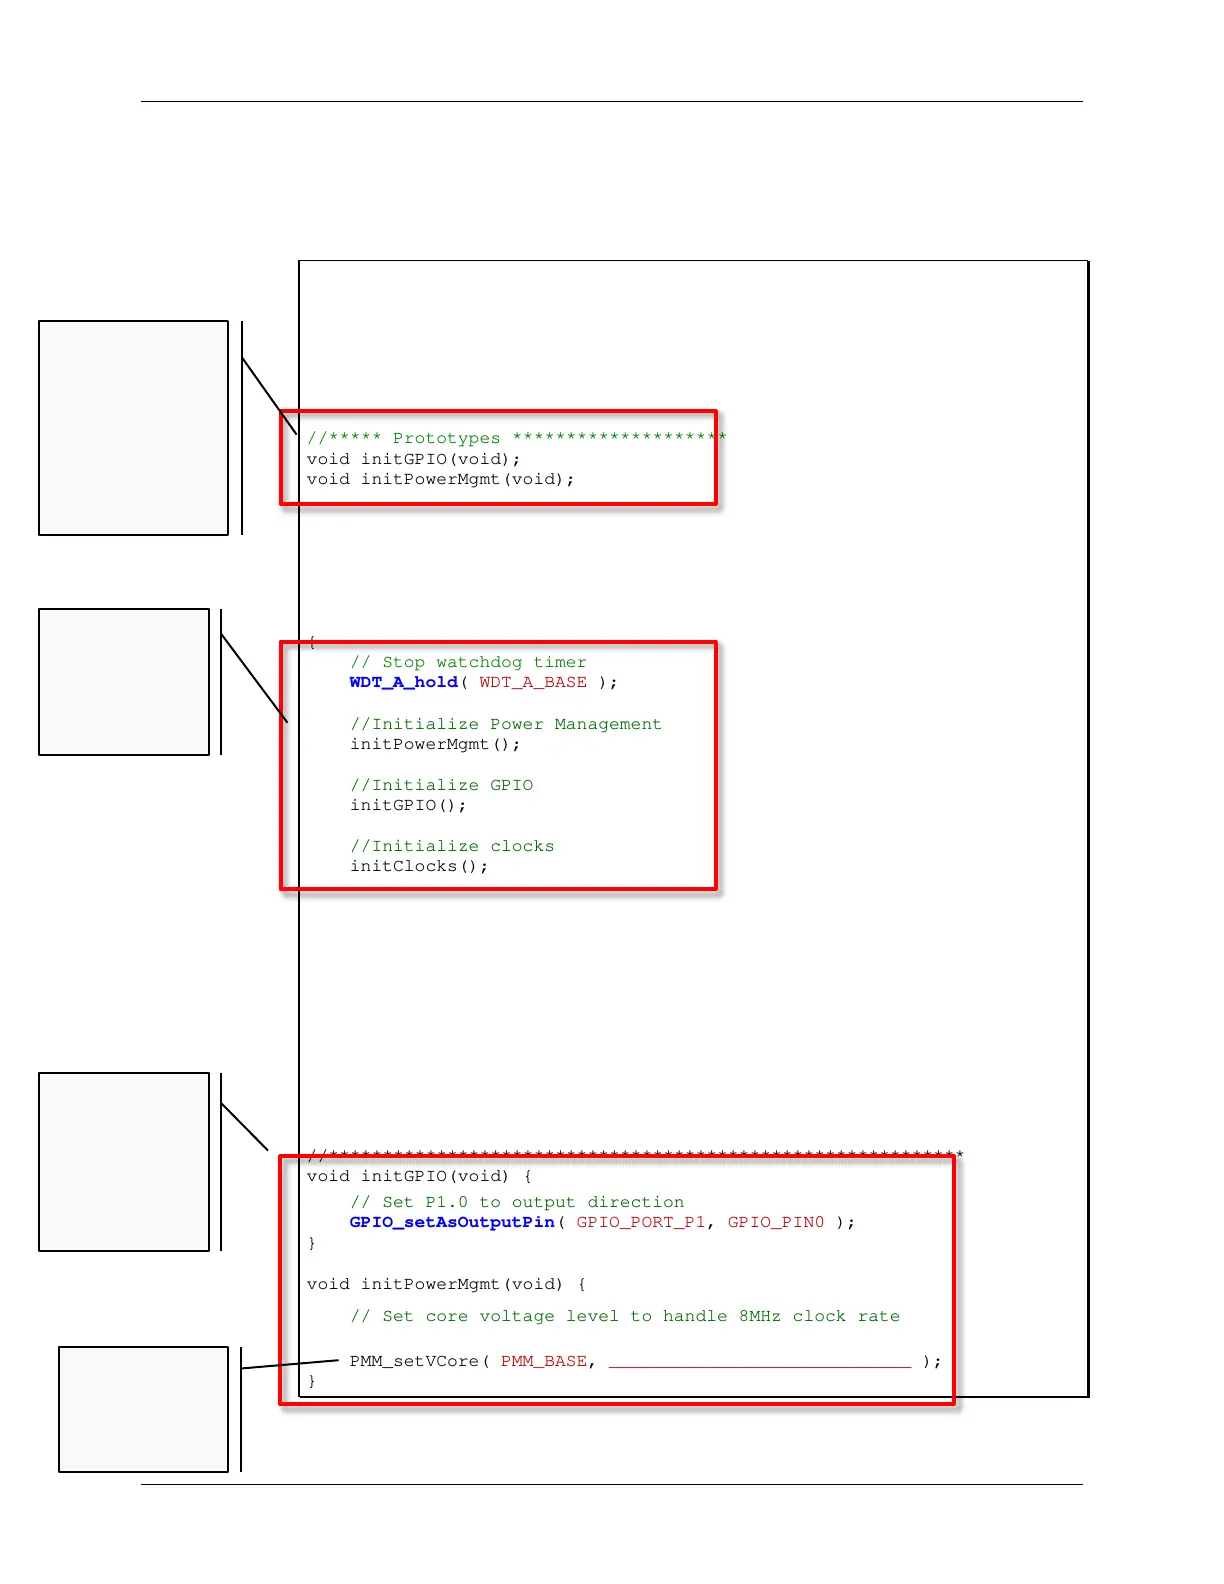
11. Use the simple initialization “template” to organize your setup code.
We’ve outlined the 3 areas you will need to adapt to create a little better code organization.
// --------------------------------------------------------------------
// main.c (for lab_04a_clock project)
// --------------------------------------------------------------------
//***** Header Files **************************************************
#include <driverlib.h>
#include "myClocks.h"
//***** Prototypes ****************************************************
void initGPIO(void);
void initPowerMgmt(void);
//***** Defines *******************************************************
#define ONE_SECOND 800000
#define HALF_SECOND 400000
//***** Functions *****************************************************
void main (void)
{
// Stop watchdog timer
WDT_A_hold( WDT_A_BASE );
//Initialize Power Management
initPowerMgmt();
//Initialize GPIO
initGPIO();
//Initialize clocks
initClocks();
while(1) {
// Turn on LED
GPIO_setOutputHighOnPin( GPIO_PORT_P1, GPIO_PIN0 );
// Wait
_delay_cycles( ONE_SECOND );
// Turn off LED
GPIO_setOutputLowOnPin( GPIO_PORT_P1, GPIO_PIN0 );
// Wait
_delay_cycles( ONE_SECOND );
}
}
//******************************************************************
void initGPIO(void) {
// Set P1.0 to output direction
GPIO_setAsOutputPin( GPIO_PORT_P1, GPIO_PIN0 );
}
void initPowerMgmt(void) {
// Set core voltage level to handle 8MHz clock rate
PMM_setVCore( PMM_BASE, ____________________________ );
}
Since the setup
code is now
organized into
functions,
prototypes need
to be included
for them
This follows
the init code
‘template’
discussed in
class
Create GPIO
and
PowerMgmt
functions
referenced
above
To fill in the
blank, refer to
Worksheet
Question #4
4 - 50 MSP430 Workshop - MSP430 Clocks & Initialization