Lab 3
Add Setup Code (to reference push button)
7. Before main(), add the global variable: usiButton1
volatile unsigned short usiButton1 = 0;
Let’s explain some of our choices:
Global variable: We chose to use a global variable because it’s in scope all the time. Since it
exists all the time (as opposed to a local variable), it’s just a bit easier to debug the code.
Otherwise, local variables are probably a better choice: better programming style, less prone
to naming conflicts and more memory efficient.
Volatile: We’ll use this variable to hold the state of the switch, after reading it with our
DriverLib function.
Does this variable change outside the scope of C? ________________________________
Absolutely; its value depends upon the push button’s up/down state. That is why we must
declare the variable as volatile.
unsigned short … You tell us, why did we pick that? ______________________________
_________________________________________________________________________
usiButton1: The ‘usi’ is Hungarian notation for unsigned short integer. We added the ‘1’ to
‘Button’, just in case we want to add a variable for ‘Button2’ later on.
(We could have also used
the names ‘SW1’ and ‘SW2’ as they’re labeled on the Launchpad, but we liked ‘Button’ better.)
=0 … well, that’s just good style. You should always initialize your variables. Many embedded
processor compilers do not
automatically initialize variables for you.
8. In main(), add code to setup push button (SW1) as an input with pull-up resistor.
This setup code should go before the while{} loop.
And don’t forget, this code was the answer to Worksheet question #3 (page 3-29). Reminder
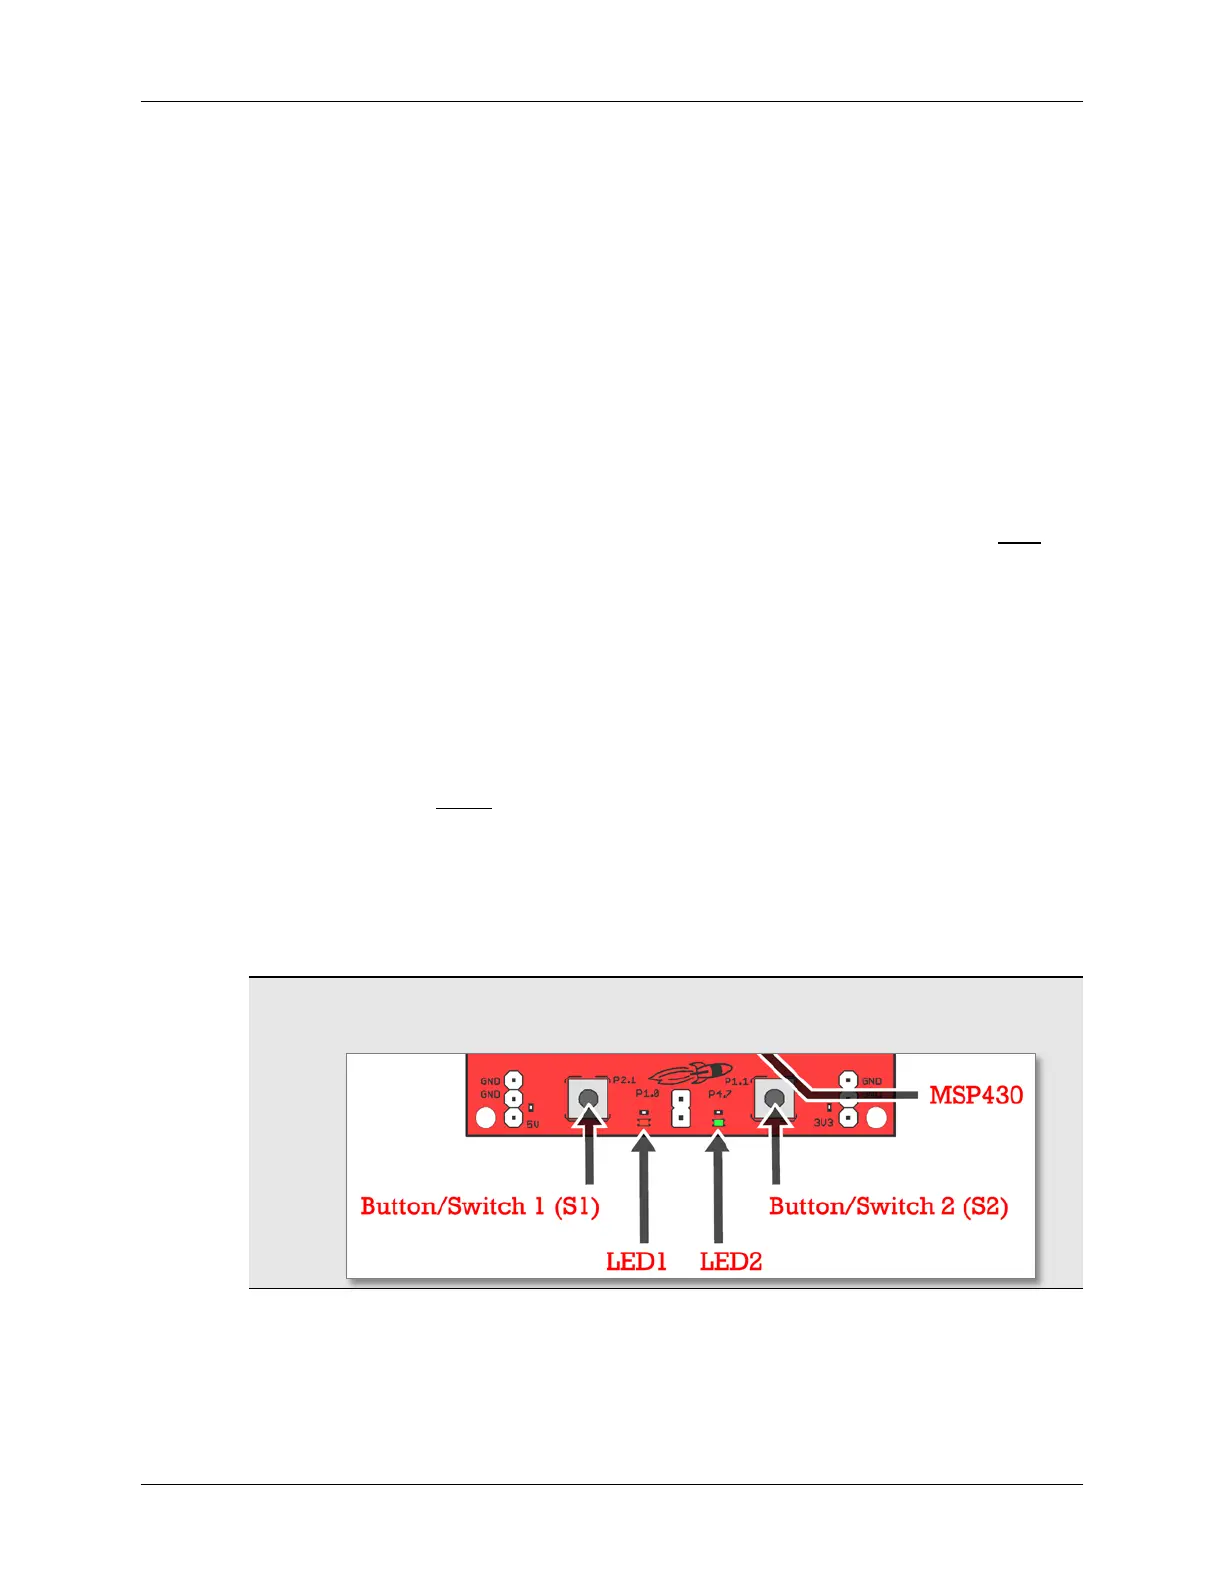
– SW1 is connected to Port 2, Pin 1)
Hint: We should’ve have recommended bringing a magnifying glass to read the silk screen on the
Launchpad board. It’s very hard to see which button is SW1 – and the pin it is connected to. It
may easier to reference the Quick Start sheet that came with your Launchpad.
3 - 32 MSP430 Workshop - Using GPIO with MSP430ware