Appendix – Looking ‘Under the Hood’
8 - 32 Gettings Started with the MSP430 - Using Energia (Arduino)
Appendix – Looking ‘Under the Hood’
We are going to create three different lab sketches in Lab 8d. All of them will essentially be our
first ‘Blink’ sketch, but this time we’re going to vary the system clock – which will affect the rate of
blinking. We will help you with the required C code to change the clocks, but if you want to study
this further, please refer to Chapter 3 – Inititialization and GPIO.
Where, oh where, is Main
How does Energia setup the system clock?
Before jumping into how to change the MSP430 system clock rate, let’s explore how Energia sets
up the clock in the first place. Thinking about this, our first question might be…
What is the first function in every C program? (This is not meant to be a trick question)
_________________________________________________________________________
If Energia/Arduino is built around the C language, where is the main() function? Once we answer
this question, then we will see how the system clock is initialized.
Open main.cpp …
C:\TI\energia-0101E0010\hardware\msp430\cores\msp430\main.cpp
The “C:\TI\energia-0101E0010” may be different if you unzipped the Energia to a different location.
When you click the Download button, the tools combine your setup() and loop() functions into the
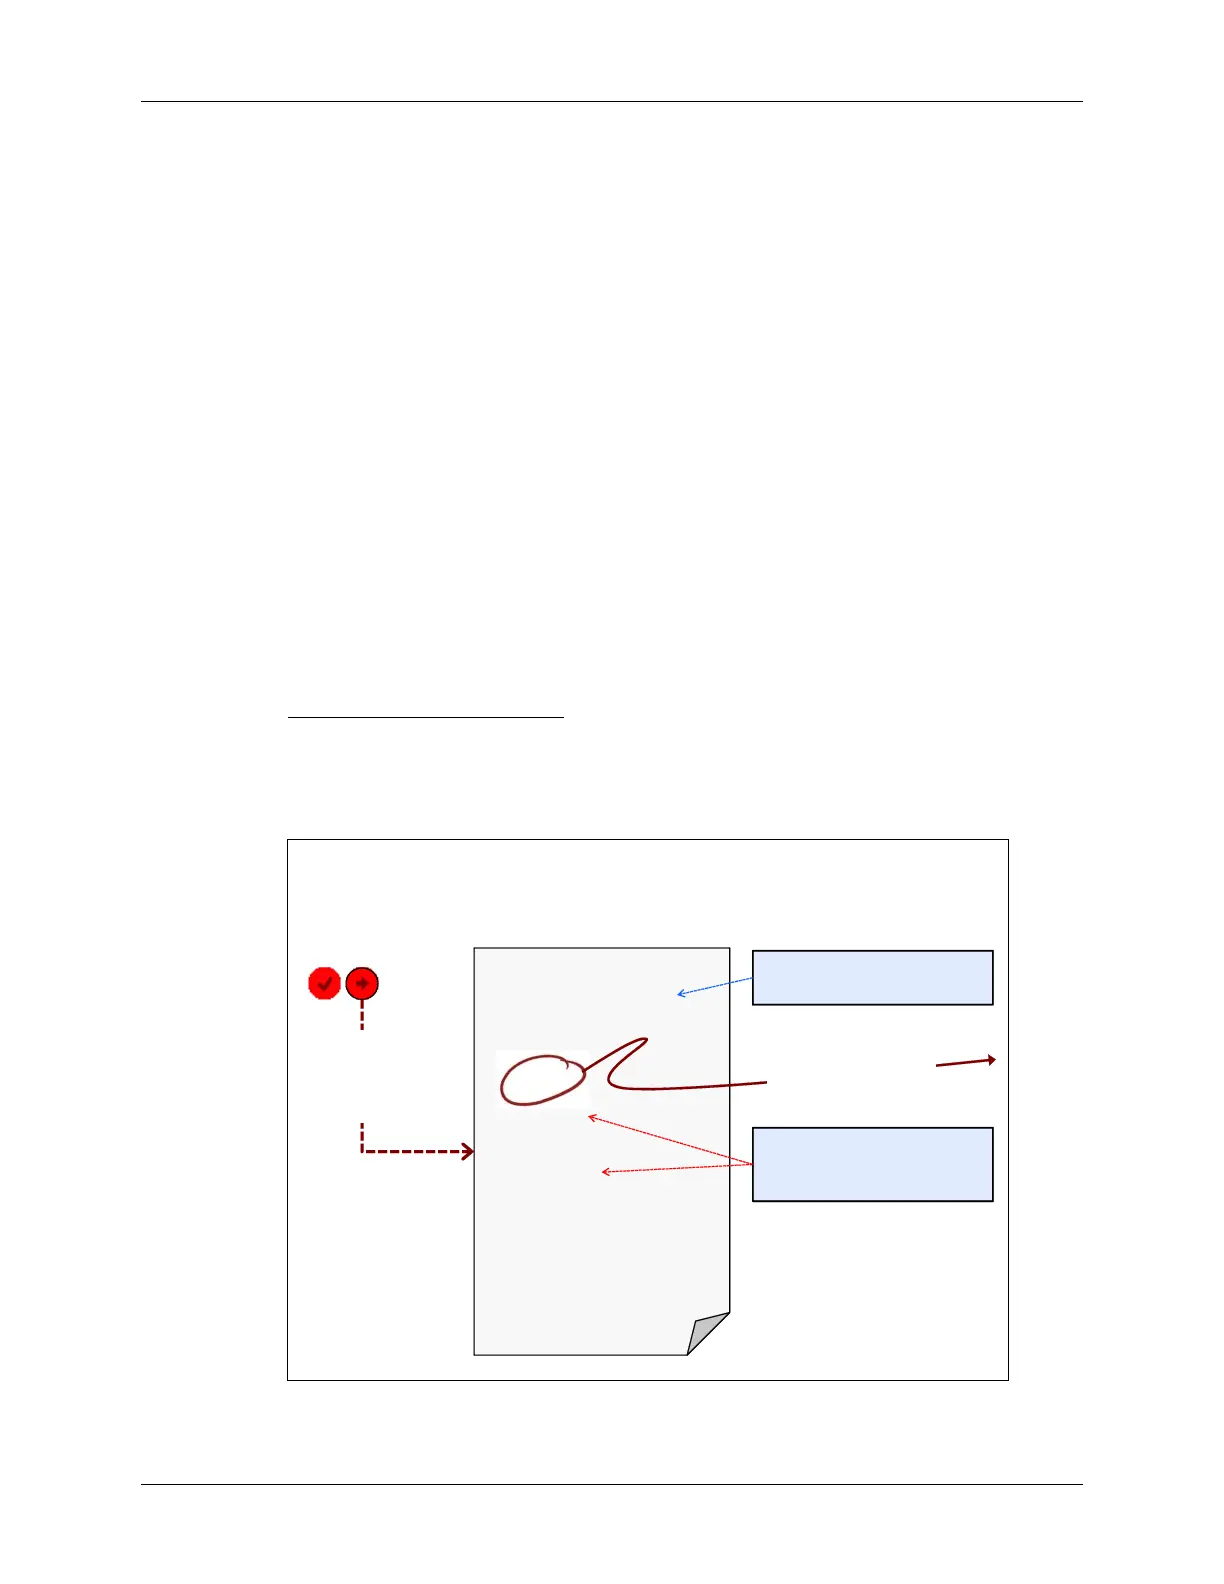
main.cpp file included with Energia for your specific hardware. Main should look like this:
main.cpp
// main.cpp
#include < Energia.h >
int main(void)
{
init();
setup();
for (;;) {
loop();
if (serialEventRun) {
serialEventRun();
}
}
return 0;
}
Clicking download
combines sketch with
main.cpp to create a
valid c++ program
We have already seen setup()
and loop(). This is how Energia
uses them.
Energia.h contains the #defines,
enums, prototypes, etc.
System initalization is
done in wiring.c
(see next slide)
C:\TI\energia-0101E0010\hardware\msp430\cores\msp430\
Where do you think the MSP430 clocks are initialized? _____________________________