15
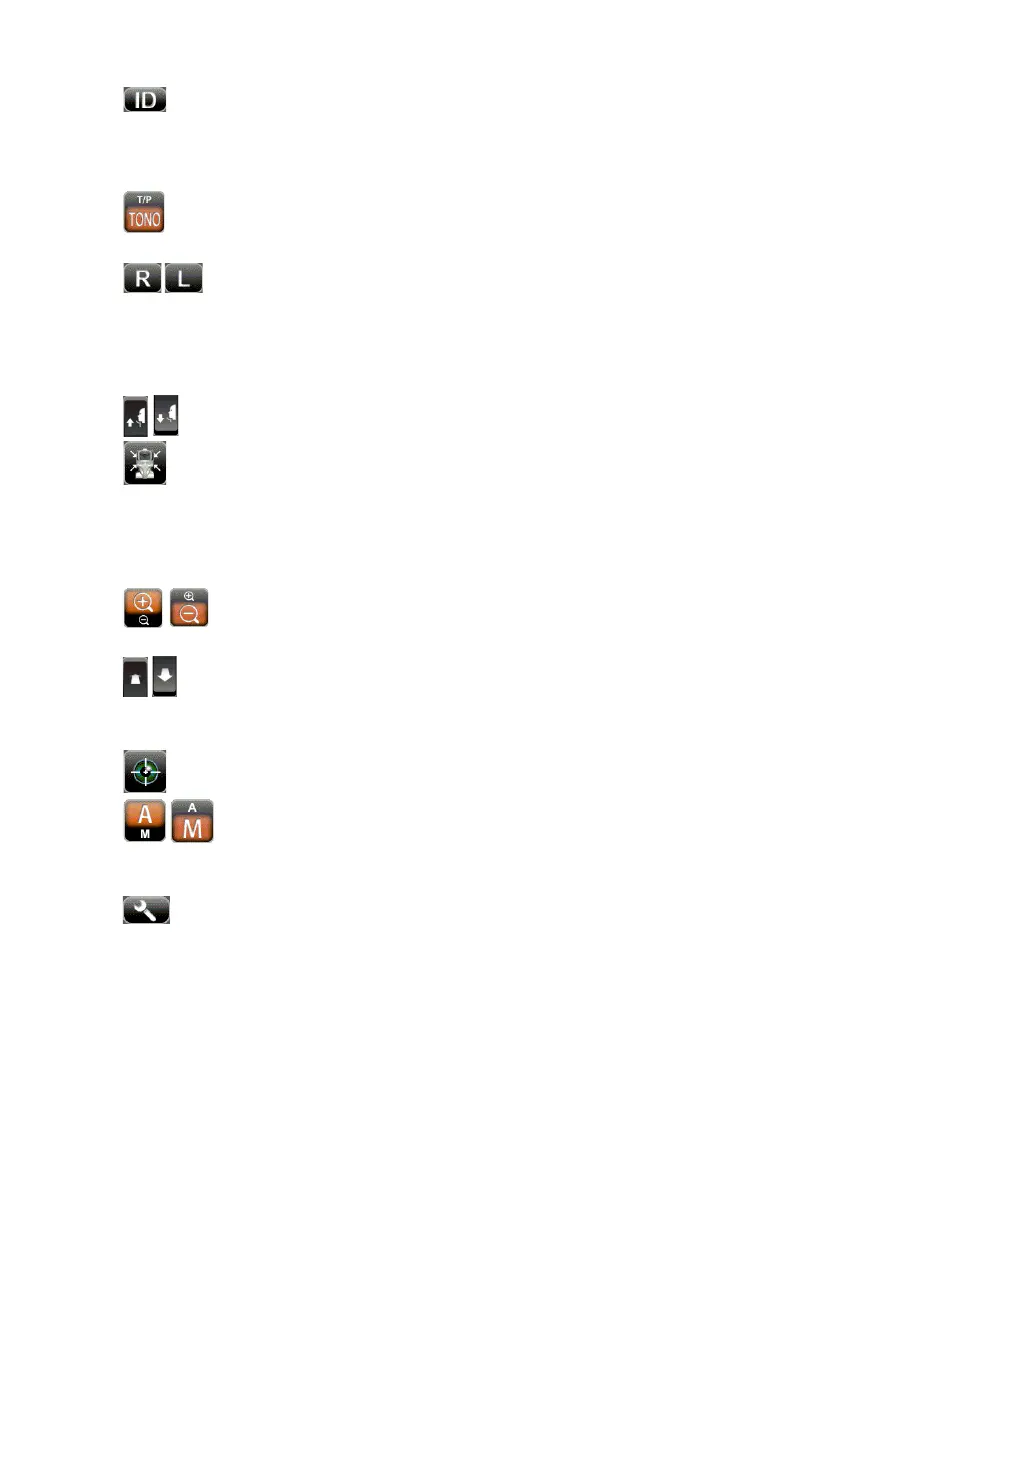
COMPONENTS
ID button................................... Input the patient ID (up to 13 characters) and operator
ID (up to 13 characters). However, if no patient ID is
inputted, the patient No. of each patient is allocated
automatically. (See page 100 for details.)
Measurement mode button....... Selects a measurement mode from TONO and T/P.
(only in CT-1P)
R button/L button ............... Selects the right/left eye. By tapping the button, the
main body moves to the selected direction.
The selected button is framed in orange. The layout
where the R/L button is displayed reverses according to
the position of the control panel.
Up/down button for chinrest... Moves the chinrest up/down.
Air check/End button................ Displayed under Auto mode: Selects Air check or End
operation. Air check operation checks that the measure-
ment system of the instrument operates properly. End
operation is to move the chinrest and measuring head
to the measurement last position.
Zoom button...................... Displayed under Manual mode: Enlarges the patient's
eye display.
Forward/Backward button for measuring head
............. Moves the measuring head closer to/away from the
patient's eye.
Start button............................... Starts measurement.
Auto/Manual button.......... Selects Auto/Manual mode (A: Auto mode, M: Manual
mode). The name of the selected mode (Auto/Manual)
is displayed on the control panel.
Settings button......................... Displays the SETUP screen.