43
BASIC OPERATIONS
SETTING THE MEASURING RANGE
In this instrument, the measuring range can be switched in 2 steps between "1-30" and "1-60."
Normally, "1-30" is used, but if the patient's ocular pressure is high, switch it to "1-60." The
default setting is "1-30" upon power on.
1 Check the measurement screen.
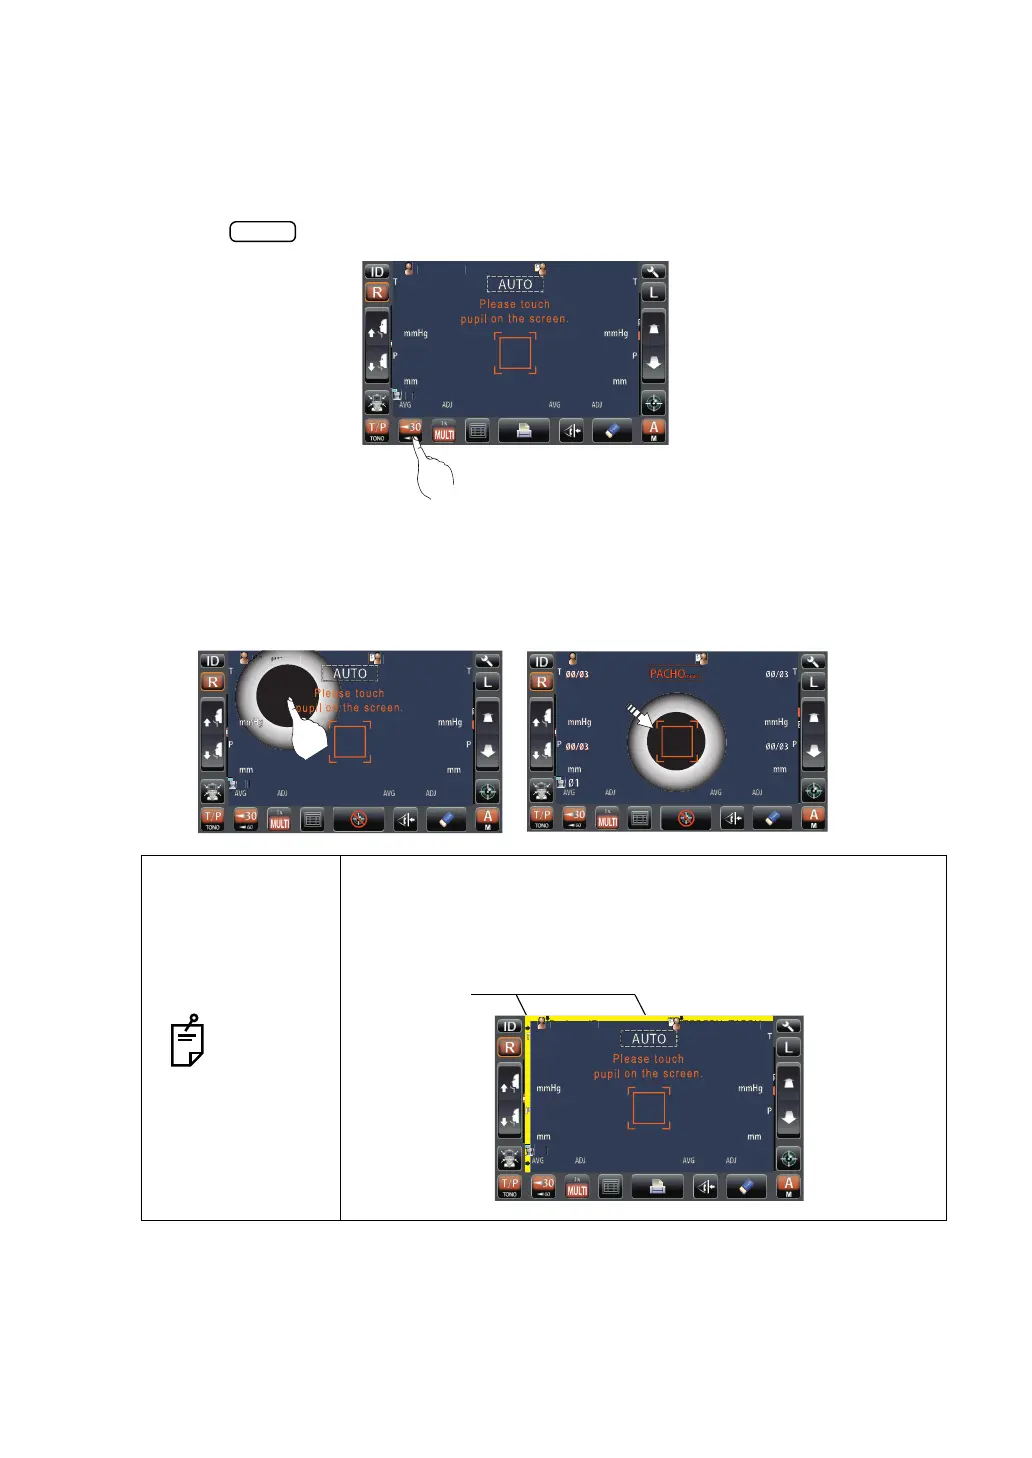
2 Tap the button of the control panel and set the measuring range.
ALIGNMENT AND MEASUREMENT
Alignment can be operated from the control panel.
1 When the pupil is displayed, tap the display around the pupil. The measuring head moves
to display the pupil image and alignment dot on the center of the screen.
NOTES
When the measuring head has reached the limit of movement
(vertical/lateral directions), a yellow-colored limit mark appears,
showing it is the movement limit in that direction. Tap the display,
move the measuring head to a position until the pupil image
comes to the center.
PatientID
PatientID
/3
/3
/3
/3
/3
/3
/3
/3
OPCON
ARO
PatientID
/3
/3
/3
/3
/3
/3
/3
/3
1
OPCON
TARO
TOPCONTAROU
PatientID
PatientID
OPCON
AROU
TOPCONTAROU
at
ent
PatientID
/3
/3
/3
/3
/3
/3
/3
/3