70
Model Code Page
21. Engine
1. 8. 2000
6000--8950
215 2
1. 6. 1999
C. Assembling and fitting lubricating oil
pump
1. Fit the gear wheels in the pump body. Fit the cover using
a new gasket. Partly tighten the bolts. Rotate the pump shaft
and tap the side of thecover lightly until the position isreached
where the shaft rotates most freely. Tighten the bolts and
check that the shaft still rotates freely.
2. Fit the key and drive gear onto the shaft (tapered joint with-
out key on the later pumps). Apply Loctite 242 onto the nut
threads and tighten the nut to 60 Nm. Remember the washer
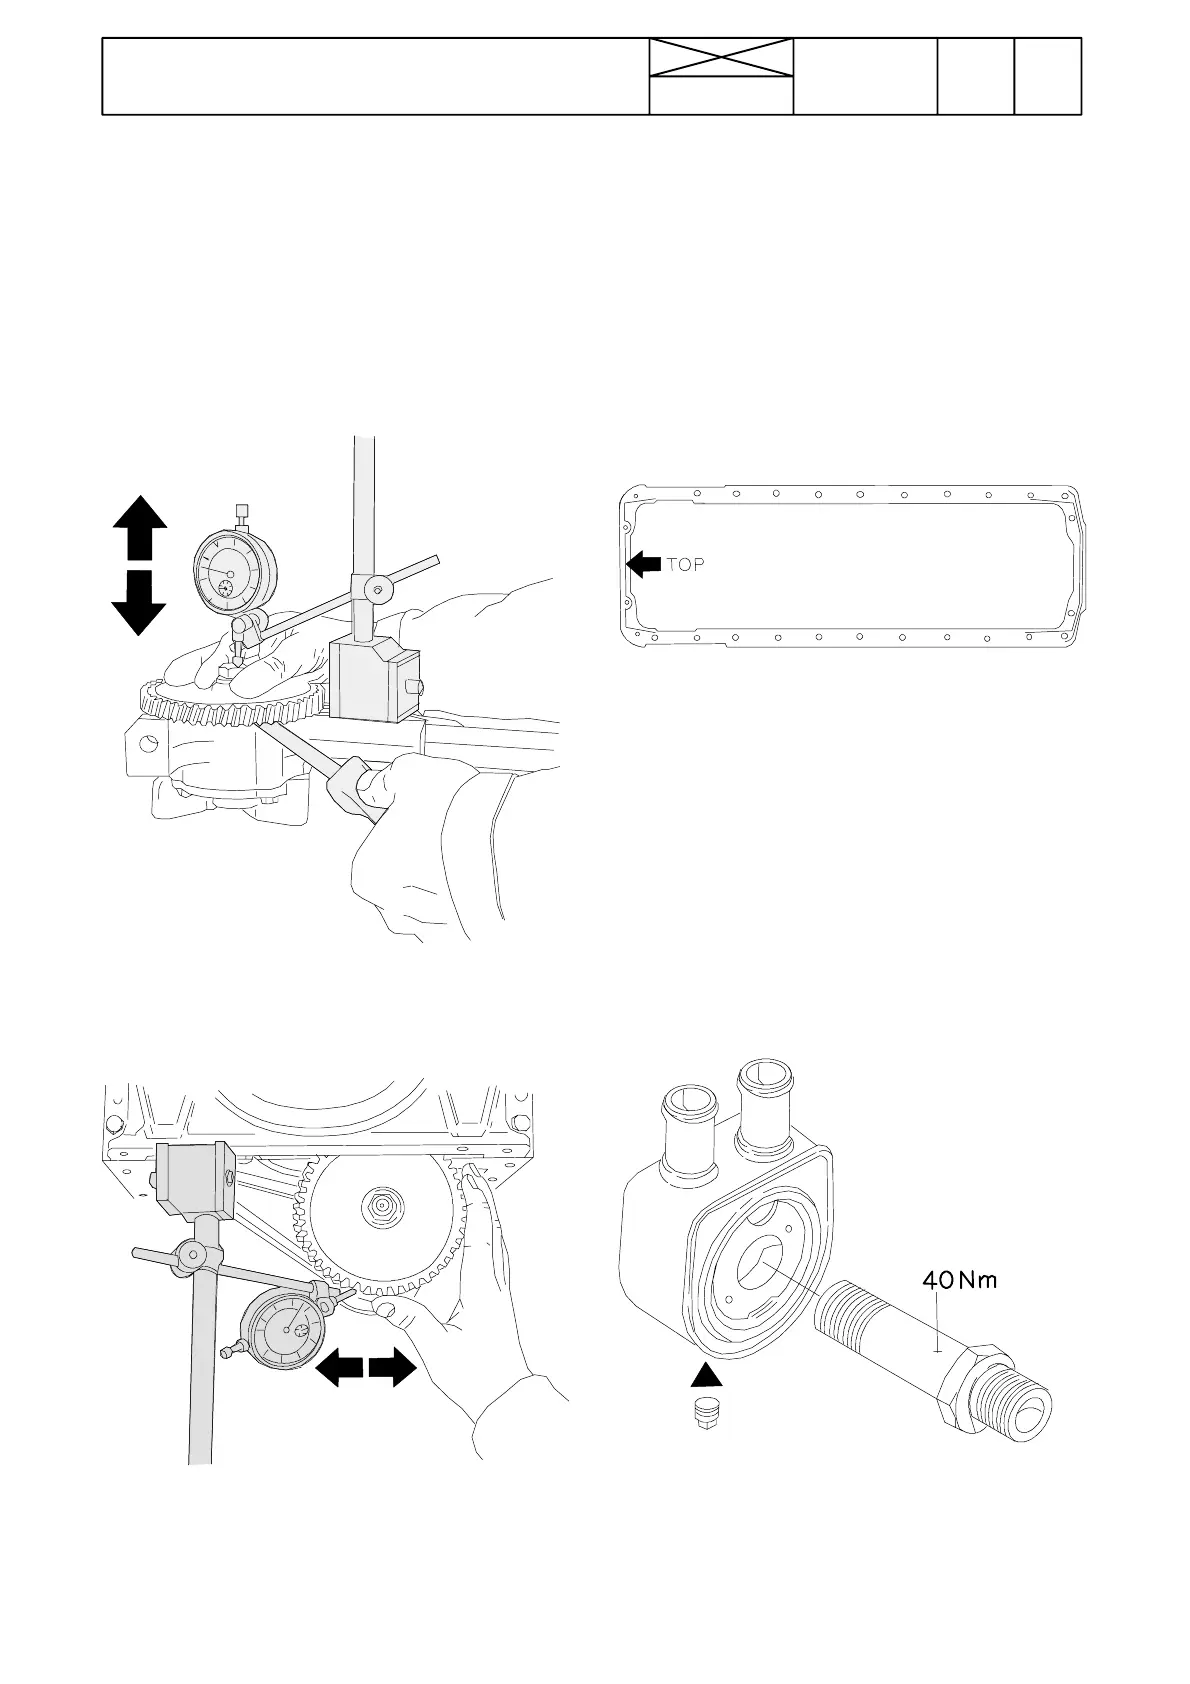
under the nut.
3. Fasten the oil pump in a vice and check the end float be-
tween gear and pump housing. The clearance which should
be 0,03 ---0,11 mm, is adjusted by the number of gaskets be-
tween the cover and body.
4. Fit the pump and check the tooth backlash against the
crankshaft gear. The clearance, which should be 0,05 ---0,25
mm, is adjusted with shims between the pump body and the
cylinder block (shims 0,2 mm, order no 8360 07871). One
shims increases/decreases the backlash about 0,07 mm.
Note! Whenmeasuring the too th backlash, the engine should
be the correct way up as the crankshaft bearing clearance af-
fects the tooth backlash.
5. Connect suction and pressure pipes toget her with new
seals.
6. Fit the engine (or the oil sump).
D. Fitting oil sump g asket
Fit the oi l sump gasket with silicone stripes against the cylin-
der block.
E. Lubricating oil cooler on 6800, 6850,
8400 and 8350---8950
The lubri cating oil cooler is placed in the oil filt er housing.
1. The engine coolant should be drained before removing the
lubricating oil cooler.
2. Fit new sealing rings. Fit the c o oler with draining plug tur-
ned downwards. Connect coolant pipes in the correct way.
3. Apply locking fluid to the nipple (the thread which attaches
to the filter head) and tighten it to a torque of 40 Nm.