1030
Model Code Page
67. Powered front axle Carraro
1. 10. 1999
8450--8950 674 4
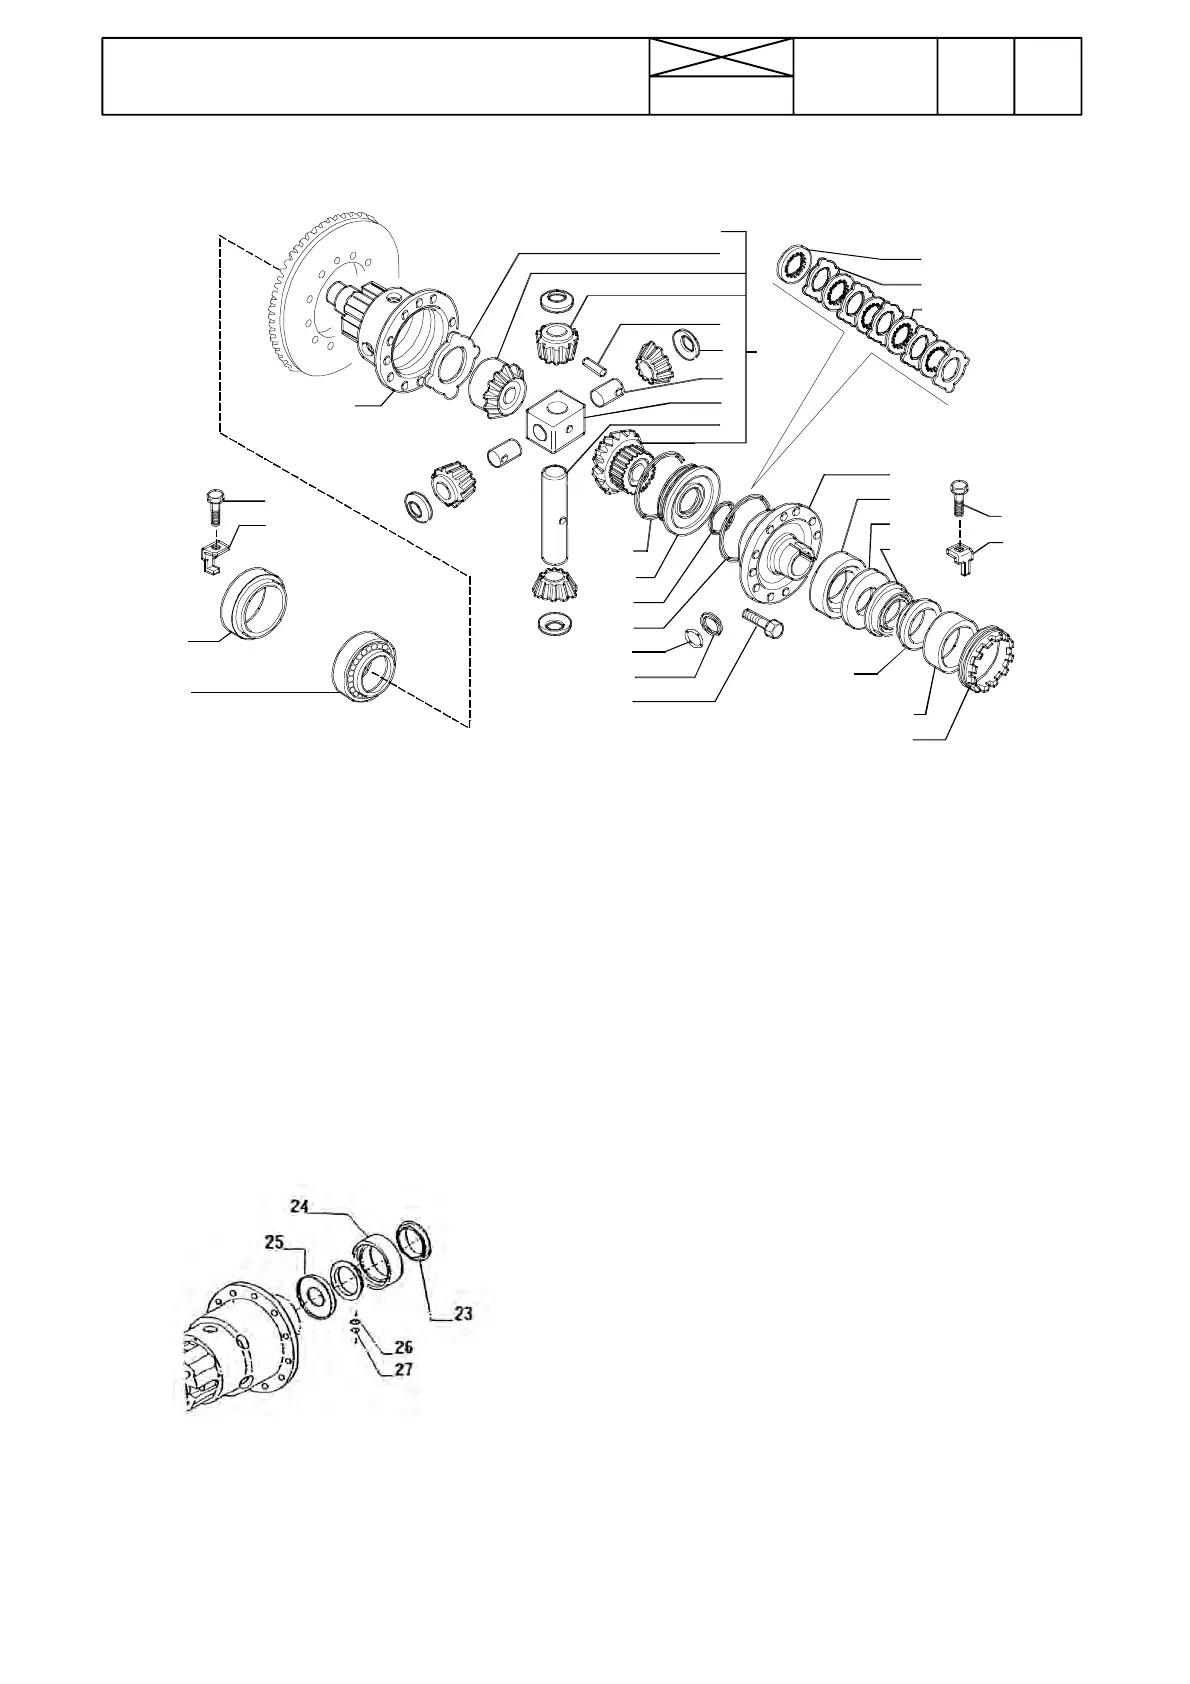
D. Disassembling differential
16
28
26
13
25
5
4
6
7
20
9
10
11
2
1
21
22
23
24
8
3
27
16
17
12
13
14
15
18
19
15
18. Unscrew bolts (27), at which time the crown wheel is
released and the differential housing is s plit.
19. Remove cover (12) and change o---ring (24).
20. Remove piston (22) and change o---rings (21) and (23).
21. Remove the disc pack (9, 10, 11) (note the fitting order.
Steel discs have teeth on the outer circ umference) and
check the conditio n of the discs. If the disc wear can be
found, change all discs at the same time. Thickness of the
discs, see page 670/2.
22. Remove and check the condition of the differential pin-
ions. Before removing, remove tension pins ( 5) .
Note! In connection with damages, c hange all parts under
pos. no. 25.
23. Check/change seals (23) and o---ring (27).
24. Check the housing wear. Small damages can be re-
paired with fine emery cloth.
E. Assembli ng differential
25. Assembling is done in a reverse order.
26. Lock the differential pinions with pins (5). Fit t he disc
pack and the differential side gears (disc pack contains 1
thrust plate, 8 steel discs and friction discs. Steel discs
have teeth on the outer circumference).
27. Refit piston (22) and its o---rings (23) and (21), co ver
(12) and o---ring (24).
Note! The differential gears have thrust washers with differ-
ent thickness, see technical data. In addition, the differential
gears have a certain tooth backlash, see technical data. If
the thrust washers must be changed, the tooth backlash
must be checked with a dial gauge.