775
Model Code Page
44. HiTech shuttle
1. 11. 1998
6250--8750 442 5
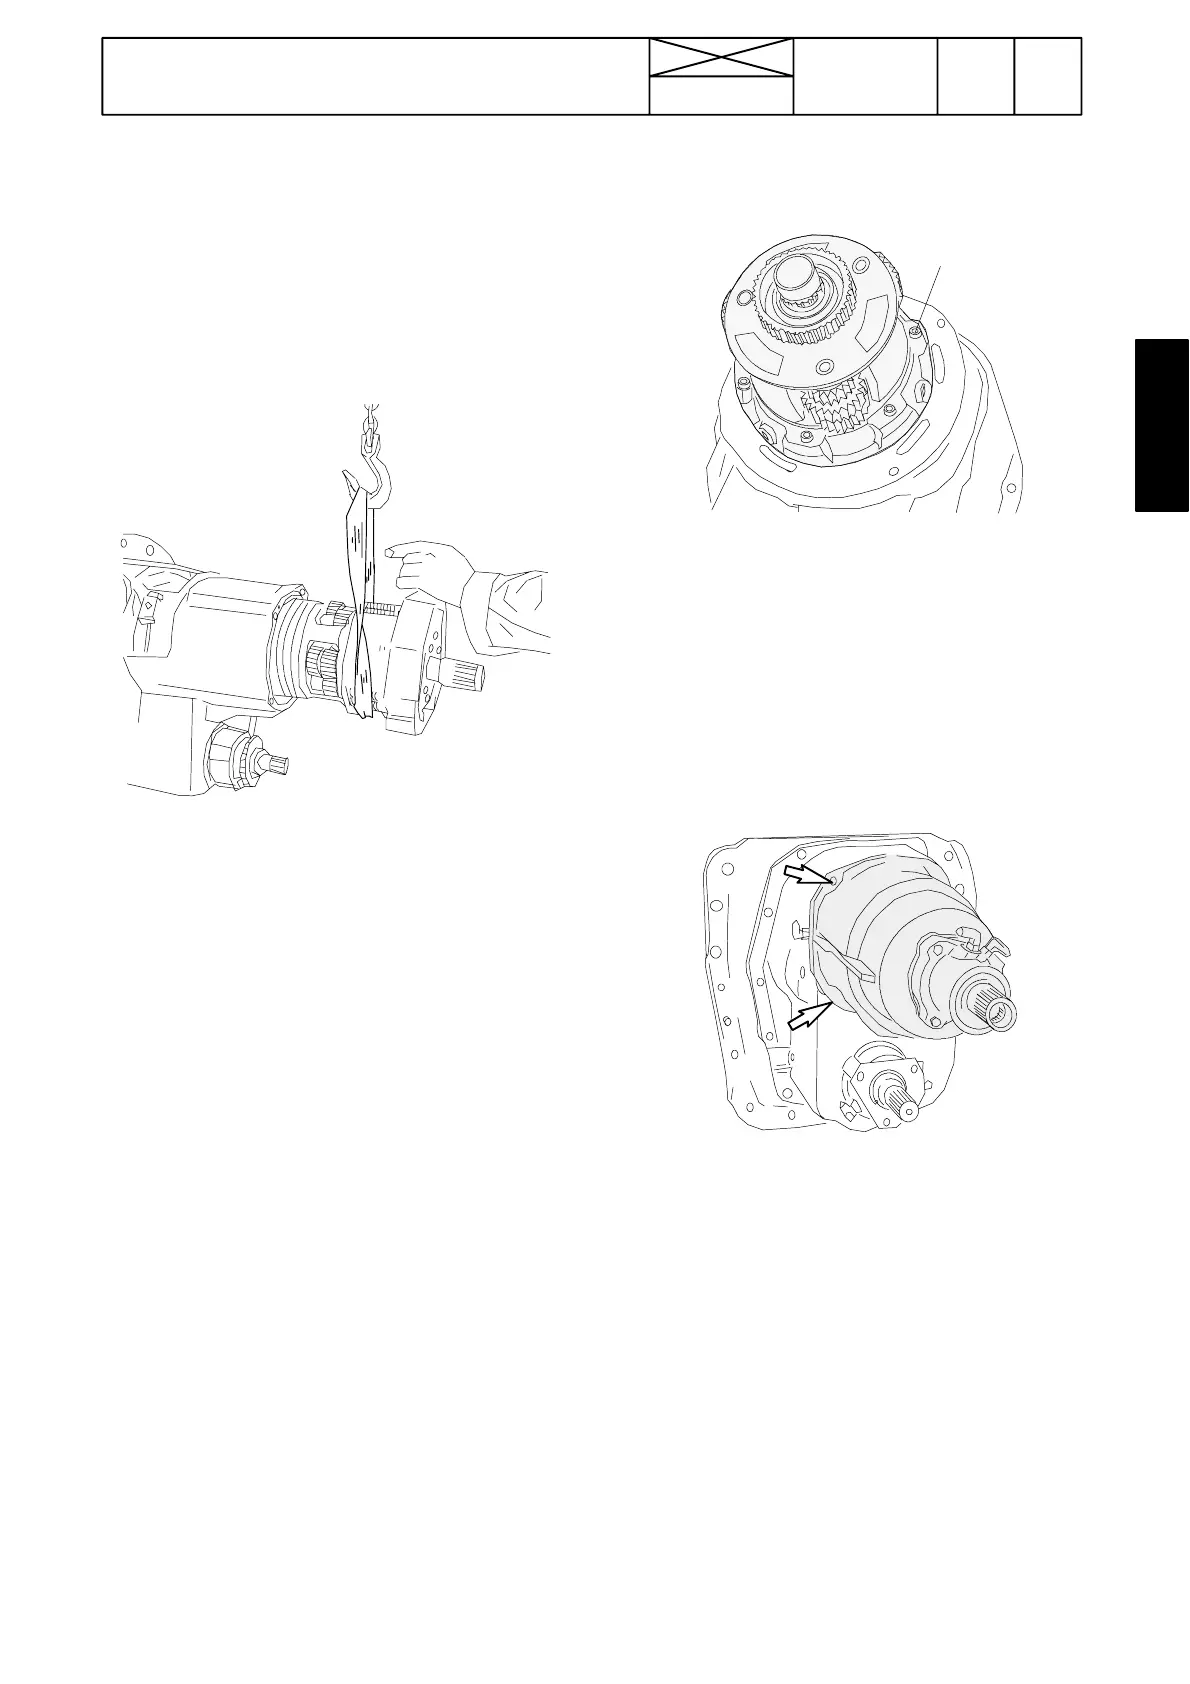
B. Fitting shuttle
Note! Before fitting the shuttle the DPS planetary car-
rier+rearmost clutch can be fastened onto the shuttle, or
they can be fastened after the shuttle has been placed in
the shuttle housing.
1. Fit the shuttle large o---ring into its groove. It can be fas-
tened temporarily with a little gearse. Fit the pump/PTO
drive shaft.
2. Wind a lifting rope round the shuttle flange. Position the
shuttle horizontal on the shaft and push it straight into the
housing so that the rearmost sun gear shaft is guided onto
the gearbox input shaft.
Note! Blow, if needed, compressed air through the pres-
sure pipe union into the shuttle foremost clutch so that the
planetary carrier is locked and the rearmost sun gear shaft
can be rotated with the shuttle input shaft, at which time the
splines connect with the gearbox input shaft splines .
3.Thefinalstageofthemountingmustbedonecarefully
so that the metallic sealing ri ngs in the rear end of the shut-
tle are guided into the oil flange. Fit is accurate.
4. When the shuttle is in place, fasten it to t he housing with
two bolts (M8, socket head). Tightening torque is 23 Nm.
5. Check, that t he shuttle input shaft has an axial play of
0,2 ---0,6.
23 Nm (8.8)
35 Nm (10.9)
6. Fit the DPS ball bearing into the shuttle front face and fit
the small spiral springs into the holes on the piston of t he
DPS rearmost clutch . Fasten the DPS planetary car-
rier+clutch pack onto the front face of the shuttl e. Use loc-
king fluid Loctite 243 on the bolt threads.
Note! Tightening order of the pl anetary carrier fixing bolts,
see page 440/15.
7. Pl ace the DPS housing large o---ring into its groove. Fit
the DPS housing. Tighten the bolts to 23 Nm.
Note! Before fitting the DPS housing, push the foremost
and middle sun gear shafts of the DPS into the clutch drum
in the DPS housing. Concerning detailed instructions, see
page 444/3.
8. Reco nnect all oil pipes to the shuttle and the DPS hou-
sing. Refit other removed parts.
9. Assemble the tractor frame according to instr. 423 5A on
page 423/17. Check the function of the shuttle and DPS.
Check for leaks.