ENGINE
M6060, M7060, WSM
1-S53
Piston Ring and Connecting Rod
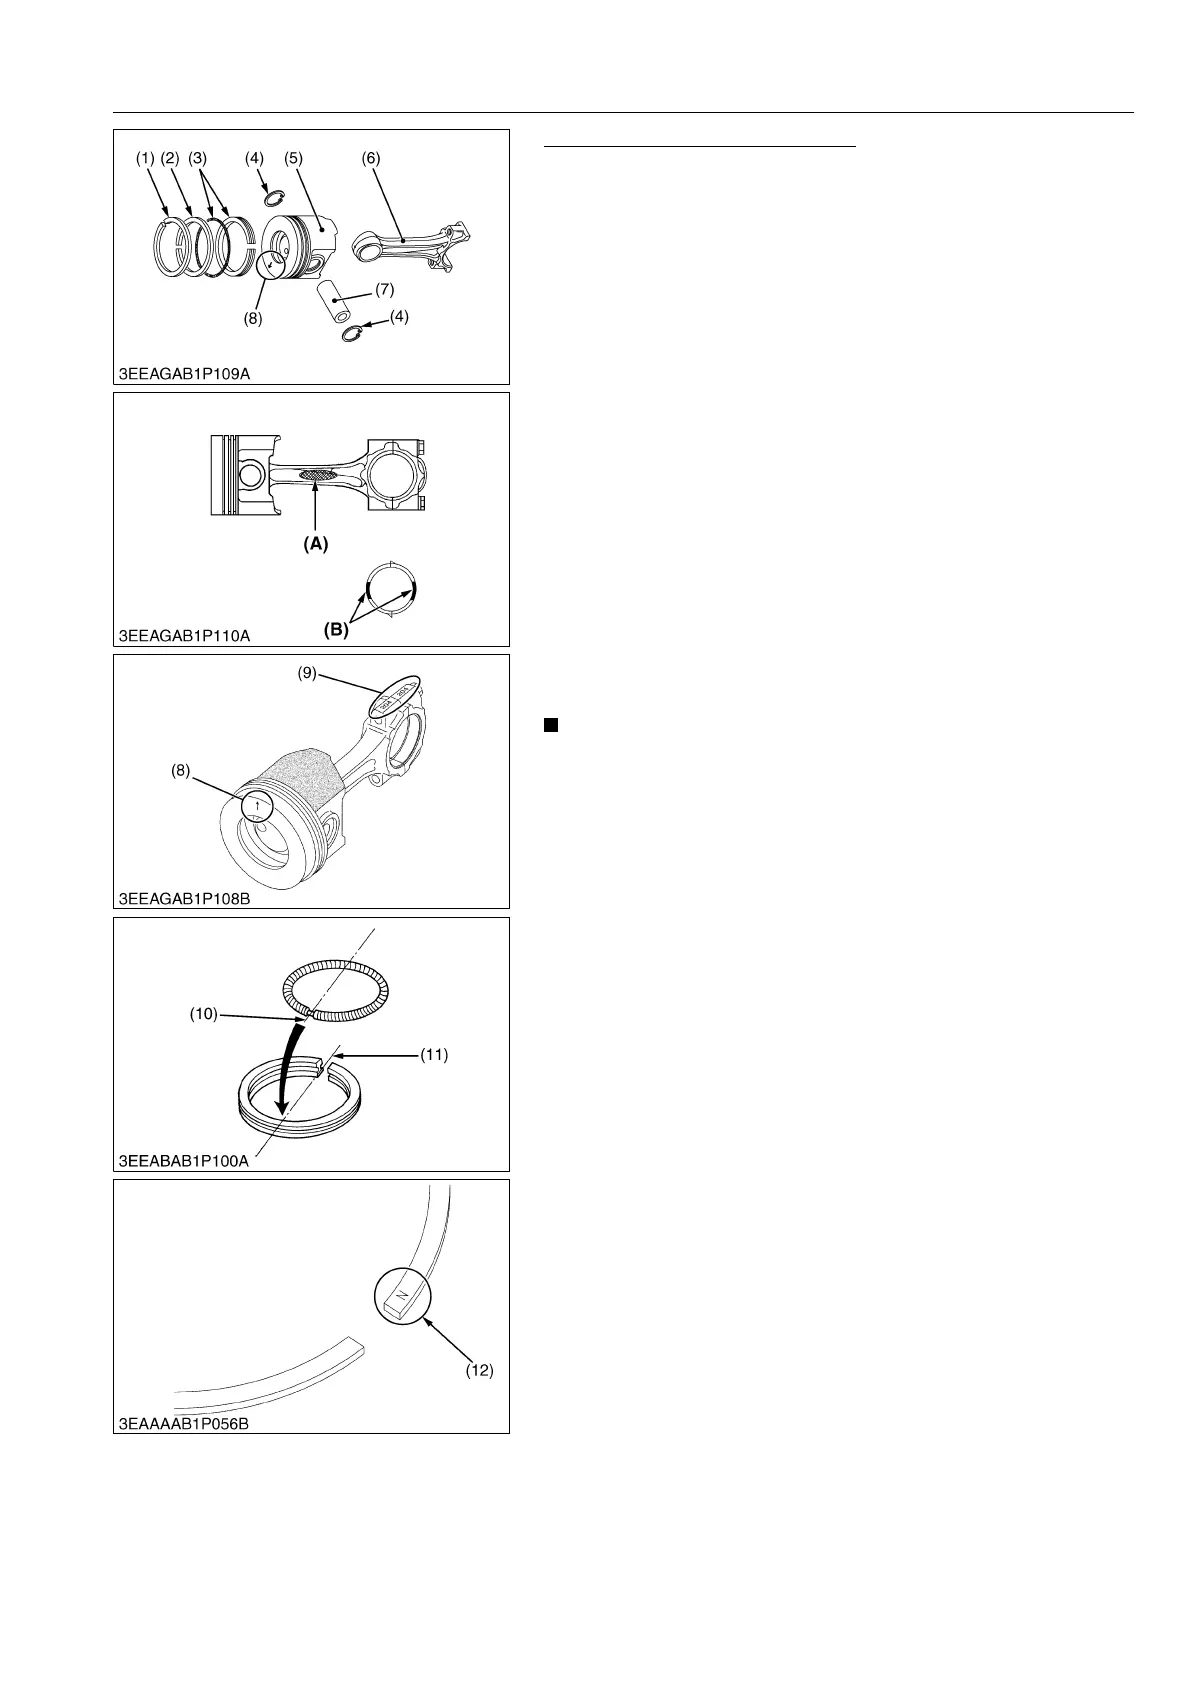
1. Remove the piston rings using a piston ring tool.
2. Remove the piston pin (7), and separate the connecting rod (6)
from the piston (5).
(When reassembling)
• Be sure to fix the crank pin bearing I.D.color (B) and the
connecting rod I.D.color (A) are same colors.
• When installing the ring, assemble the rings so that the
manufacture's mark (12) near the gap faces the top of the piston
(5).
• When installing the oil ring (3) onto the piston (5), place the
expander joint (11) on the opposite side of the oil ring gap (10).
• Apply engine oil to the piston pin (7).
• When installing the piston pin (7), immerse the piston (5) in 80
°C (176 °F) oil for 10 to 15 minutes and insert the piston pin (7)
to the piston (5).
• Assemble the piston (5) to the connecting rod (6) with the ↑ mark
(8) and the connecting rod numbering mark (9) facing same
side.
• The end faces of the oil ring (3) are plated with hard chrome. In
putting the piston (5) into the cylinder, be careful not to get the
oil ring (3) scratched by the cylinder. Use the piston ring fitter to
tighten up the oil ring (3). If the ring's planting is scratched, it
may get stuck on the cylinder wall, causing a serious trouble.
• Mark the same number on the connecting rod (6) and the
piston (5) so as not to change the combination.
9Y1210828ENS0075US0
(1) Top Ring
(2) Second Ring
(3) Oil Ring
(4) Piston Pin Snap Pin
(5) Piston
(6) Connecting Rod
(7) Piston Pin
(8) Mark (↑)
(9) Numbering Mark
(10) Oil Ring Gap
(11) Expander Joint
(12) Manufacture's Mark
(A) Connecting Rod ID Color :
Blue or without Color
(B) Crank Pin Bearing ID Color :
Blue or without Color