February 2013
4-232
ColorQube® 9303 Family
REP 12.90-171
Repairs/Adjustments
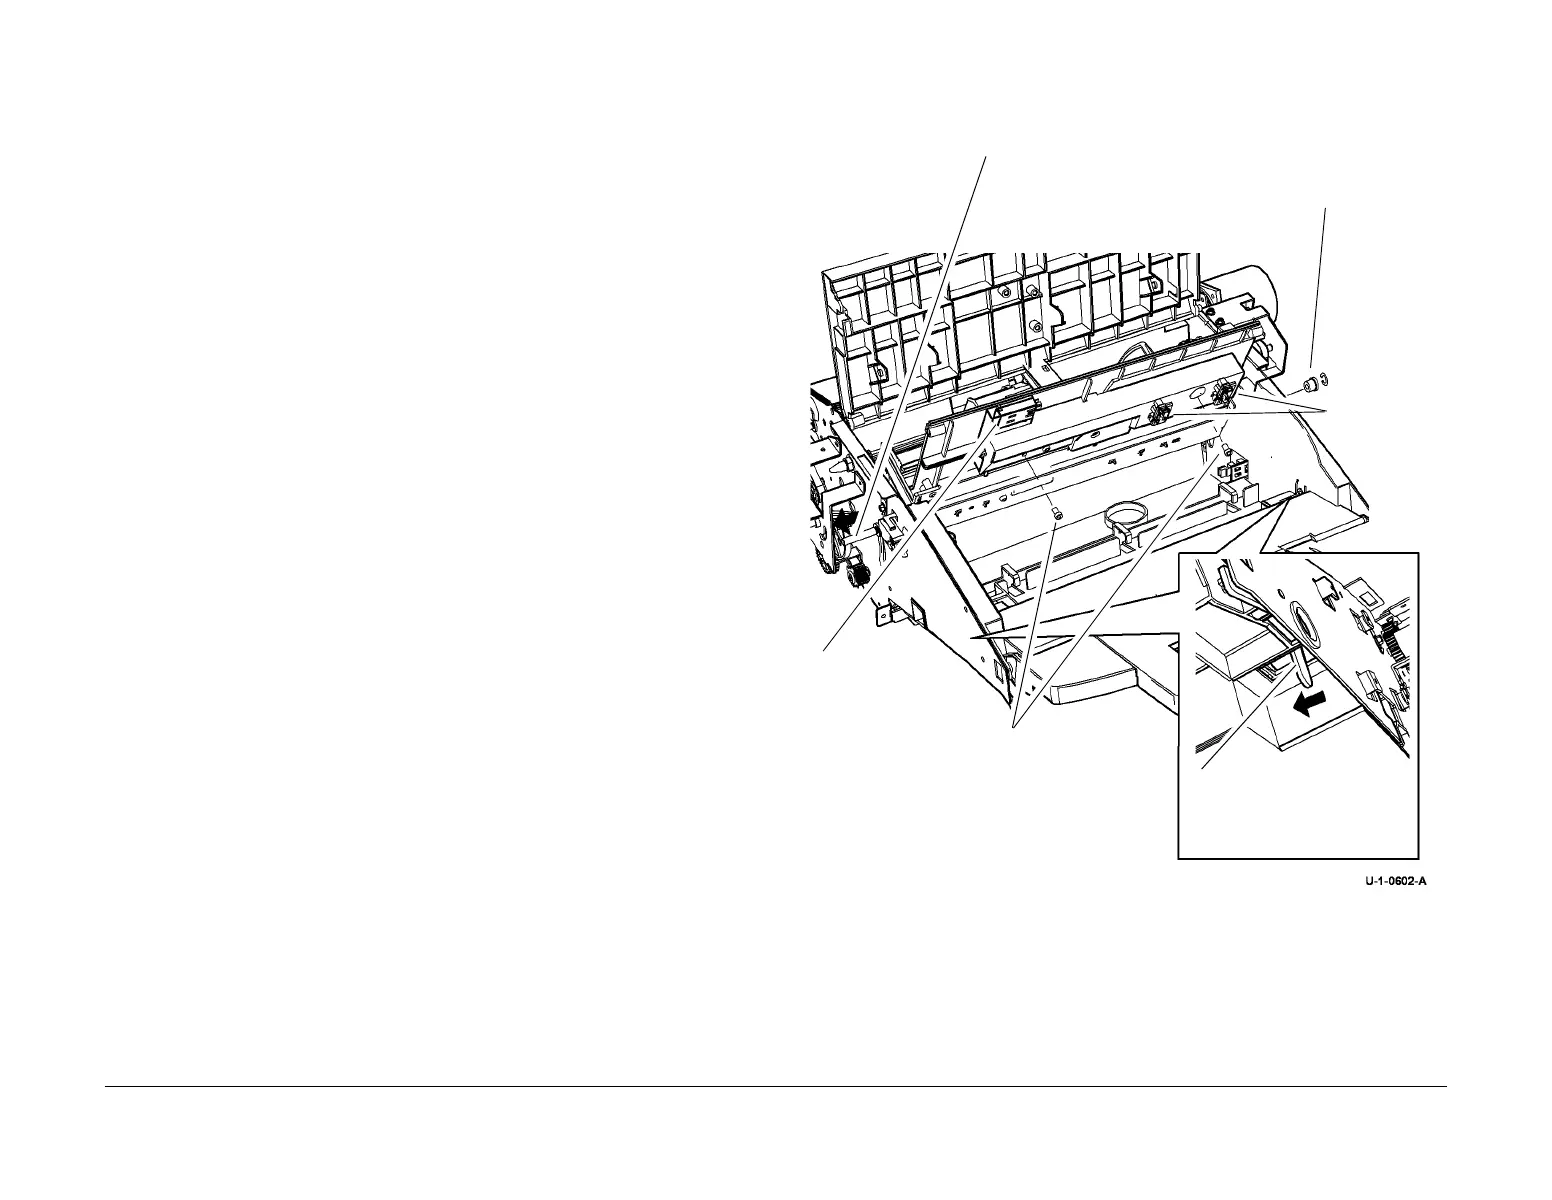
REP 12.90-171 Bottom Tray and Paper Sensors
Parts List on PL 12.300.
Removal
WARNING
Take care during this procedure. Sharp edges may be present that can cause injury.
WARNING
Switch off the electricity to the machine. Refer to GP 14. Disconnect the power cord
from the customer supply while performing tasks that do not need electricity. Electricity
can cause death or injury. Moving parts can cause injury.
1. Undock the Inserter, REP 12.82-171.
2. Remove the bottom tray sensor bracket, Figure 1.
NOTE: Observe the position of the two springs when lifting the bottom tray.
Figure 1 Bottom Tray and Sensors
Replacement
1. Reverse the removal procedure to replace the bottom tray and paper sensors.
2. Check that the loading levers are at the same angle and that the tray pivot shaft passes
below the front and rear loading levers. Check that the bottom tray is supported horizon
-
tally in the frame.
3. Make sure that the bottom tray springs are correctly aligned before engaging the front and
rear pivot tabs.
3
Remove the pivot shaft
5
Remove the relevant
sensor
1
Release the front and rear pivot
tabs and lift the bottom tray.
4
Remove 2 screws, then
the sensor bracket.
2
Remove the
circlip and
bearing.
Paper present
sensor.
Paper width
sensors

 Loading...


