5 Replacing Parts
DX100 5.1 Replacing DX100 Parts
5-8
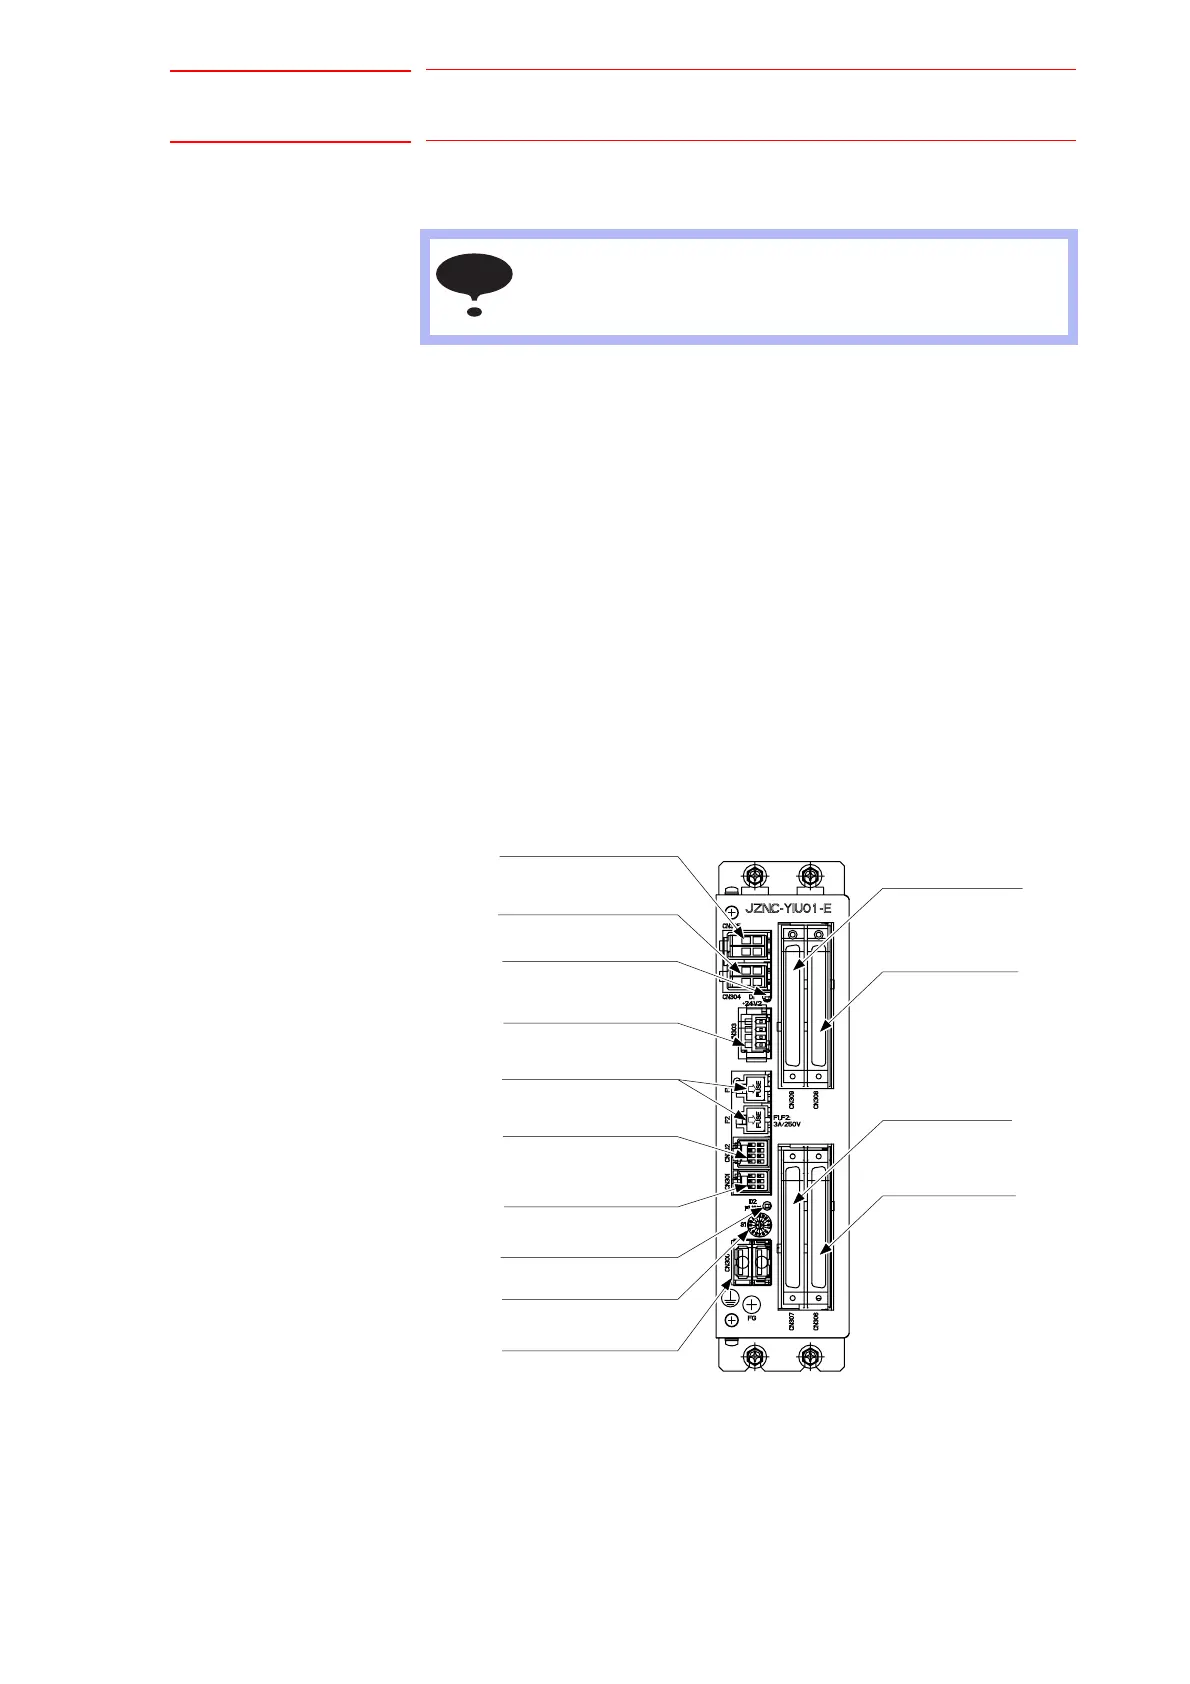
5.1.1.5 Replacing the I/O Unit (JZNC-YIU0-E)
Replacement Procedure
1. Disconnect all the cables connected to the I/O unit.
(Disconnect the ground wirings screwed to the front side of the unit.)
2. Loosen the screws (four places) fixing I/O unit.
3. Remove I/O unit from the controller by holding up its cover.
4. Mount new I/O unit to the controller.
5. Connect new I/O unit by tightening upper and lower side screws (four
places)
(Connect the ground wirings firmly.)
6. Connect all the disconnected cables.
7. Set the rotary switch to the same value as the removed unit’s rotary
switch.
I/O Unit JZNC-YIU01-E
NOTE
Turn OFF the power before replacing the I/O unit.
F1,F2
(CN301)
(CN303)
(CN304)
(CN309)
Digital I/O connector
Digital I/O connector
(CN300)
(CN302)
(CN305)
D1:24V2IN LED
(CN306)
(CN307)
Digital I/O connector
(CN308)
Digital I/O connecto
Communication switch
Rotary switch
D2:FUSE CUT LED
Panel IO connecto
Universal input connector
Power supply protective
fuse 3A/250A
For switching external
power supply
Power supply output connector
Power supply input connector

 Loading...