13-12
IM 701240-01E
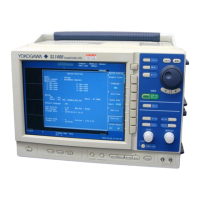
13.7 Changing the SCSI ID Number
Procedure
1. Press MENU.
2. Press the Next 1/2 soft key.
3. Press the Self Test soft key.
4. Press the Test Item soft key.
5. Use jog shuttle+SELECT to select SCSI.
Changing the ID Number of the SL1400
6. Press the Own ID soft key.
7. Turn the jog shuttle to select a value in the range of 0 to 7.
Changing the ID Number of the Internal Hard Disk
8. Press the Internal ID soft key.
9. Turn the jog shuttle to select a value in the range of 0 to 7.
Executing the ID Number Change
10. Press the Initialize SCSI soft key. The SCSI ID is changed to the selected ID
number. The SCSI icon ( ) at the upper left corner of the screen blinks while
the change is in progress. When the change is complete, the icon disappears.
Note
• If you do not execute Initialize SCSI after changing Own ID or Internal ID, the new ID is
not activated until the SL1400 is powered up the next time.
• To save the data after executing Initialize SCSI, select the destination medium and
directory.
 Loading...

