Note
♦
When performing repairs, replace self-locking nuts and bolts.
♦
Always replace bolts that are secured with additional torque
as well as sealing rings, seals, and O-rings.
♦
All cable ties that are opened or cut open during removal must
be replaced in the same positions during installation.
♦
Clean input shaft splines and (in case of used clutch plates)
clean hub splines, remove corrosion and apply only a very thin
coating of lubricant -G 000 100- on splines. Then move clutch
plate back and forth on input shaft until the hub moves freely
on the shaft. Excess grease must be removed.
♦
If the transmission is replaced, modify the transmission shift
lever and selector relay lever.
– All threaded bores, in which self-locking bolts are threaded,
must be cleaned of locking fluid residue using a thread tap.
– If there are no alignment sleeves for centering the engine and
transmission in the cylinder block, insert them.
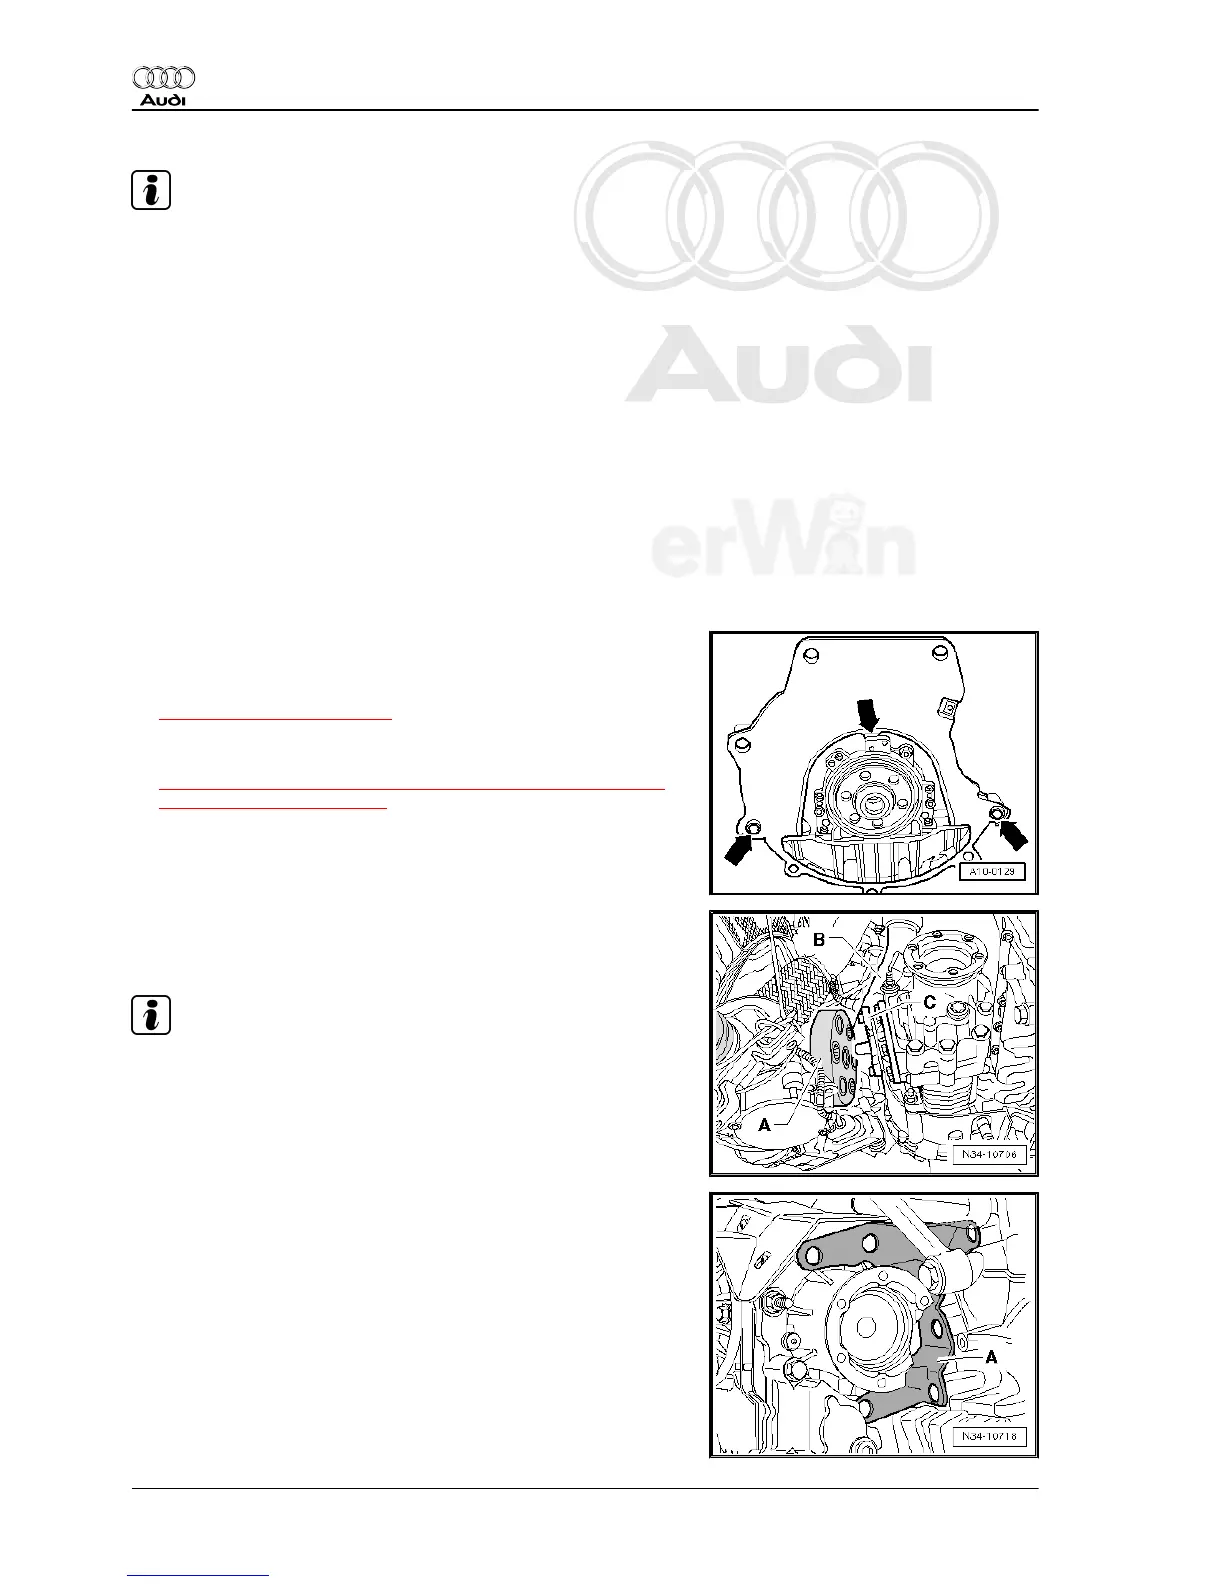
– Make sure that intermediate plate is engaged on sealing
flange and has been slid on to alignment sleeves -arrows-.
– Check the centralization of the clutch plate. Refer to
⇒ “4.9 LuK Clutch”, page 42 .
– Check the release bearing for wear. Replace the clutch slave
cylinder with the release bearing if necessary. Refer to
⇒ “2.4 Clutch Release Mechanism, Clutch Slave Cylinder As‐
sembly Overview”, page 21 .
– Carefully raise transmission with -3282- .
– Align transmission to engine and install.
– Guide the transmission past drive axle -A- and front exhaust
pipe -B- with output flange -C-. Rotate the output flange if nec‐
essary.
Note
♦
Pay attention to electromechanical steering gear when instal‐
ling the transmission.
♦
Pay attention to all lines when installing transmission.
– If applicable, insert bevel box bracket -A-.
Audi TT 2007 ➤
Manual Transmission - Edition 10.2009
108 Rep. Gr.34 - Controls, Housing


 To Next Page