4-25
Cisco D9865 Satellite Receiver Software Version 2.20 Installation and Configuration Guide
OL-31085-01
Chapter 4 Setup and Monitoring via On-Screen Display
Setup Menu
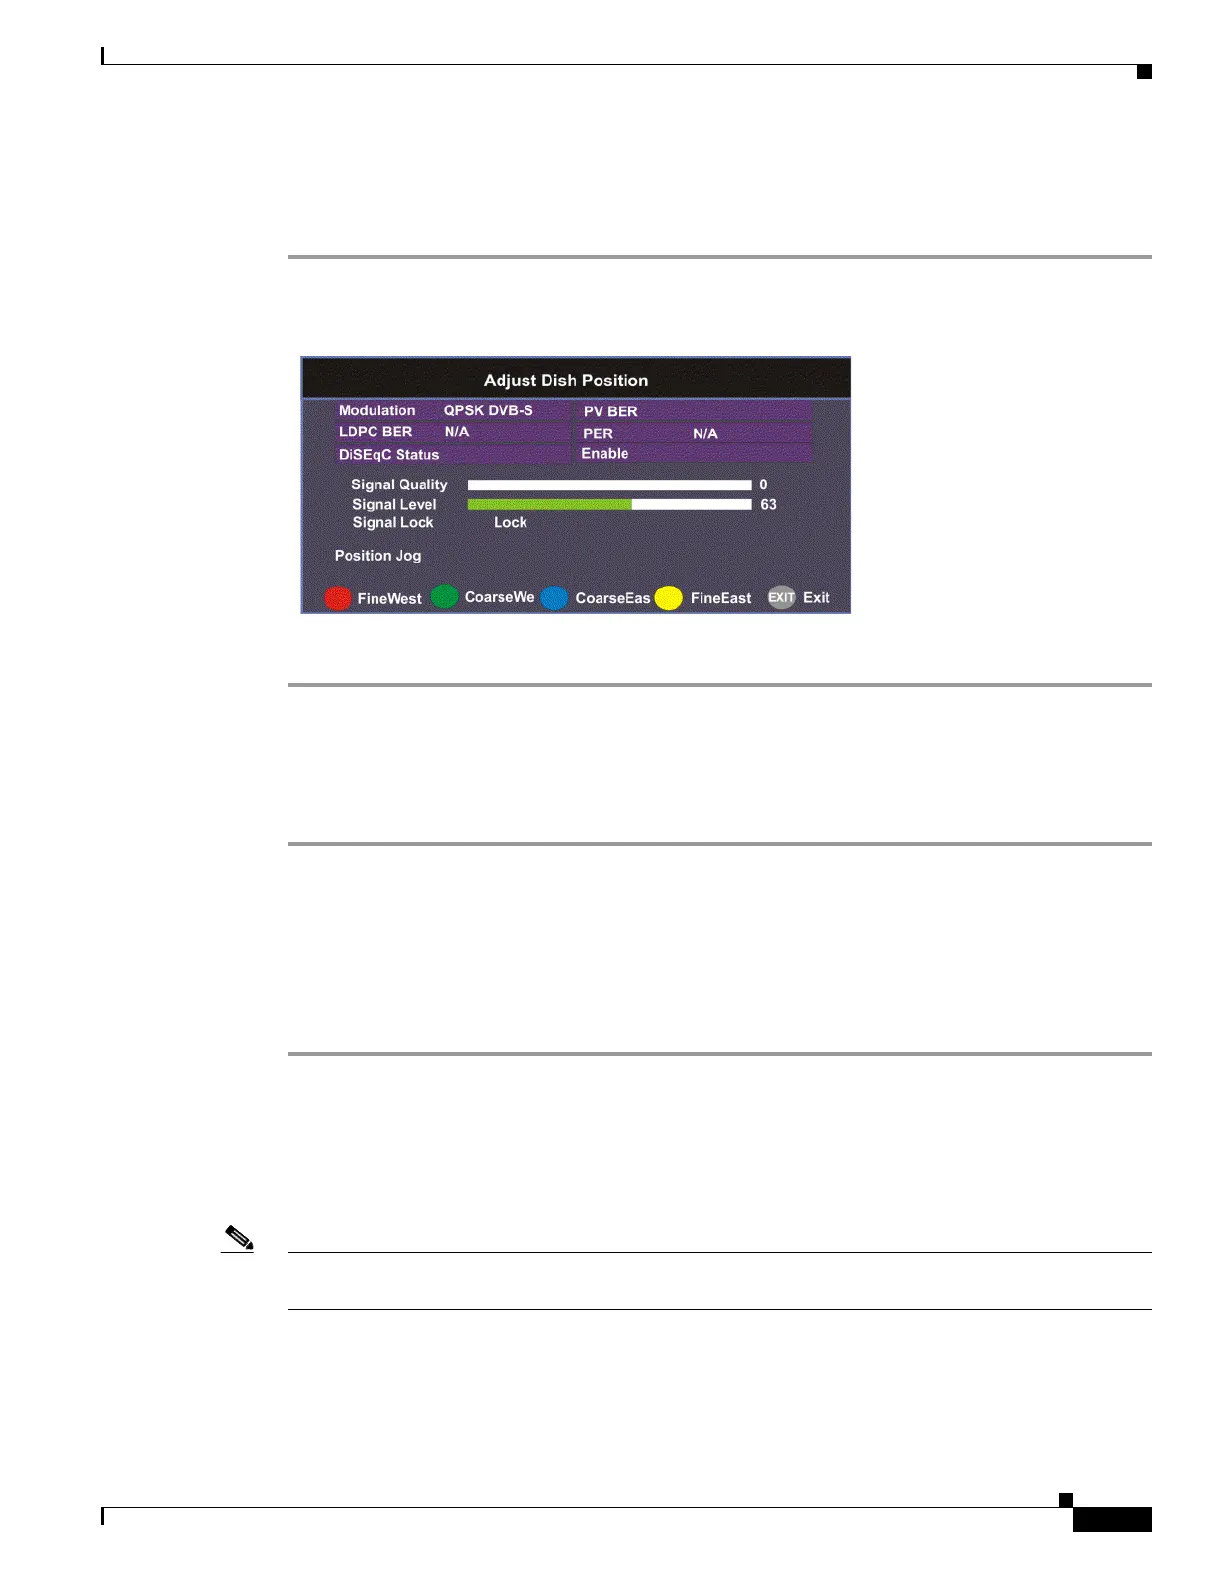
Adjusting the Satellite Position in Installer Mode
To adjust the satellite position, the DiSEqC must be set to Enable.
Step 1 On the Dish Setup screen, press the yellow button (Installer) to select Installer mode.
Step 2 Ensure the DiSEqC is set to Enable and then press the green button (Adj Dish).
Step 3 Press the red or yellow button for fine west and east dish adjustment. Press the green or blue button for
coarse east and west dish adjustment.
Changing the Satellite Position in User Mode
To select a new satellite position on the Dish Setup menu:
Step 1 Use the buttons to move to Satellite Number and press OK.
Step 2 Enter the pre-stored satellite number you want to use in the range from 1 to 255, and press OK.
Step 3 Press to move down to User Action and press OK.
Step 4 Press to choose Goto Satellite and press OK. The receiver is now tuned to the selected satellite
position.
Step 5 Press MENU to move to the previous menu, or EXIT to go to video.
Adjusting the Satellite position using Signal Tones
Dish alignment can be done using the audible signal adjustment tone. The characteristics of the signal
tone are shown in the table below. Align the dish to achieve signal lock and then best signal quality.
Note The signal adjustment tone automatically outputs as PCM audio type only, regardless of the Digital
Audio Preference set in Audio Setup.