4-48
Cisco D9865 Satellite Receiver Software Version 2.20 Installation and Configuration Guide
OL-31085-01
Chapter 4 Setup and Monitoring via On-Screen Display
Setup Menu
Editing a Multicast IP Address
Step 1 In the Multicast IP Setup screen, scroll to the multicast IP you want to edit using the buttons.
Step 2 Press OK. The Edit/Delete Multicast IP screen is displayed.
Step 3 Select Edit or press the blue button (Edit). The Add/Edit Multicast IP screen is displayed.
Step 4 Make the necessary changes.
Step 5 Press the green button (Save) to save your changes.
Deleting a Multicast IP Address
Step 1 In the Multicast IP Setup screen, scroll to the multicast IP you want to delete using the buttons.
Step 2 Press OK. The Edit/Delete Multicast IP screen is displayed.
Step 3 Select Delete or press the red button (Delete). A message appears to confirm the deletion.
Step 4 Press OK.
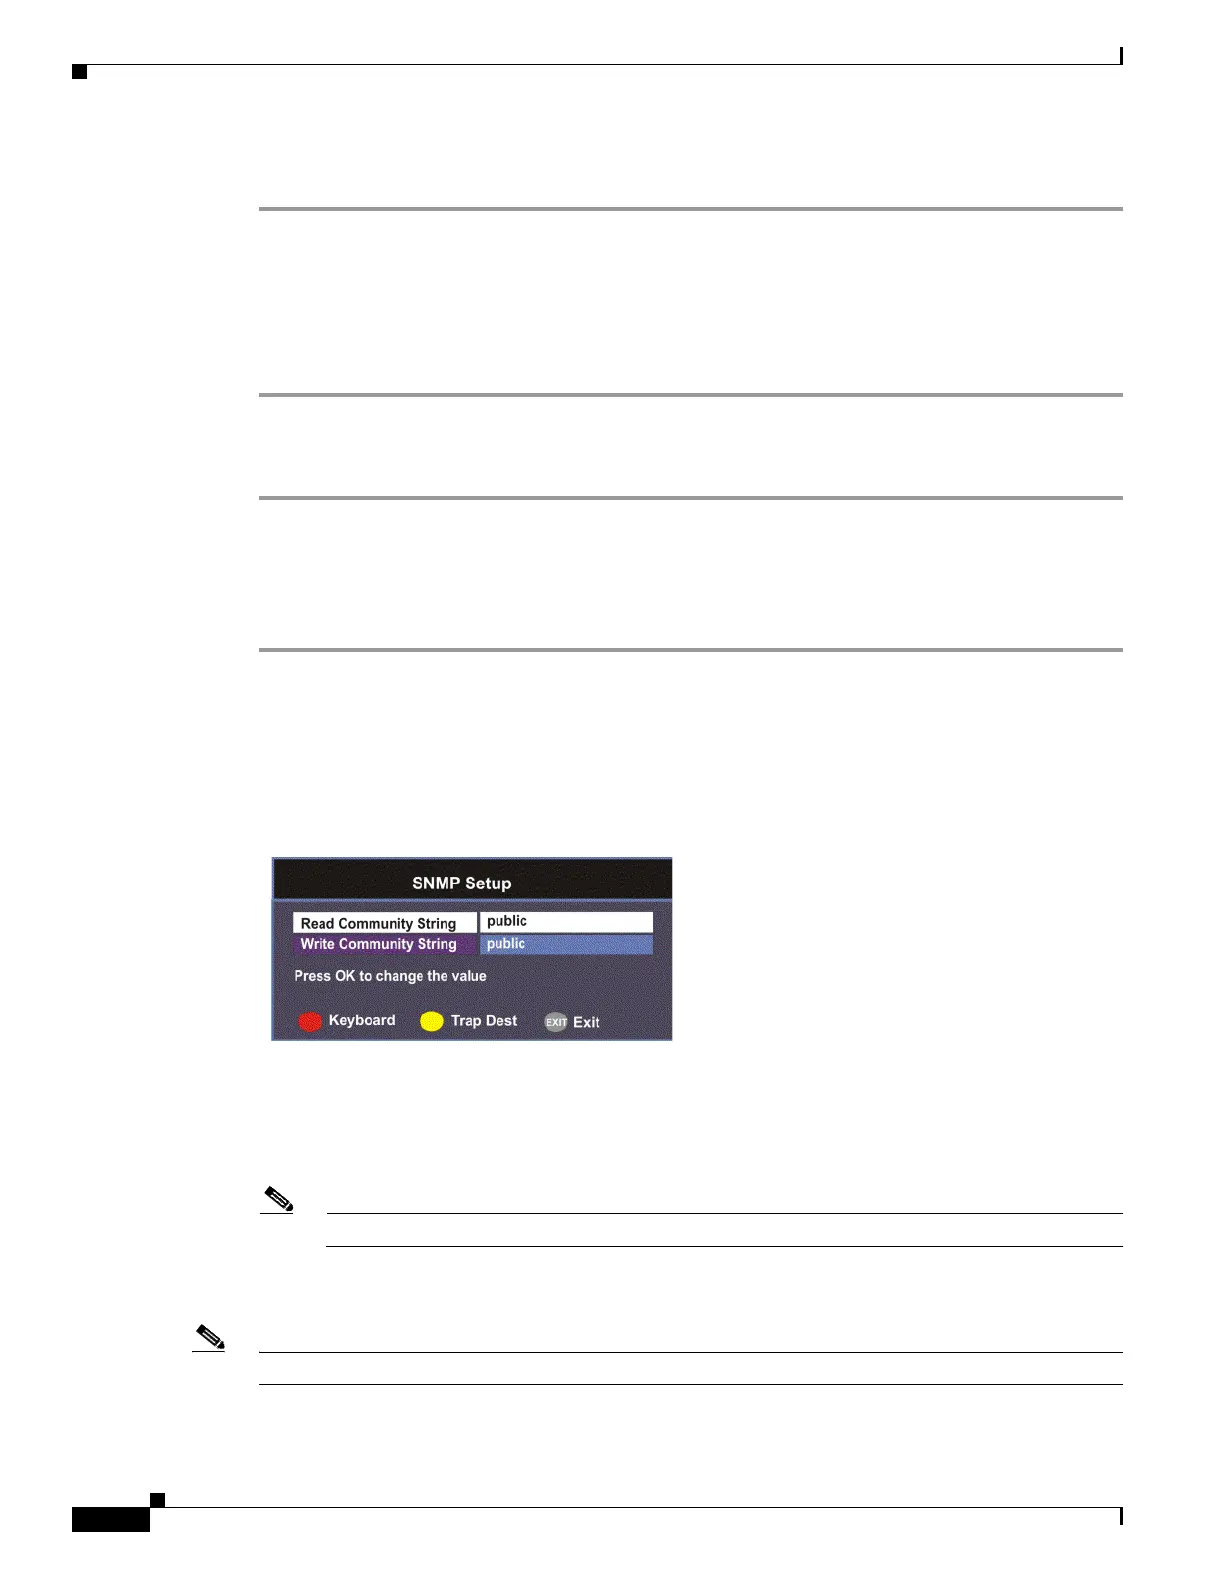
Setting up SNMP
Proceed as follows to configure SNMP:
From the Network Setup screen, select SNMP Setup and press OK.
Set the Read/Write Community String to public or a custom string. The SNMP Community
Read/Write is used when communicating with a device within an SNMP environment. These commands
allow you to set the password to read and write data to a device to display diagnostics traps/alarms. The
default community string is public. To set a custom community string, enter an alphanumeric character
string up to 31-characters in length identifying the password for the device.
Note The community string is case-sensitive.
Viewing Trap Destinations
Note You can assign up to 10 entries to the Trap Destination and Community String fields.
Proceed as follows to view trap destinations: