Click ID to visually identify a scanner in an array/tunnel. When clicked, all the
scanner lasers will turn off except for the selected scanner, whose laser will blink
for 20 seconds.
Select to Remove, Reassign, Add, or Replace from the Edit drop-down list to
complete the following actions:
Remove: When selected, you can select the scanner to remove from the
Dev/MAC Address drop-down list. Click OK to remove the selected scanner
from the system.
Reassign: When selected, the Dev column of the selected slave scanner
(selected with ID) presents a drop-down list of Dev numbers. Select a
different number to reassign the scanner.
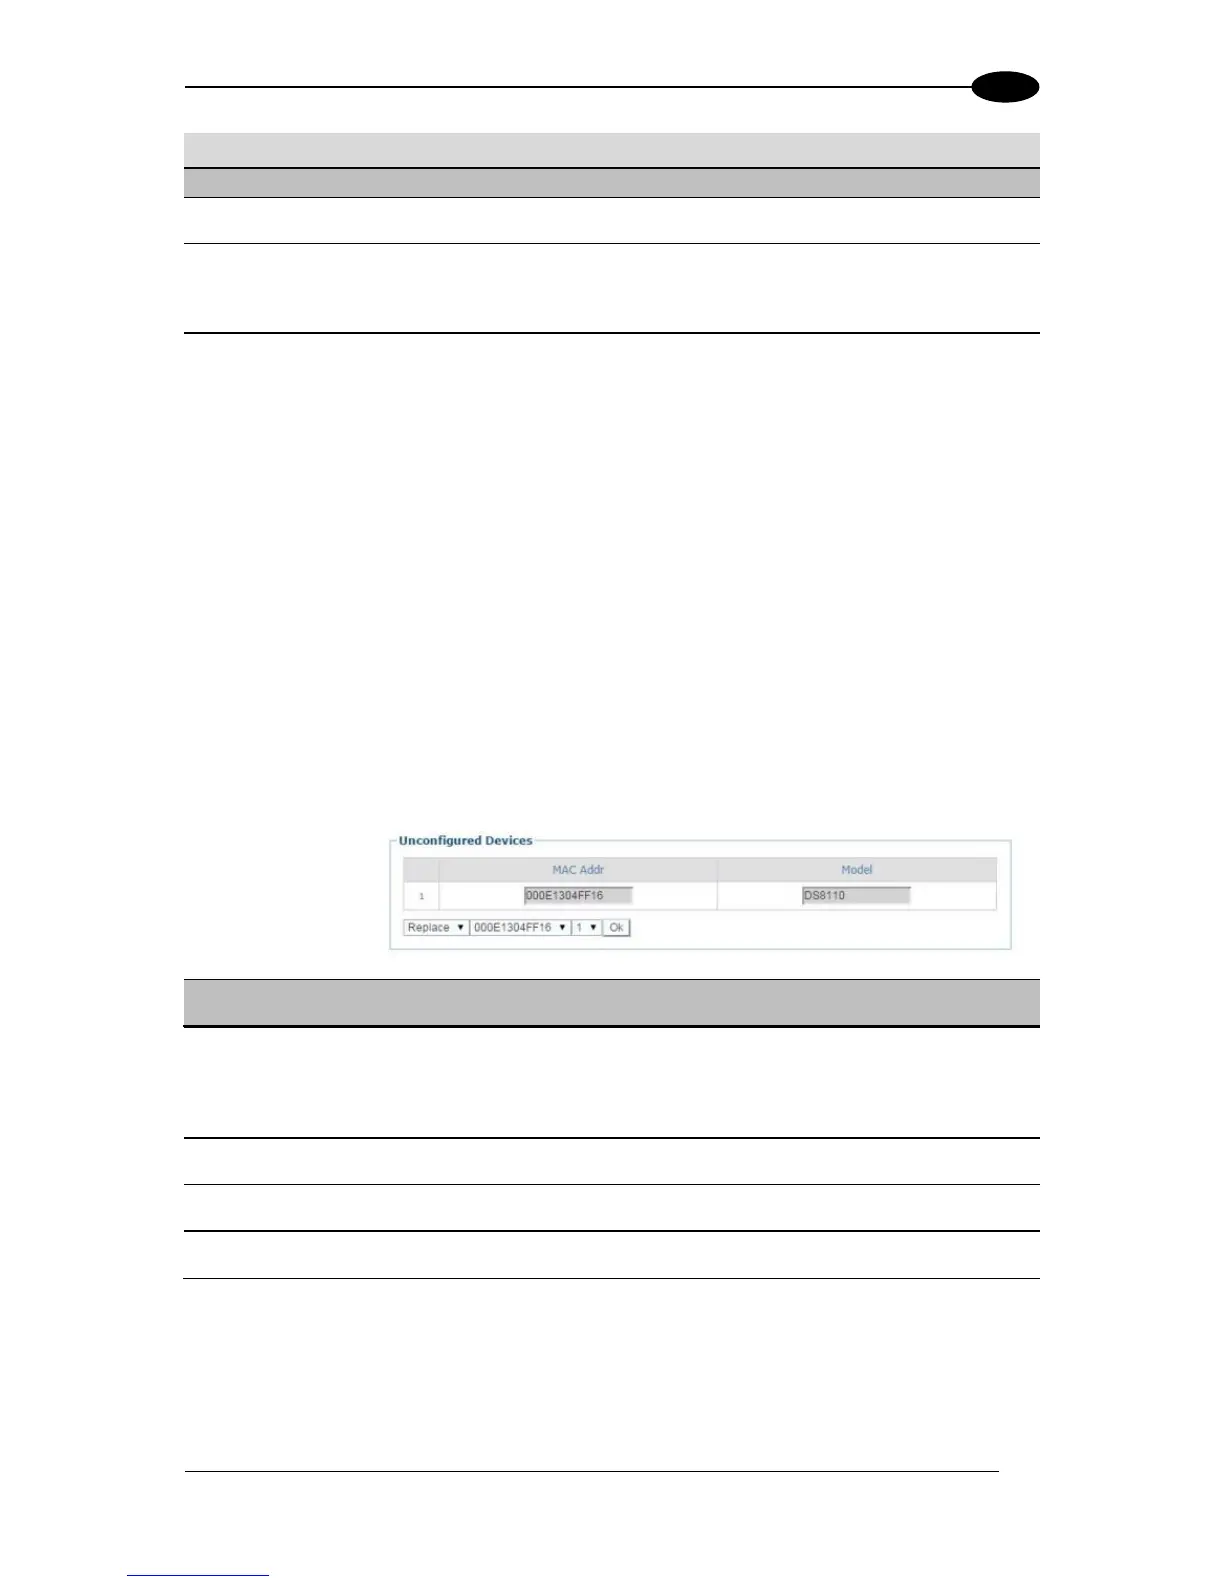
Add: This is an option under the Edit drop-down list in the Unconfigured
Devices section of the screen. Click OK to add the selected device to the
system.
Replace: This is an option under the Edit drop-down list in the
Unconfigured Devices section of the screen. When selected, you can select
from a list of slave scanners (Those with a gray indicator, meaning the unit is
not connected) in the system using MAC Address and Dev drop-down lists.
Click OK to replace the selected scanner with the Unconfigured Device.
Select the checkbox to enable Non-Singulated Dimensioning System Info options
(currently not available for Standalone or Multi-head DM3610 systems).
3. When you have finished making changes, click Update All to save all pending changes,
click Reset All to revert to all previously saved values, and click Reset Page to revert to
previous saved values on the current page.
 Loading...