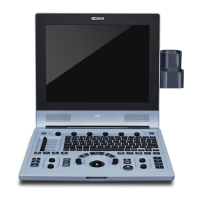
U60 Diagnostic Ultrasound System User Manual Operation
- 102 -
To perform the automatic playback:
1. Press Freeze to freeze the image, and the system displays the cine menu.
2. Set the start frame: in manual playback status, roll the trackball to review frame by frame
until the frame that you want to set as the start point, press Start Frame menu control to set
it as the start frame, or rotate the Start Frame menu control to select a frame as the start
frame.
3. Set the end frame: in manual playback status, roll the trackball to review frame by frame
until the frame that you want to set as the end point, press End Frame menu control to set it
as the end frame, or rotate the End Frame menu control to select a frame as the end frame.
4. Rotate the FPS menu control to adjust the review speed, and press Play/Stop menu control to
start the automatic playback within the set region (Start frame-end frame).
5. In automatic playback status, press Play/Stop to stop.
6. Press Cine to go back to the manual playback status. Or, press Freeze to exit the CINE
Review playback and enter real-time scanning status.
In dual or quad split screen status, freeze the image, and press or to toggle
between the two or four windows, the CINE Review progress bar corresponds to the currently
active image, you can perform manual/auto CINE Review for the currently active image. Only
CINE images in the set region of currently active image can be saved.
In dual live mode of B and B+ (Color/PDI), freeze the image, then you can perform CINE
Review and Save Cine for both images.
During playing back, press Save As to save the file in BMP, JPG, RFM, DCM, CIN or AVI
format. You can save files to the local disk or USB disk. Or, press File>Save Cine to save the
cine images of the set region. For details about operation method, please refer to 6.12.1 Saving
Files.
NOTE:
1. Cine review can’t be performed at the beginning of scanning or probe switching. You
should wait until 30 seconds later.
2. The FPS (frames per second) is adjustable, from 5 to 50, in increments of 5.
3. After opening a cine file, you can perform measurements, add comments and the
body mark on the image and print them in the report. See section 6.8 Comment Function
and section 6.9 Body Mark Function for detailed operation information.