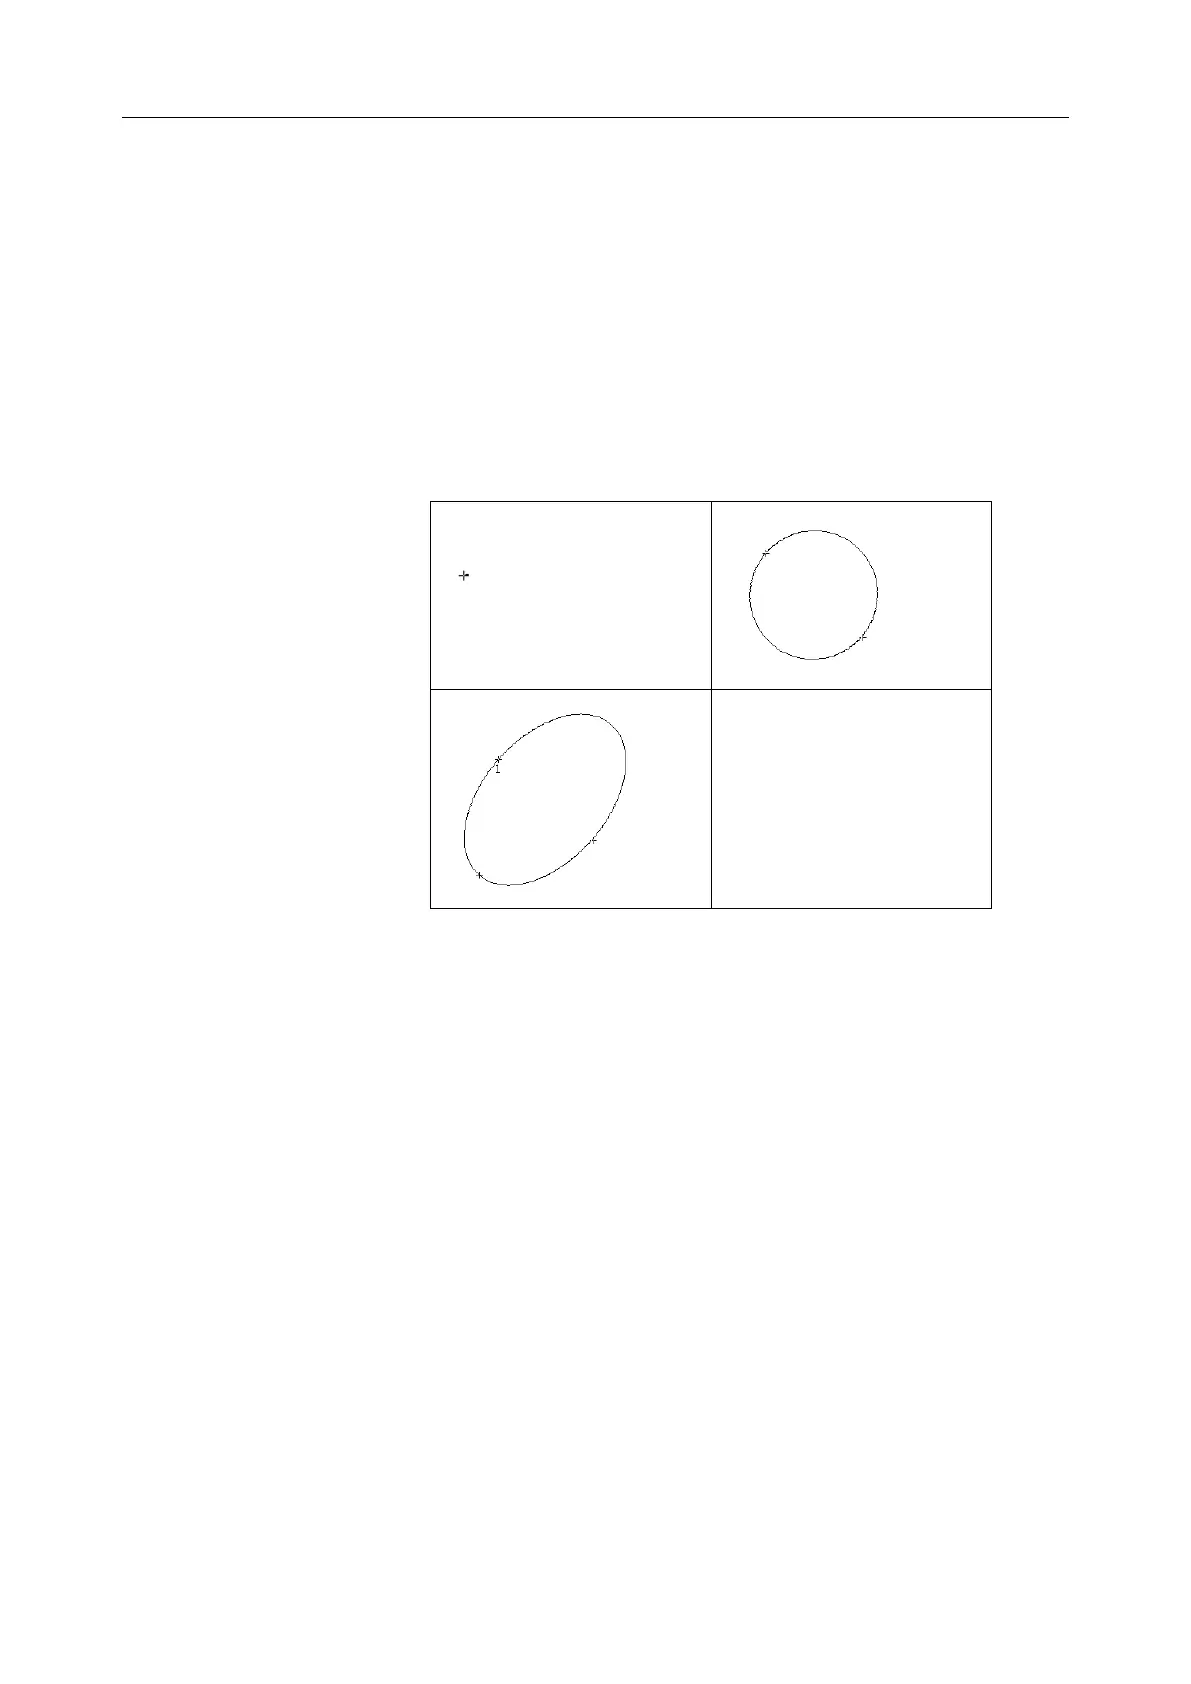
axis of ellipse.
4. Roll the trackball and press Set to anchor the end point of fixed
axis of ellipse.
5. Roll the trackball, and press Set to define the size of the ellipse.
6. Roll the trackball and press Set to begin a new
circumference/area measurement. You can measure a maximum
of eight groups of data. The outcome will be displayed in the
measurement result window, as shown below.
7. Press Caliper to finish and exit.
Figure 6-5 Ellipse Circumference/Area Method and the Results
Trace Method
To measure Circumference / Area:
1. Press Caliper to activate generic measurement function.
2. Roll the trackball to highlight Cir/Area. Then select Trace, and
press Set to activate a measurement cursor on the screen.
3. Roll the trackball and press Set to anchor the start point.
4. Roll the trackball to outline the region of interest. As you move the
trackball, the system displays dots to outline the structure. To correct
an error in the trace, press Backspace to move in reverse along the
traced outline. Roll the trackball to move forward again. The system
automatically closes the loop when the last measurement marker is
moved very near to the start point. Or press Set to close the loop. The
system draws a line from the position of the active measurement
marker to the beginning of the loop.
5. Roll the trackball and press Set to begin a new circumference/area