EPSON Stylus Pro 9000
Adjustments 116
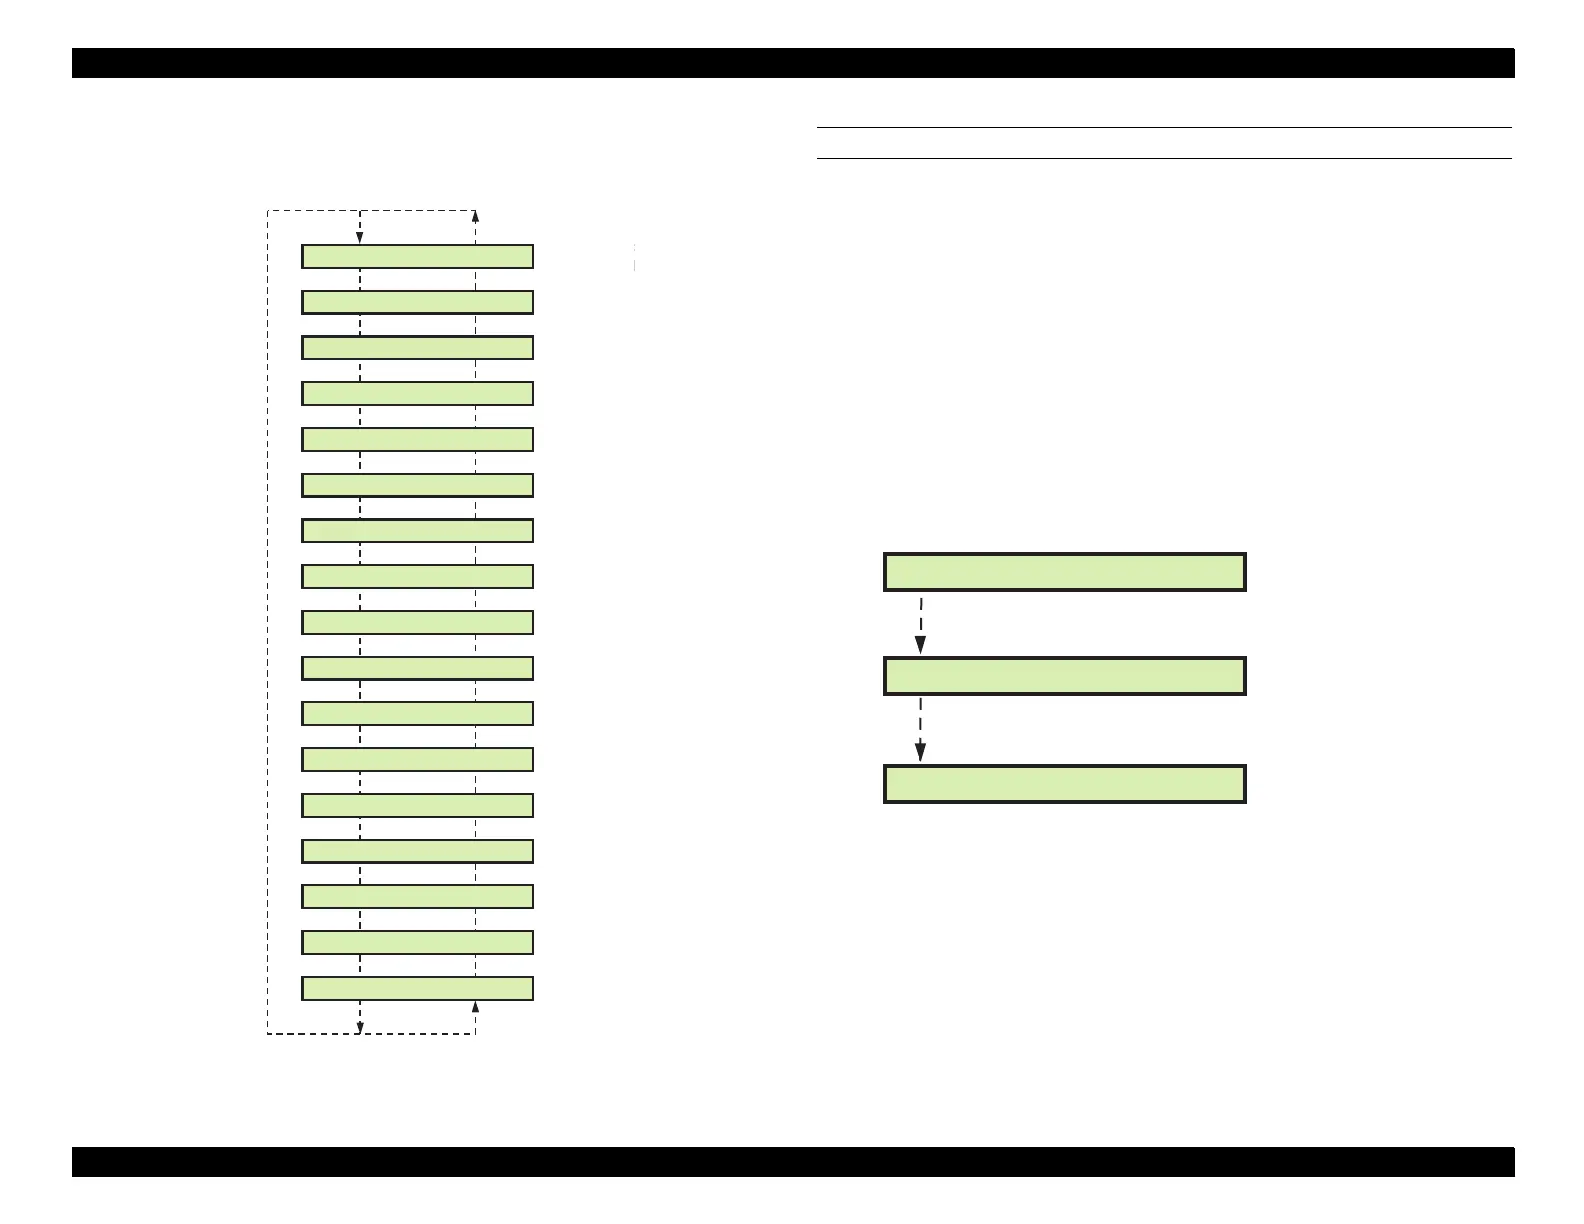
Figure 5-4. Adjustment Menu
CAP POSITION ADJUSTMENT
Use this function to automatically check and update the capping position as
stored in printer’s memory.
1. Make sure "Adj Cap Position" appears on the LCD and press the Enter
button.
2. The printer begins the HP detection sequence and automatically detects
the capping position.
3. After the adjustment process is finished, the detected distance between
the HP and the capping position is displayed.
4. Pressing the Enter button updates the capping position parameter and
displays the next menu item. Pressing the Pause button does not update
the capping position parameter and returns you to the beginning of this
function; Adj Cap Position appears on the LCD.
[SelecType]
[Paper
Source]
Adj Counter Clear
Adj Cap Position
Adj B Head Slant
Adj Check Nozzle
Adj Input Rank
Adj Check Skew
Adj Flush Point L
Adj Flush Point R
Adj Head LR Adj
Adj Bi-D
Adj BC Head Slant
Adj C Head Slant
Adj Clean Head
Adj Test Print
Adj Rear Sensor
Adj Top & Bottom
Adj Feed
Detecting Origin
After detecting
the HP, the
printer
automatically
determines the
capping position
Detecting Cap Position
Position: -0.2500mm
Carriage moves to capping position, and
position appears on LCD.

 Loading...


