EPSON Stylus Pro 9000
Technical Overview 25
To maintain a constant distance between the printhead nozzles and the paper,
the printer measures the thickness of the paper and adjusts the height of the
carriage accordingly. The printhead has three platen gap (height) settings, as
described in the table below.
The actual platen gap position used during printing depends on both the
detected paper thickness and the user’s paper thickness setting on the control
panel.
The printer uses two sensors in setting the platen gap:
Paper Thickness Sensor
This sensor physically gauges whether the paper falls into the normal/thin
category or the thick category. The Pressure Roller unit closest to home
position has a thin metal flag on top. When the Paper Release Lever is in
the Lock position and thin paper is loaded, this flag pivots into the space
between the sensor’s light emitter and receiver. However, when thick
paper is loaded, the flag is forced forward out of the sensor area.
Sensor signal = ON at 0.7 V or less: Normal or thin paper
Sensor signal = OFF at 2.4 V or more:Thick paper
PG Sensor
This light-reflecting sensor detects whether the subcarriage is in the thick
paper position or normal paper position. The PG Gear rotates with the PG
Cam, and the PG Sensor determines the subcarriage’s position from the
position of the PG Gear, using the hole in the gear’s side as a reference.
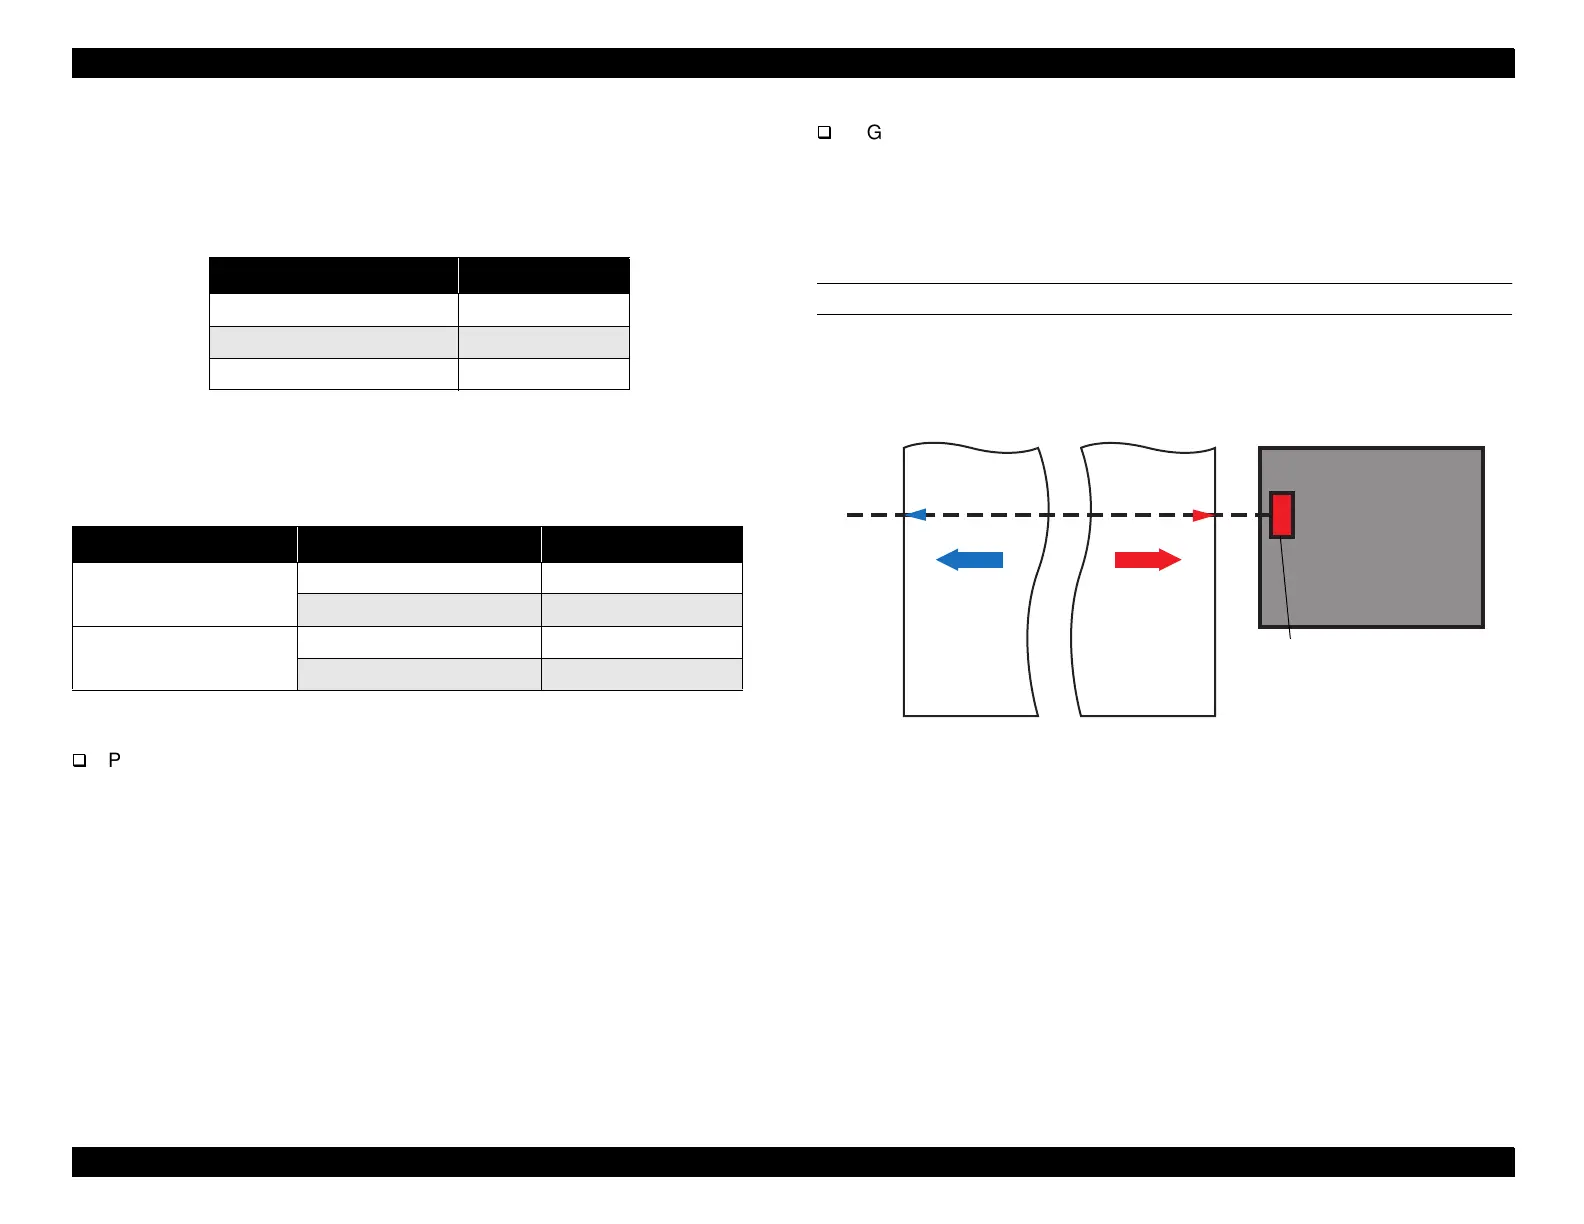
PAPER WIDTH SENSOR
This sensor locates the right and left edges of the paper. The light emitted from
the sensor is reflected back to the sensor where paper exists. In this way the
sensor determines where the paper’s edge is and how wide the paper is.
Figure 2-6. Paper Width Sensor
Table 2-1. Platen Gap Settings
Platen Gap Setting Gap Distance
PG “Small” 1.3mm
PG “Medium” 2.2mm
PG “Large” 2.7mm
Table 2-2. Platen Gap Setting Determination
Control Panel Setting Paper Thickness Sensor Platen Gap Position
Wide Wide PG “Large”
Standard PG “Medium”
Auto Wide PG “Large”
Standard PG “Small”
Paper
HP side
Carriage
Paper Width
sensor
Right
edge
Left
edge
 Loading...


