EPSON Stylus Pro 9000
Adjustments 134
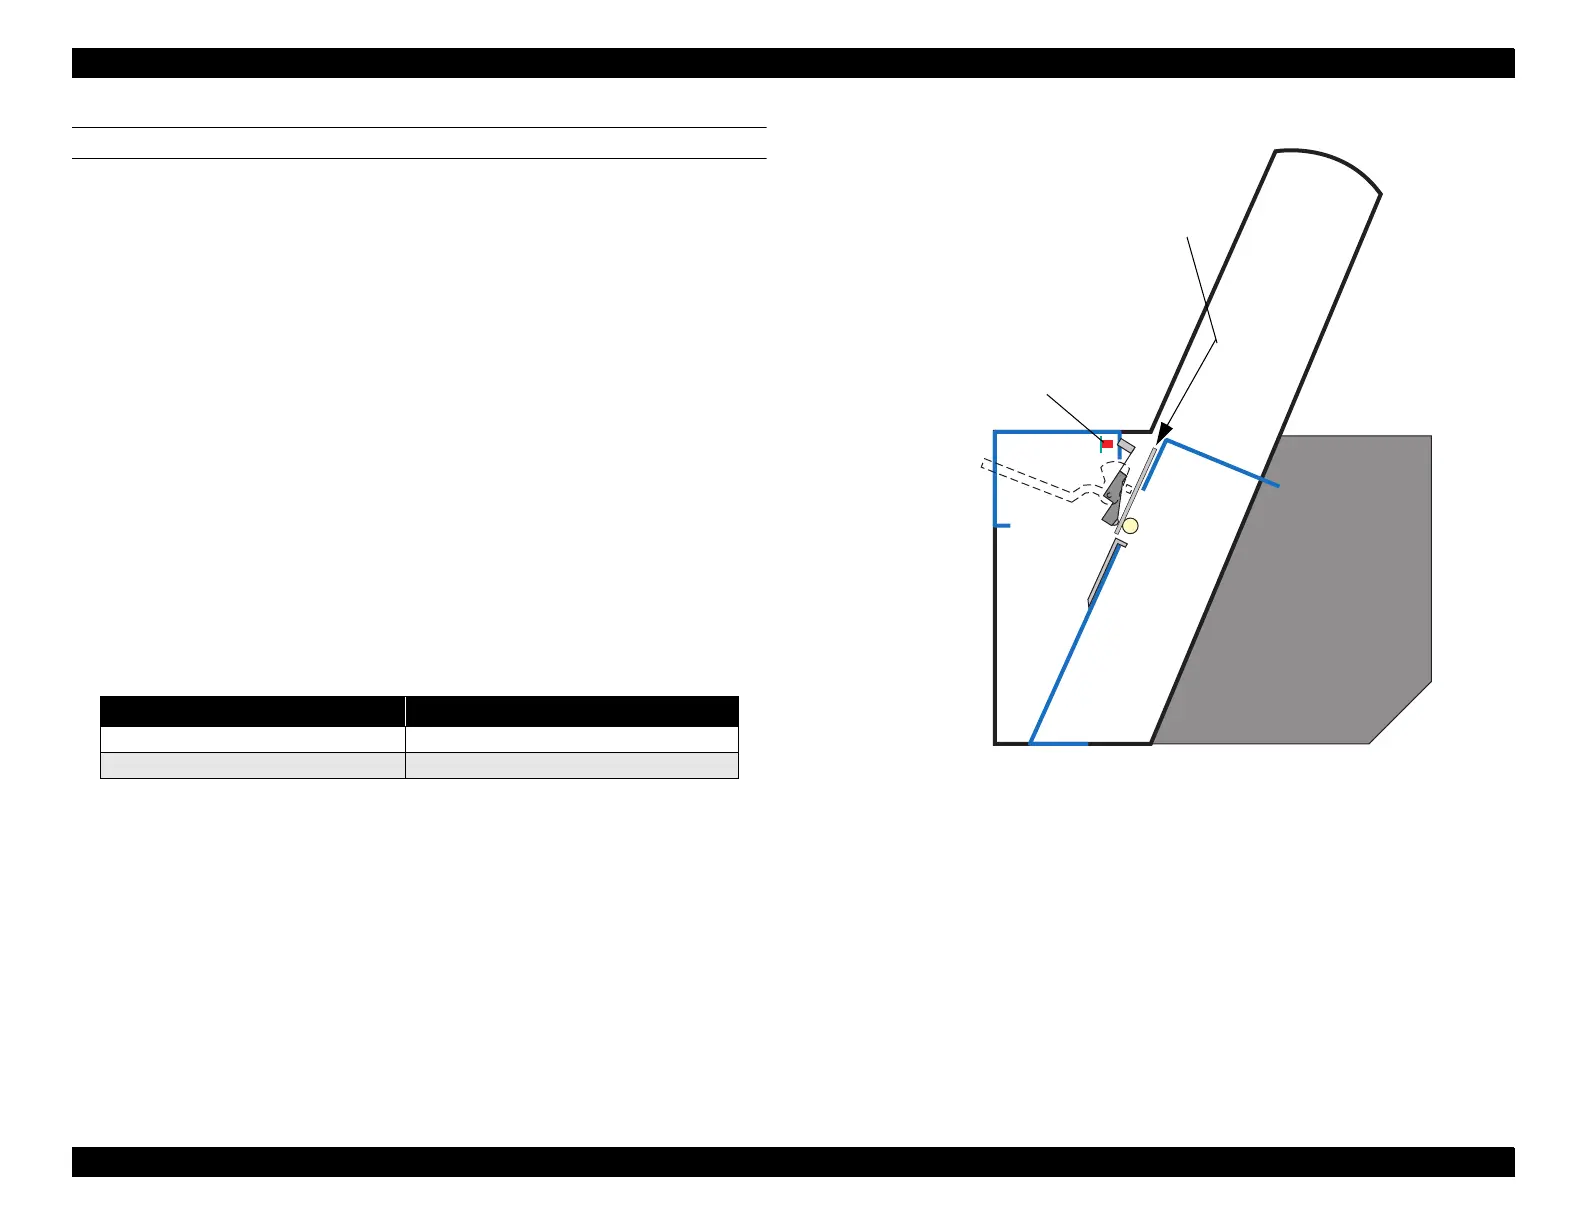
PAPER THICKNESS SENSOR ADJUSTMENT
Perform this adjustment whenever you remove or replace the Paper Thickness
Sensor.
1. Press the following buttons and turn on the printer to enter the Self-
Diagnostics mode: Paper Feed ↓ + Cut/Eject + Cleaning
2. Press the SelecType or Item button until "Check: Test" appears on the
LCD, and then press the Enter button.
3. Press the SelecType or Item button until "Test: Sensor" appears, and then
press Enter.
4. Press the SelecType or Item button until "Sen: Paper xxxx" appears.
5. Raise the Paper Release Lever, and then verify that "Sen: Paper Thick"
appears on the LCD.
6. Insert a thickness gauge near home position between the PF Roller and
the Paper Pressure Rollers, and then lower the Paper Release Lever to
hold the gauge in place.
7. The LCD message should vary according to the size of gauge as shown in
the table below:
8. If the correct message does not appear, loosen the screws securing the
sensor assembly to the printer frame, reposition the sensor, tighten the
screws, and check the sensor again.
Table 5-12. Paper Thickness Sensor Check
Thickness Gauge LCD Message
0.7mm (thick paper) Sen: Paper Wide
0.6mm (standard paper) Sen: Paper Std
Paper Thickness
Sensor
Thickness Gauge

 Loading...


