EasyManuals Logo

Epson Stylus Pro 9000 - Print Engine User Manual

Epson Stylus Pro 9000 - Print Engine
198 pages
To Next Page IconTo Next Page
To Previous Page IconTo Previous Page
Page #82 background imageLoading...
Page #82 background image
EPSON Stylus Pro 9000
Disassembly & Assembly 82
REMOVING THE CARRIAGE HOME POSITION SENSOR AND
ENCODER
Preparation:
Remove the Maintenance Cover as described in Maintenance Cover
Removal on page 58.
Remove the Top Cover as described in Top Cover Removal on page 59.
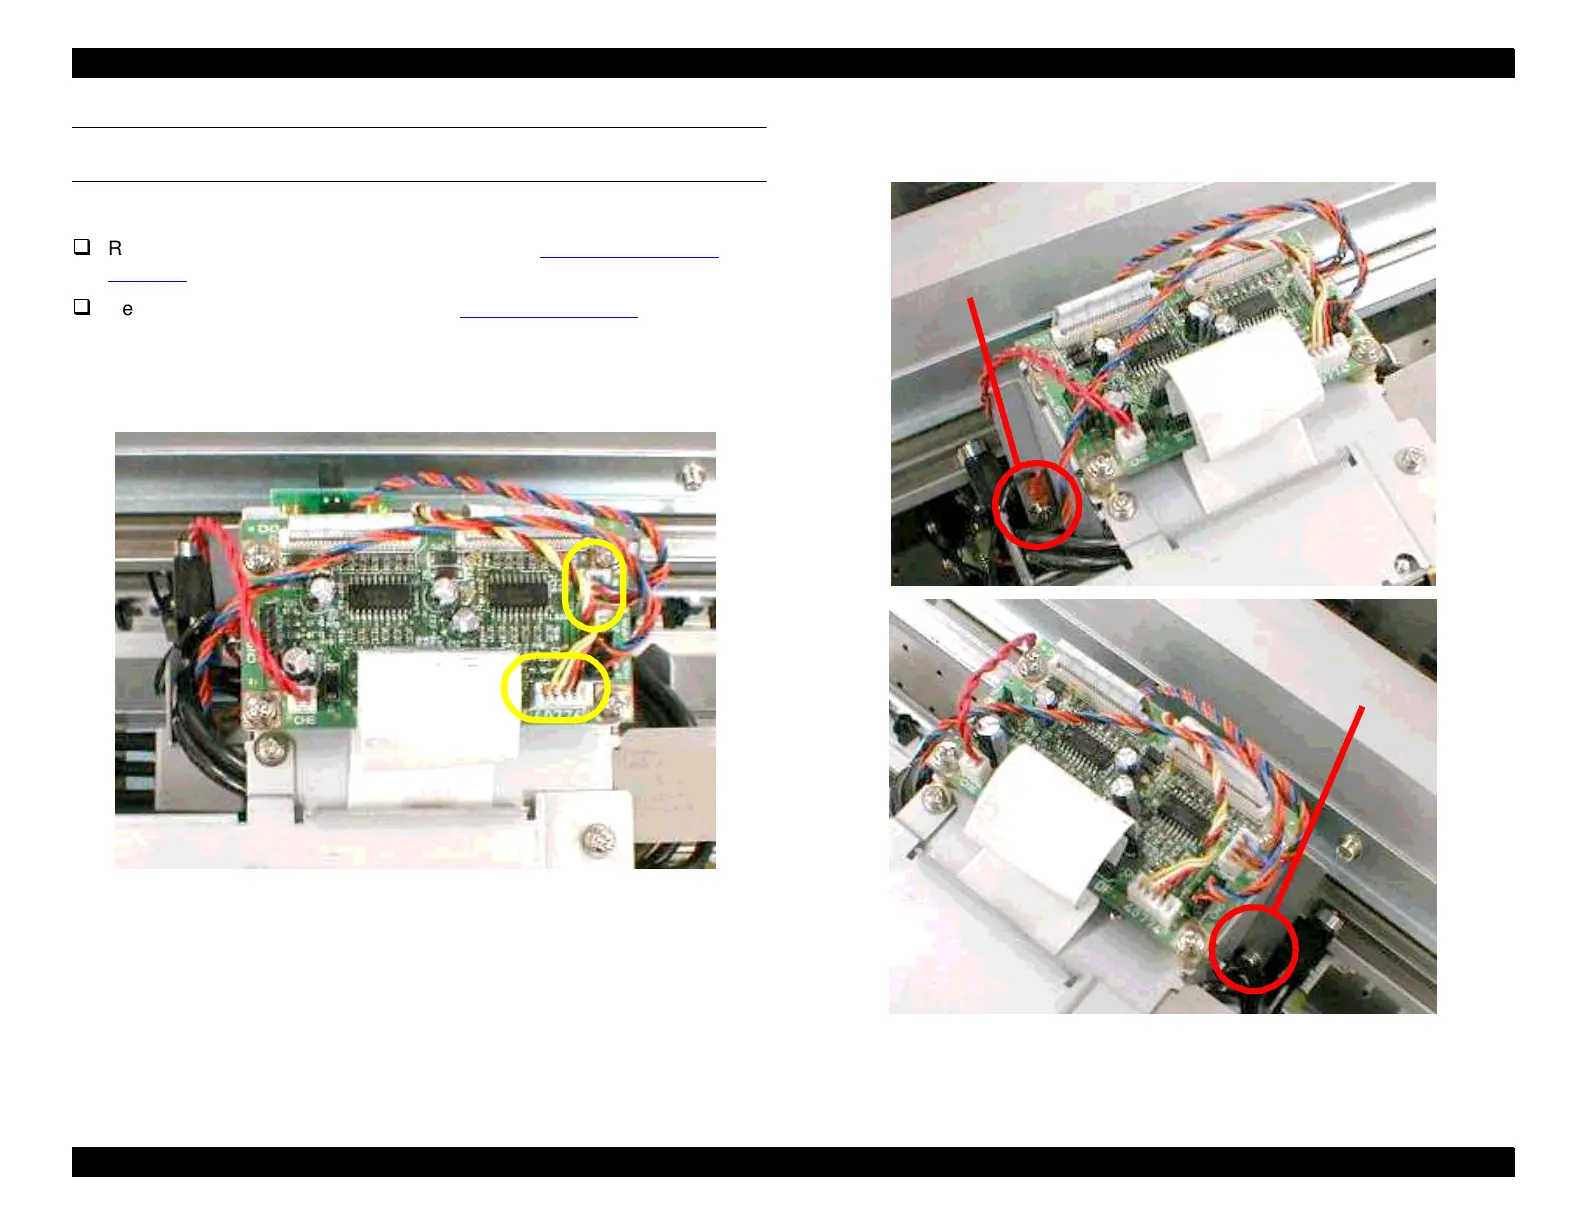
1. Disconnect the cables from CN2 (Encoder) and CN4 (HP Sensor) on the
carriage circuit board.
Figure 4-43. Disconnecting the Cables
2. Remove the two screws (CP(W2) M3x6) securing the circuit board
mounting frame to the carriage assembly.
Figure 4-44. Removing the Circuit Board Mounting Frame Screws
Screw
Screw

Table of Contents

Questions and Answers:

Question and Answer IconNeed help?

Do you have a question about the Epson Stylus Pro 9000 - Print Engine and is the answer not in the manual?

Epson Stylus Pro 9000 - Print Engine Specifications

General IconGeneral
BrandEpson
ModelStylus Pro 9000 - Print Engine
CategoryPrinter
LanguageEnglish

Related product manuals