EPSON Stylus Pro 9000
Technical Overview 32
PAPER SIZE DETERMINATION (DETECTION OF TOP EDGE)
If the printer is in Roll Auto Cut or (Cut) Sheet mode, it determines the location
of the top (leading) edge of the paper before printing. Note that the printer skips
this procedure if Roll Cutter Off is selected.
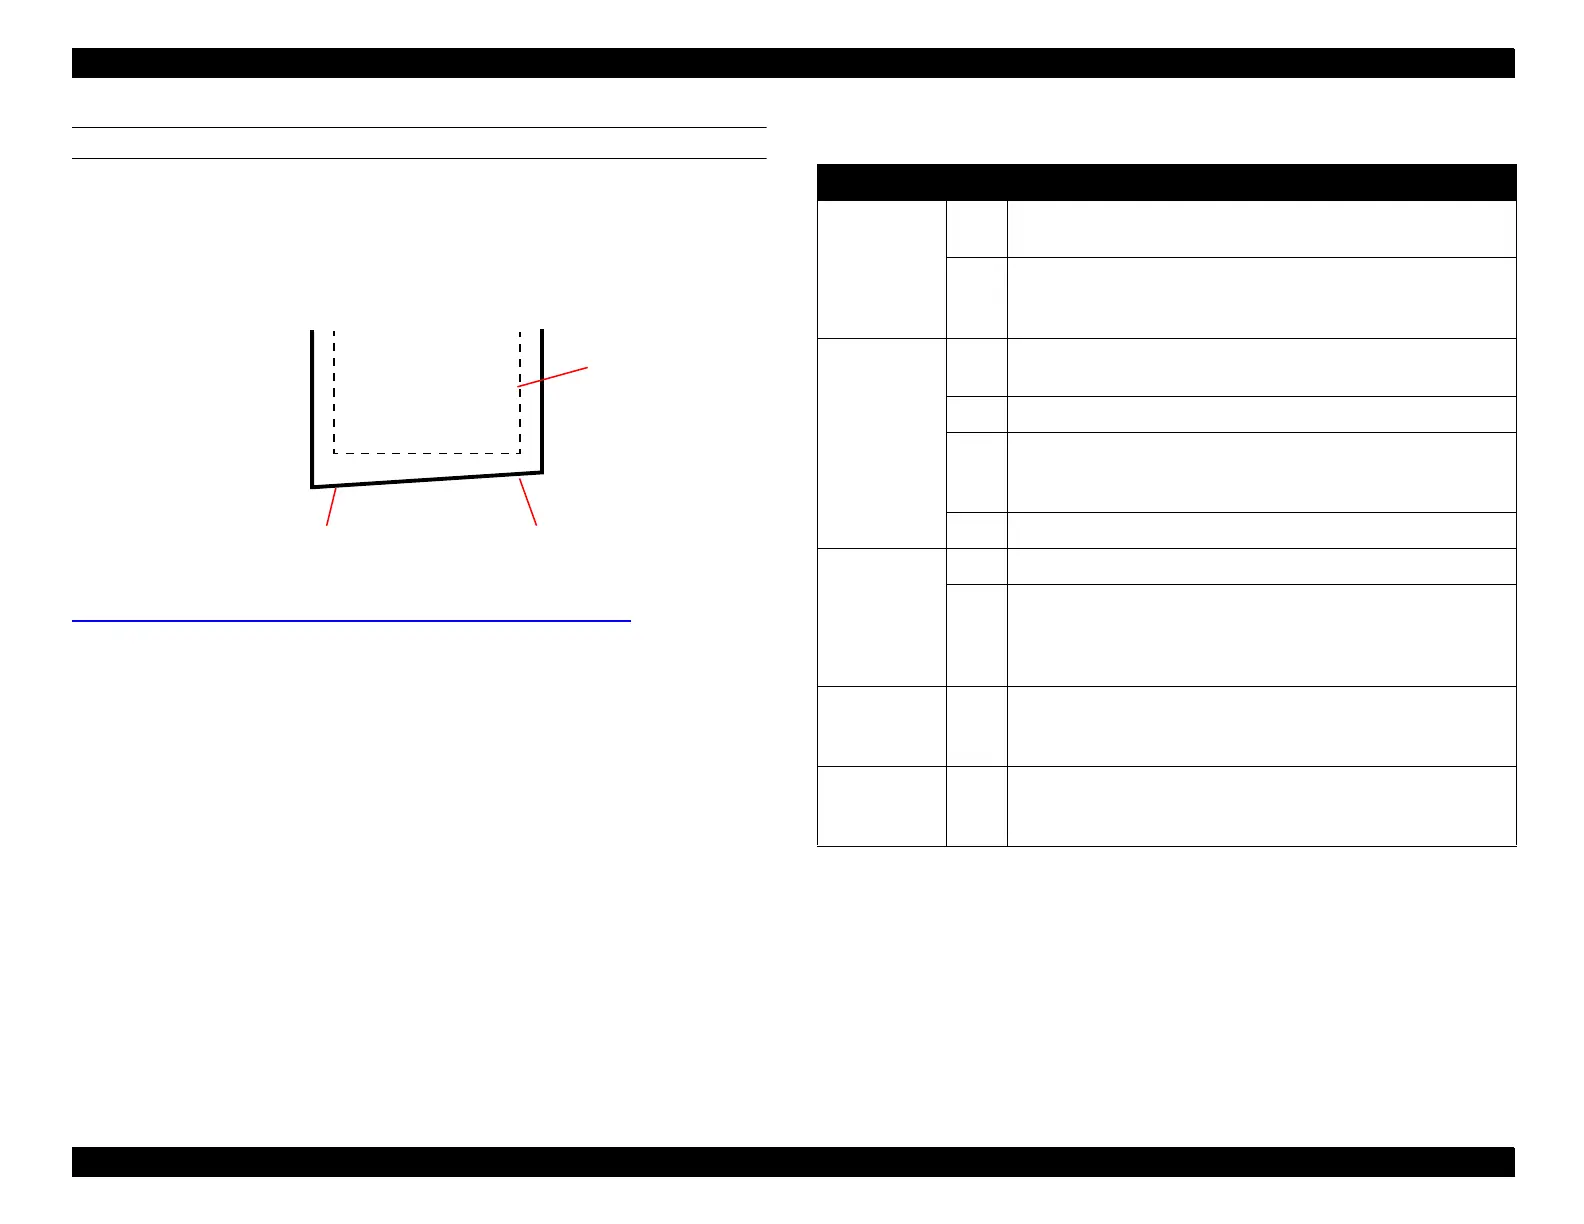
The “top-left” and “top-right” edges are as shown below. Note that the top edge
may not be straight across.
After determining the position of the left and right edges of the paper (see
Paper Width Determination (Left and Right edge Detection)
on page 31),
the printer performs the following steps to locate the top edge and correctly
position the paper for printing:
Top-Right Paper Edge
Printable Area
Top-Left Paper Edge
Table 2-6. Top Edge Detection and Positioning
Purpose Step Action
To make sure
paper is
loaded
correctly
1
Printer reverse feeds (pulls paper back up) a maximum
distance of 200 mm.
2
The Front Paper Sensor checks for paper. If, during reverse
feeding, it detects the top edge of the paper, go to step 3;
otherwise, report “Reload Paper” error.
To determine
top-left edge
position
3
Carriage moves from home position to 30 mm inside left edge
of paper.
4 Printer reverse feeds 200 mm max.
5
The Paper Width Sensor checks for paper. If, during reverse
feeding, it detects the top edge of the paper, go to step 6;
otherwise, report “Reload Paper” error.
6 Printer registers top-left edge position.
To determine
top-right edge
position
7 Carriage moves to 30 mm inside right edge.
8
The Paper Width Sensor checks for paper. If it detects paper,
the printer reverse feeds paper until Paper Width Sensor
detects top-right edge. If paper not detected, printer advances
paper until Paper Width Sensor detects top-right edge.
To ready
carriage for
printing
9 Carriage returns to home position.
To set paper
for printing
10
Printer advances paper so that the shorter of the two edges
(top-left or top-right) aligns with a position approximately 1 cm
below the level of the Front Paper Sensor.