EPSON Stylus Pro 9000
Appendix 150
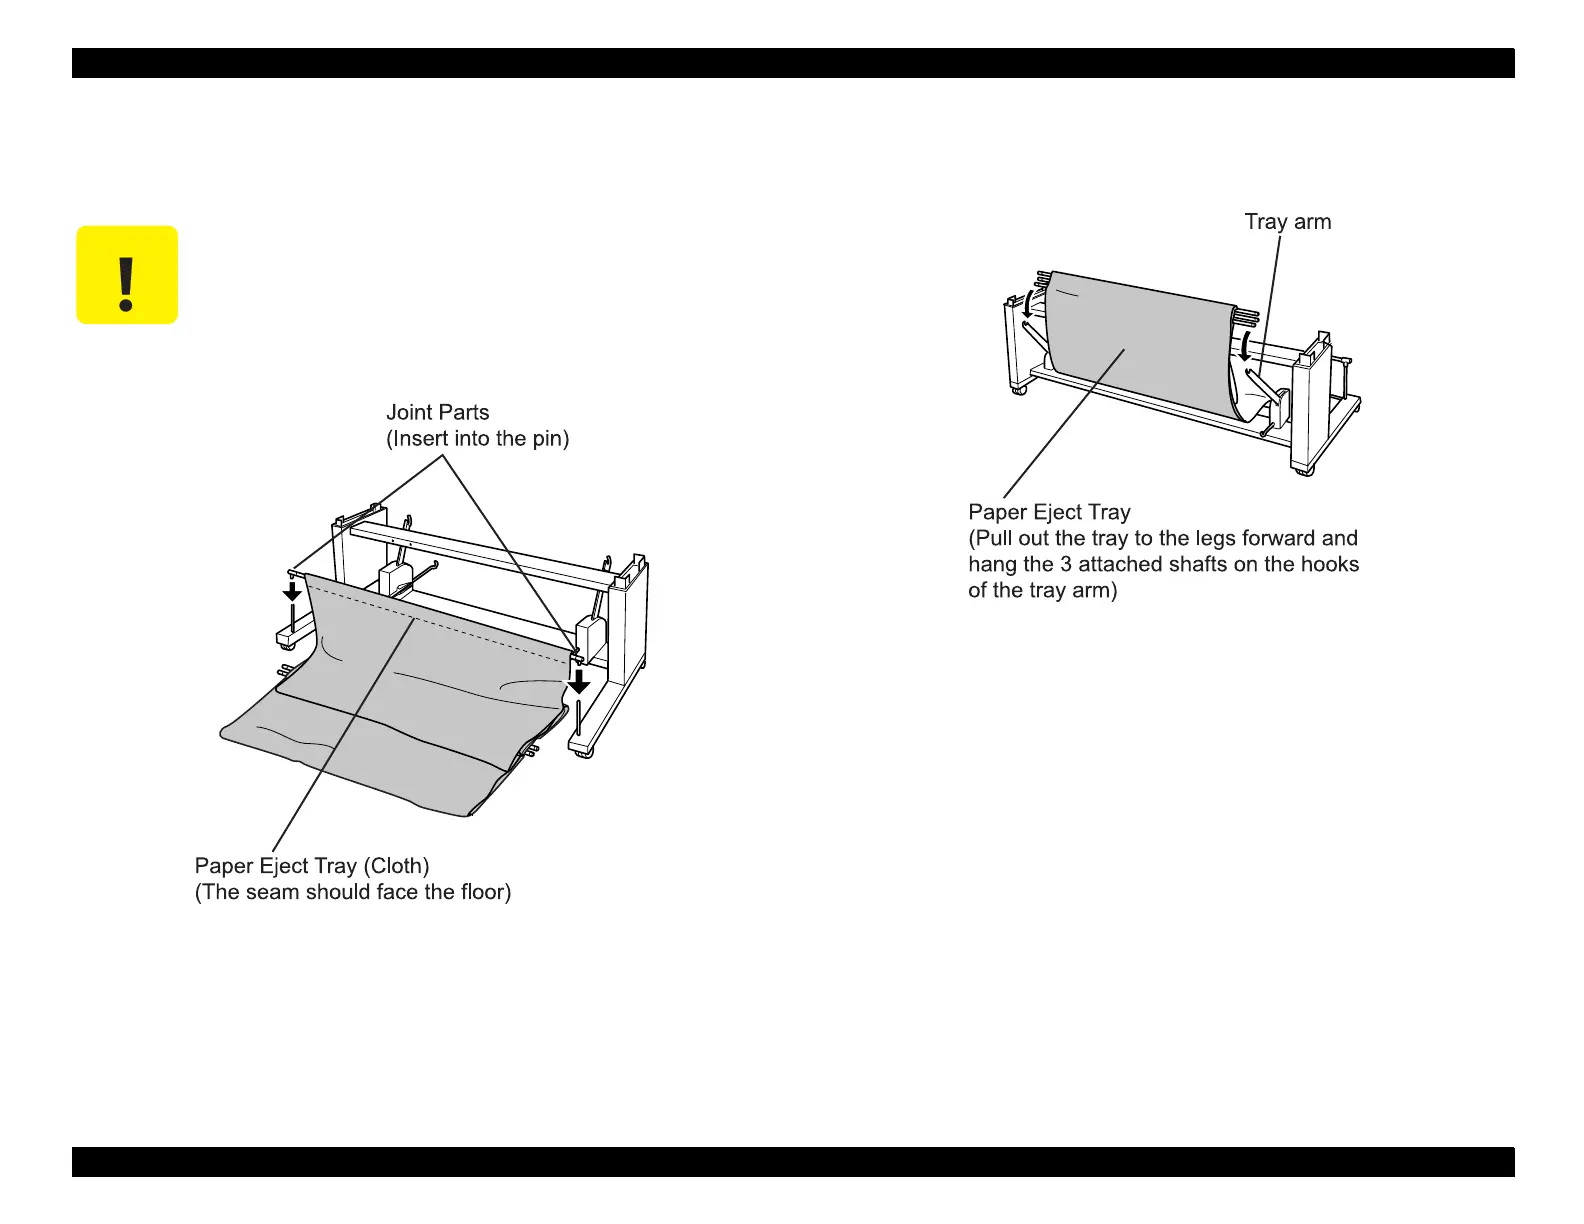
8. Holding the eject tray cloth, locate the shaft which has a joint at both ends
and connect those joint ends to the pins you set up in step 7. Connect the
joints to the top of the pins and push down securely.
9. Move the other three Paper Eject Tray shafts, which are all in the cloth, in
front of the stand and hang them on the hooks located at the tips of the
right and left “Tray Arms”.
CAUTION
When installing the “Paper Eject Tray” cloth, make
sure the seam (folded-fabric side) faces the floor (rear
as shown below); otherwise, the printed-paper edge
may get stuck on the seam.

 Loading...


